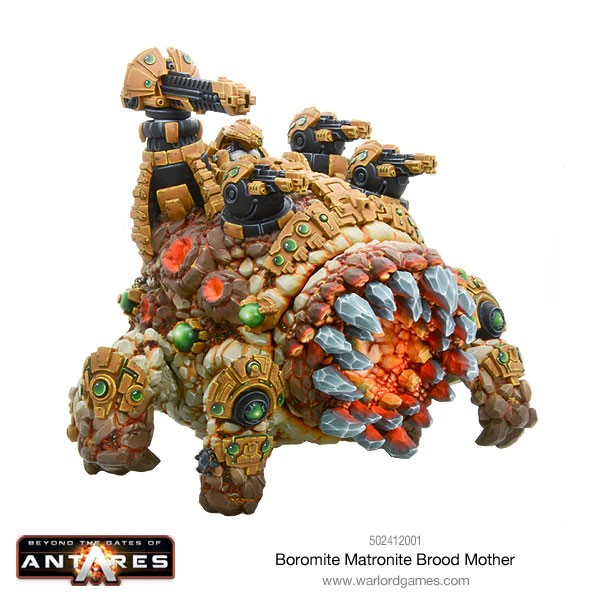
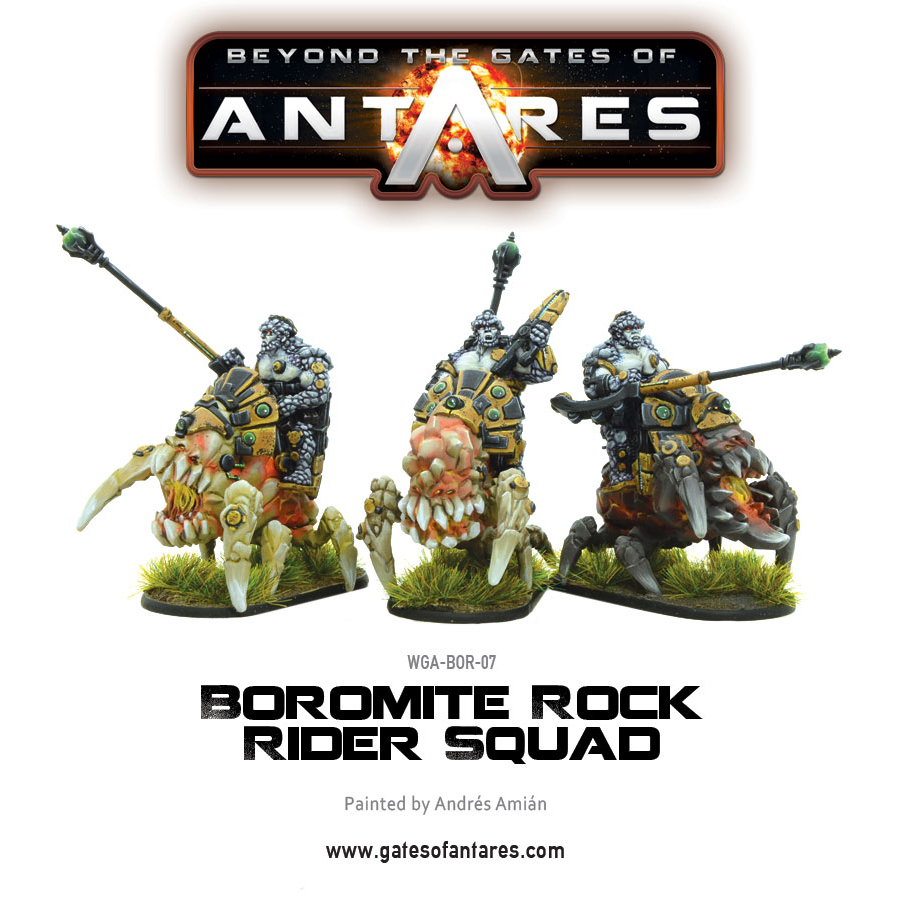
Just before Christmas the mighty large Brood Mother arrived for the Boromites in Beyond the Gates Of Antares – Warlorder RichD had a chat with Chase Murphy fairly soon after about his idea for a crazy paint job and we just had to get all the gory details…
Chase: You did it didn’t you? You bought it. You’ve been checking the post every day and today there was a very weighty package from Warlord with your name on it. Its here! Your very own Broodmother!!! What are you standing around for go open it!
*sounds of doors slamming*
*Packaging being ripped open*
*The sound of a drawer opening and closing*
*The sound of scissors cutting*
*You hear empty packaging hitting the floor and the crinkle of a plastic bag*
*Now the sound of fingers fondling resin*
Yes its all yours. Soon you shall begun an odyssey of creation, a long and through process that shall *sniff* culminate in the proper assembly of *sniff* *sniff* umm… culminate in proper *sniff*. Why do I smell super glue?!? What are you doing! Stop! You cant just start gluing the thing together.
I swear you hobbyist are all the same, like little kids. Look you just spent some serious money on this right?
*Nods*
And you waited some time for it to arrive right?
*Nods*
Now you want this to look its best, you want it to be the center piece of your army and have everyone at your community drooling over it right?
*Nods*
So naturally your going to want to take your time to properly clean, sand, file and trim all your parts before your assemble them. Right?
*Head shaking*
*Sound of a pistol cocking*
*Nods*
*Nods*
*Nods*
Good, I’m glad we could agree. So show everyone whats in the package and lets get this process started.
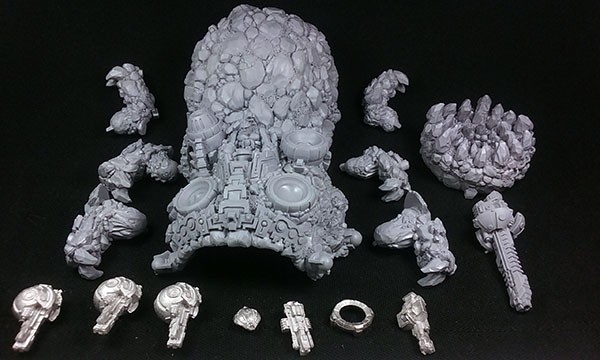
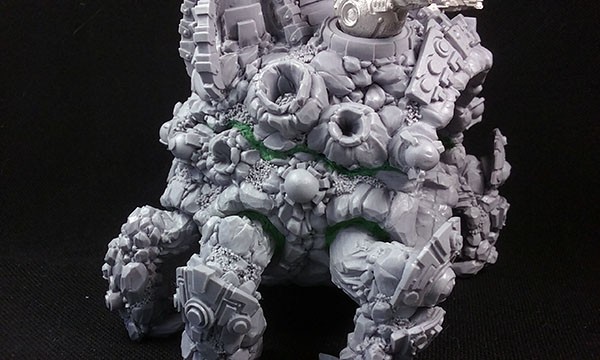
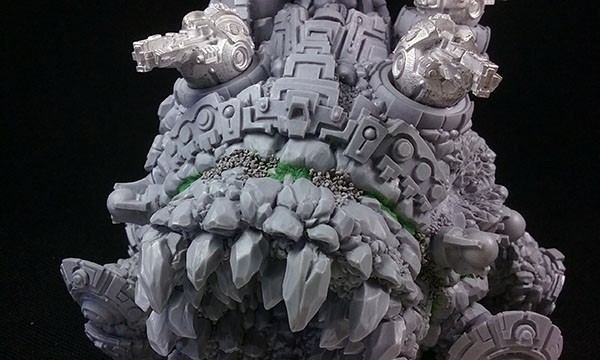
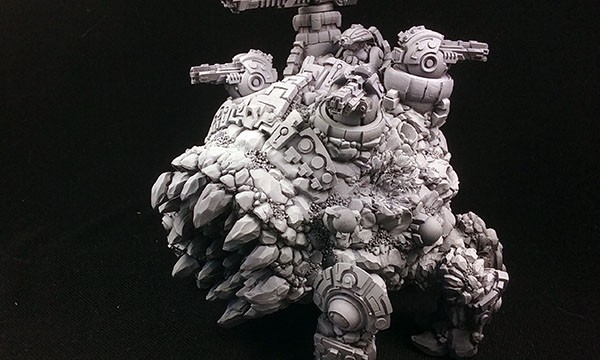
The part count of the brood mother is surprisingly reasonable given the level of detail on this miniature. Consequently is it still a miniature when its this big or is it more correct to call it a Model or Figure? Well whatever the correct term for it the Broodmother is an exceptional piece of casting and design. However because there are so few pieces there is the temptation to just start gluing it all together without much forethought but that’s a mistake.
We need to start by cleaning everything first. For that your going to want to rinse every piece even the metal ones with warm water and a little dish soap. Most miniatures have a very light dusting of a releasing agent on them that comes from the casting process. Its easy enough to remove with soap and water but leaving it on the surface of your pieces can give you some grief when you prime, as your primer will not adhere properly to the surface. I can tell you from first hand experience your going to need the best priming job possible on this miniature so you need that surface clean of any finger grease or releasing agent.
Once all your pieces are washed you need to start thinking about trimming off the flash on the pieces. Fortunate there is very little of this. Your going to need a pair of clippers, a knife and an Emory board. Using a metal file on resin or plastic is a bad idea. Its too rough and wont smooth the surface but rather rough it up. Using an Emory board is best or any other nail smoothing product as it wont tear up your miniature. Pay particular attention around the primary gun tower as the casting on mine was not the cleanest there. I promise this will be the hardest part of the prep process. Don’t rush through it, do it right and it will be done.
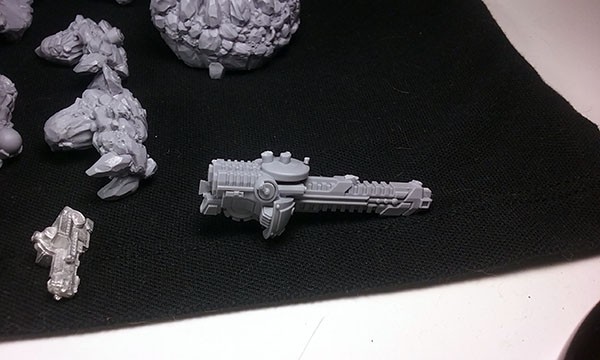
You will notice on the main gun (this is assuming your using the main gun, there are three options in the bag) that there are three pegs on the attachment point. Two of them are flash the other is what you need to attach the gun. I’ll just give you a hint, its the middle one you want to keep. Use your clippers and remove the other two and sand them down with the Emory board.
Also a little note, resin turns into a very fine powder when its filed, so I advise wearing a mask while sanding it. Rumor is breathing that stuff in might not be the healthiest thing to do. Personally I figure an ounce of prevention is worth five figures of medical care, so best to ware a dust mask.
Done? Wonderful, lets continue. Now you can use the super glue… honest! Feel free to be liberal with the glue its a big miniature and its going to have to survive a long life on the game table.

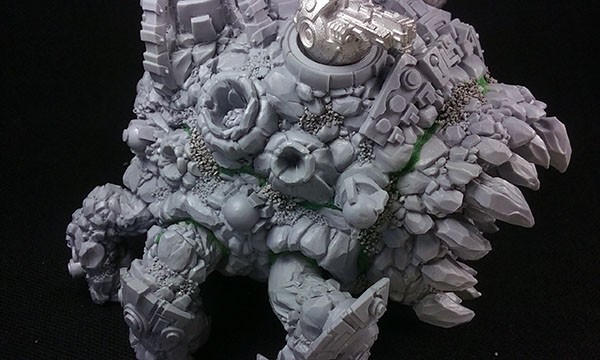
So right now your probably looking at all those legs and trying to remember which ones go where. Fortunately for us Warlord included some handy lettering so we would know what leg goes where. However this is where things get tricky. The legs do not fit perfectly into the body. Further more there is no base for this miniature, that means you need all six legs to be firmly and flatly on the ground to properly support the miniature. Its my personal opinion that this is the weakest design element of this monstrous figure.
To give yourself the best chance to get it right I recommend using “Green Stuff” to initially attach the legs. As it has a long curing time you will have amble time to position them to perfectly stand on all six distributing its weight evenly. I can not stress enough getting this right. Do not rush. Take your time. Do it rig…you rushed didn’t you?!? Well.. not the end of the world..I guess.
Now that you have the legs tacked in place feel free to soak the leg holes in super glue to hold it all in position. Please give this ample time to dry unless your a fan of gluing your hand together.
Finally use your green stuff to fill in the gaps round the legs and around the main body.
While you have your green stuff still soft and workable we need to address a few issues you Broodmother might have. While the casting on these pieces is very solid in general its not perfect. There may be some thin places where its just not very thick. I want you to take the excess green stuff you have and reinforce these areas. Hold your pieces up to the light to identify them, then give them a going over.
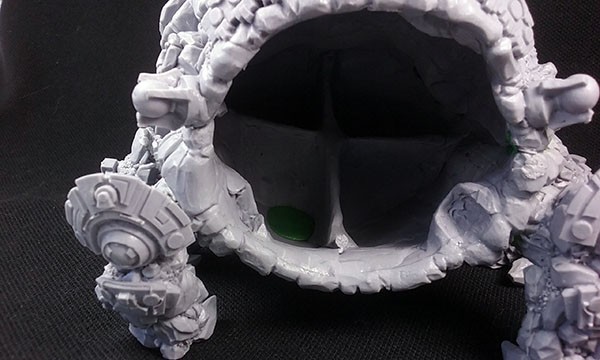
I found the back of the mouth looked suspiciously thin so I laid down a thick layer over the back of the teeth. Last thing I wanted was to risk punching a hole in the mouth while painting it. While I would normally complain about this kind of thing on a smaller miniature. This is an absolutely huge piece. Casting such large pieces without warping or other errors is extremely difficult. Besides a little cautionary preparation now can save you grief down the line.
Time to finish gluing the mouth and all the little extras into place.
You will no doubt notice the gap around the mouth. I want you to again take your green stuff and work it into the crack until its smooth. Don’t worry if your not a green stuff expert, I never have been. Just make sure its smooth before it dries.
Now I wanted to hide my green stuffing around some of the gaps, having large smooth lines across such a rocky miniature I figured would be a dead give away as to what I had done. So I took a little medium railroad ballast and glued it over some of the green areas.
I also applied it to several other areas that I felt were a little bare. Just don’t go wild with it if you follow this step. An interesting note, I think this is the very same material used to create the rough spots on the original sculpt so its perfect for adding more.
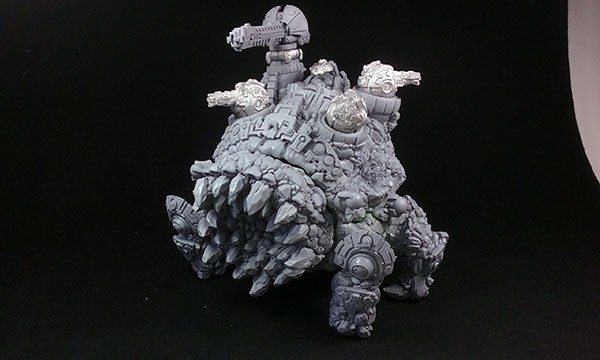
Last its time to prime the miniature. I knew just looking at this miniature I was going to have to handle it a great deal while painting it. Something I usually avoid like the plague. Unless you can come up with a reasonable way to mount this beast for painting your going to have to do a good job priming or you will risk rubbing the primer off during the painting process with your hand.
To ensure the best coverage I chose to apply three thin coats of primer. I used Vallejo brush on primer and applied it with my crappy airbrush. I started with black primer and worked until I had an even coat. This was allowed to dry for 6+ hours. Then I mixed some white into my black primer and shot it again. By doing this it was very easy to tell when I have achieved solid coverage. Priming black on black you will never tell the difference between your first and second coat. Last after another 6+ hours. I applied pure white primer over the hole surface. Easiest time I ever had getting three layers of primer and ensuring even coats.
That’s it all done.
All joking aside. Preparing a miniature to receive paint can be annoyingly time consuming I do know that. But doing a poor job here will affect your end product no matter how good a painter you are. Things like mold lines can ruin the look of a miniature and are nearly unfix-able once you start painting. Solid, careful preparation is part of producing a good miniature. I encourage you to invest the time. The broodmother is an amazing miniature. Its also a hefty investment for a single piece, well worth it to be sure, but hefty. Take the time to do the best you can, you will thank yourself later.
For part 2, which is where that painting of the beast starts, click here…
Do you have an article within you? Are you itching to show your collection to the world? Join our Beyond the gates of Antares facebook page for the most up to date news and more!
Expand your army!