If you missed part One of this Battle Report, you can catch it here!
Turn 3:
With the first dice out of the bag, I decided to use Superiority, which removes one of James Order dice from the bag this turn. This is useful as it prevents him from using a unit this turn.
Next, the Overseer fires down onto the Hazard squad, utilising the Scrambler shot that was fired in the previous turn, scoring two hits and killing one!

The Hazard Command squad realising the danger they are in, attempt to Advance, but promptly fail their test! That is not what I wanted boys!
The Boromite mass compacters fire and manage to kill the unit leader despite his reroll, things are not looking great for the Algoryn!
The Hazard squad near where the Scrambler shot landed attempt to charge up the ladder to the Overseer, but fail and go down!
The Hazard squad on the left flank rallies, whilst the Medic Advances in to support the squads trying to take the main compound, firing off a couple of rounds but missing their mark.
Whilst the Boromites Mag Cannon Advances to get into a better firing position, the Micromites stay attached to the Hazard squad nearest the mass compactors who then proceed to gun down yet another Hazard suit!

The x-launcher loads a Net ammo round and fires it onto the medic team, which scatters and manages affect both the medic and the Hazard squad.
At the end of the turn, the Overseer passes his test and comes off Down, as does the Algoryn Hazard Command but the Hazard suit nearby fails!
Turn 4
The Mass Compactor armed Boromites fire again on the Hazard squad facing them, slaying one and the Algoryn fail their break test and flee!
Both flanks and therefore objectives are now completely controlled by the Boromite forces, so now I’m just fighting for pride!
The Overseer rapid fires at the Medic, killing one and they also fail their break test and flee the field.
The Mortar team fires a normal round at the remaining Hazard squad, felling one in the process. Whilst the Micromites stay put and the Mag Cannon support team goes onto Ambush, the Algoryn Command squad Advances up the hatch and unleashes a volley of shots into the Boromite Work Gang…scoring no kills!
With the remaining Boromite units simply settling into their positions the Algoryn are well within Breaking point of the entire army, fortunately, I pass and the fight continues!

Turn 5

The Algoryn Command charges into the Gang Fighters, with Point Blank shooting occurring before contact, the Algoryn manages to kill the Gang leader with no casualties on their side. In the ensuing combat phase, the Hazard unit is all armed with D spinners, giving them two attacks each and I opted to give them SV2 (the other option is to increase their Res by 2!)
With strength five being boosted to strength seven (+2 for Assaulting and a Hand Weapon) the Gang fighters manage to save all of them!
The Boromites in return cause 4 hits with no SV…I then proceed to roll two 10s! I chose to continue the combat, this time managing to wipe the unit out!

The Mass Compactor unit advances on the second squad of Hazard suits, and unleashes hell, killing all four with the help of the scrambler ammo!
The Overseer fires at the Hazard Command squad, and fails to kill any but does add a pin, bringing the total to four pins taken during the previous combat, which they manage to pass.
With the endgame well in sight, the Mag Cannon fires its rounds at the Hazard Command, hitting but not killing, forces another Break Test with its failed and they go down.
With that being the case we decided to end the game there, as there was no hope left for the Algoryn!
We decided for the narrative that the Hazard Command would be captured, and interrogated, thus forming another scenario for our next game!
A resounding victory for the Boromites!
After Action Report
Sam
What a great game! I thought I had them at a disadvantage once all three of my Drop Capsules landed pretty much where I wanted them too.
The Spearhead force is a fun army to use, and what it lacks in numbers it makes up for in sheer toughness. The hazard suits are great, high Res and having the extra shot when using rapid-fire means that pouring 15 shots into a unit is very much worth it. That Scrambler ammo was a real headache for them!
If I were to change anything I would probably drop the three units down to three men in each, enabling me to perhaps get a Skimmer unit or two into the army.
Alternatively, just swap one of the units entirely with a Skimmer Command squad. That would give me some manoeuvrability but in games like this infantry is needed to win the game, so perhaps a combination of faster moving units to harass the enemy while the slower Hazards deploy onto the objectives. However, this army is designed to be a tough nut to crack, and I made some truly appalling dice rolls!
James
Very pleased with that result against a very tough army!
The Boromites proved to me once again how hardy they can be with their great Command Stat, passing tests to keep them in the fight. The Gang Fighters on the central objective being Down for quite a lot of the game was very useful for me and they proved a difficult unit to shift.
Overall, I’m happy with the list I took, giving me plenty of SV required to beat the high armour, not to mention the exceptional Scrambler munitions that the launcher dropped on the Algroyns head!
In a game about tactical decisions with every dice pull, I believe I made the correct calls in reinforcing certain areas at the right time. The control of the game was set for me when I managed to get rid of the MOD2 Skimmer with the massive damage of the Mag Cannon reducing Sam’s dice count. With the volume of fire coming from RF3 weapons, taking the extra Leader re-rolls helped me weather the Algoryn storm. I cannot wait until the next game!

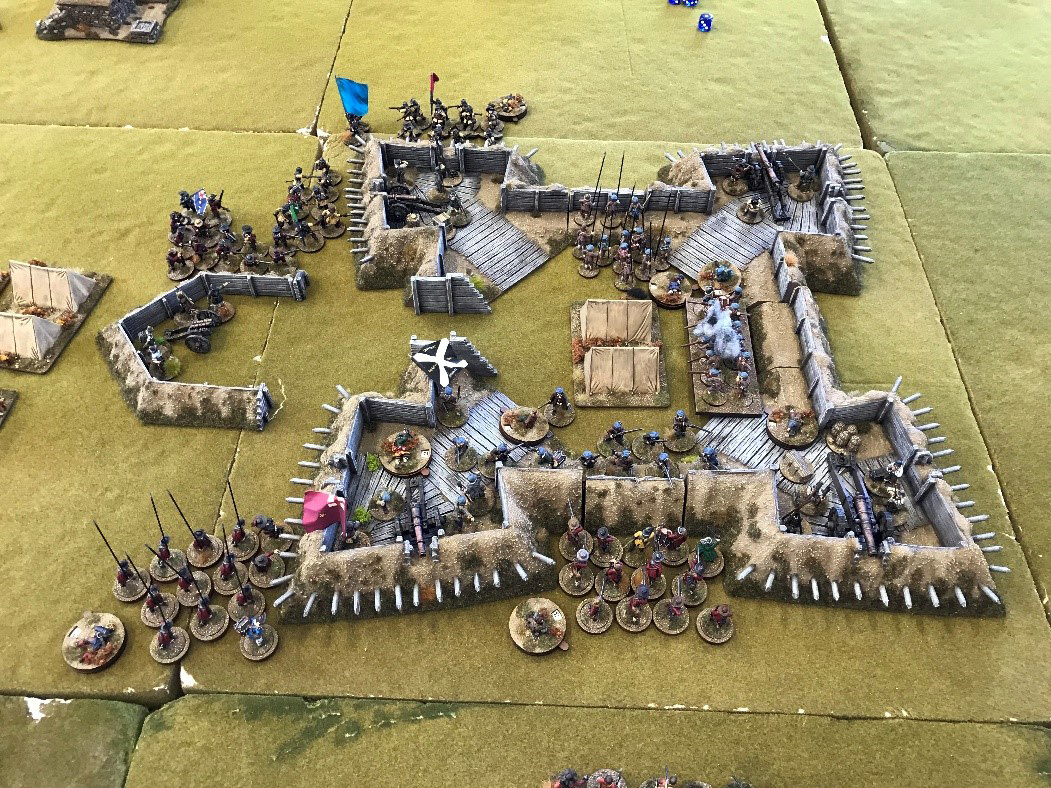
Terrain by 4Ground, Sarissa Precision and custom built by James Smedley. Gaming mat provided by Deepcut Studio. Battle Report by Sam Phillips.