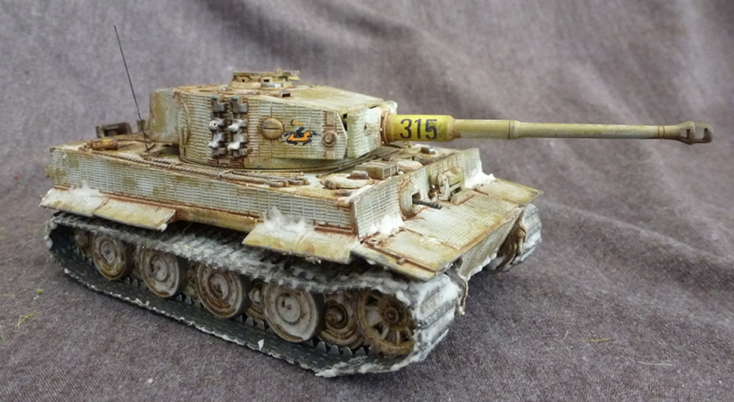
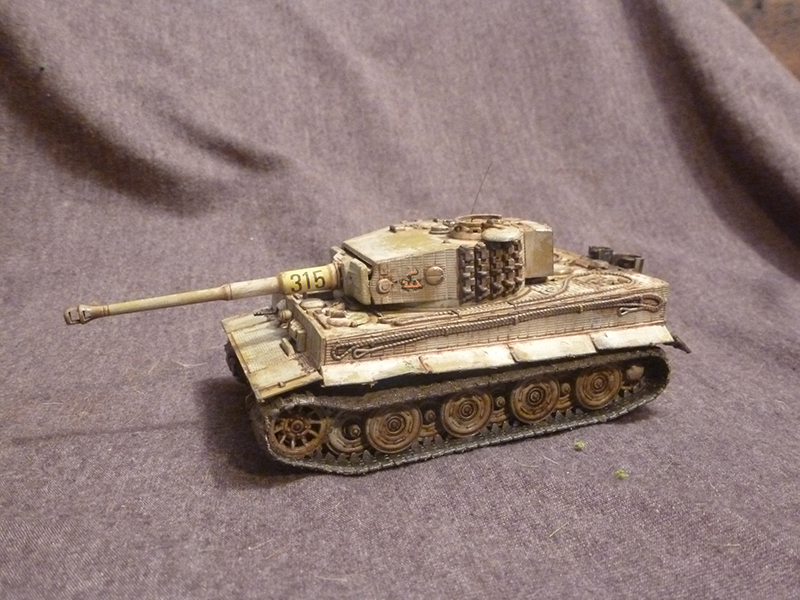
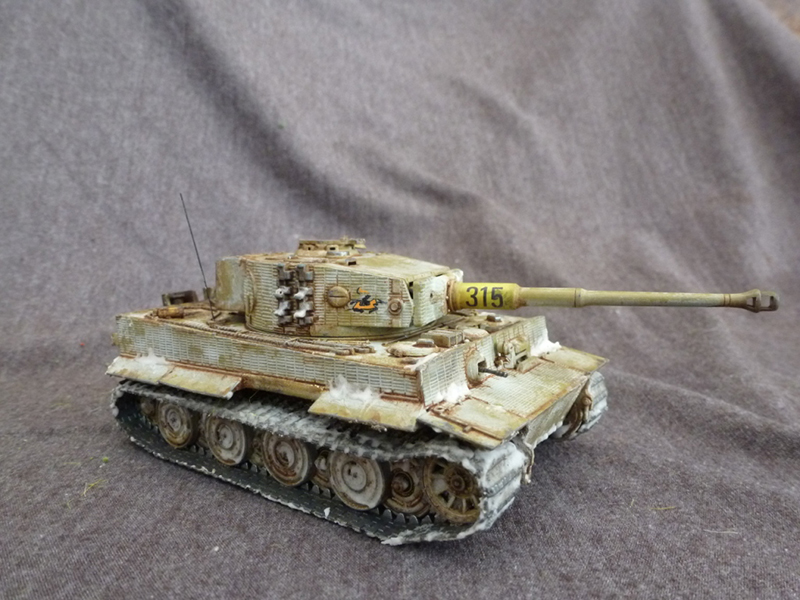
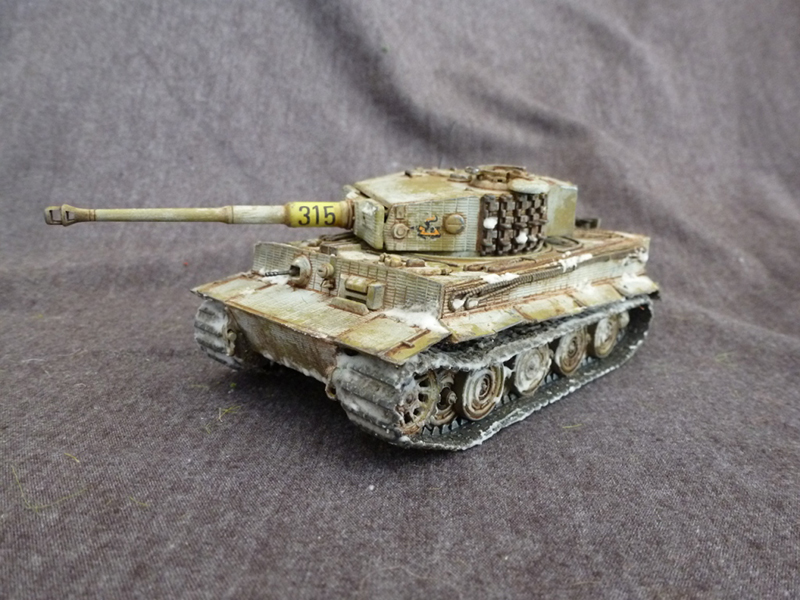
Whitewash camo was a tactic employed by the Germans and Soviets on the Eastern Front, as well as the German and American forces on the Western Front – so Andy’s tutorial focuses on the rather splendid Tiger, although it’s a technique which can be applied to the vehicles of any nation!
Andy: ‘This is my simple guide to applying winter whitewash. You can get various special chipping effect solutions and paint fancy effects, however some simple gloss varnish and household salt can get you a great looking weathered winter finish. I’ve used an airbrush to paint my Tiger, however this is not required, you can also apply the white using a brush, or even use some packing foam that comes in blister packs if you want to get a really rough and weathered finish!
I’m using a plastic Tiger tank here, but the techniques work for any vehicle from any army, and can even be used for things like helmets and ammunition boxes. Anything that would get a winter finish!
Winter whitewash was applied as a temporary paint finish to vehicles serving in snowy conditions to provide a semblance of camouflage. The paint was applied in a fairly haphazard fashion and tended to be water soluble too, so become worn and streaky very quickly. This can be a daunting looking finish to attempt, but can also be spectacular. Through the next 7 steps I’ll show you how it can be done!
Step 1 – Build and Prime
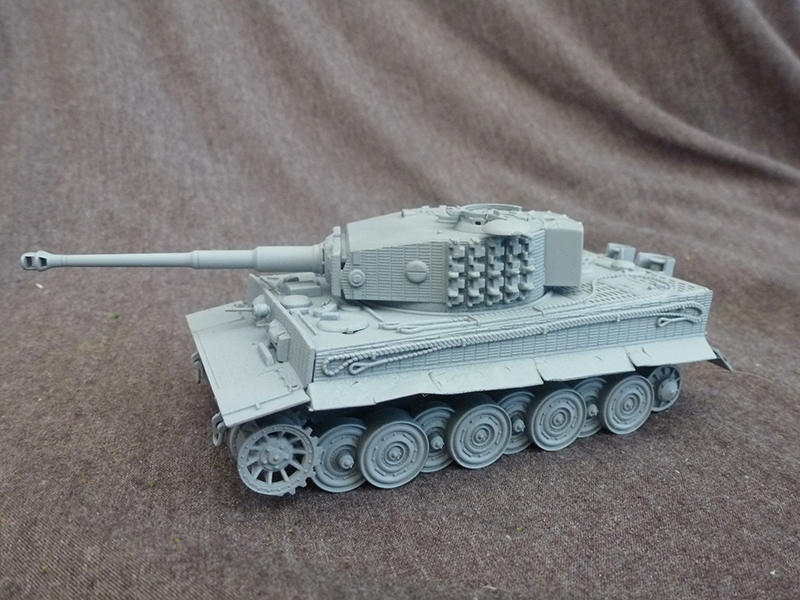
Fairly self explanatory this – build the vehicle so that it is mostly complete, but leave off the tracks. You could leave the wheels off until later if you wanted. I just glued mine on as I wanted to get a feel for how the model looked, and didn’t want to risk losing them! I used a grey car primer, but use whatever you normally like. The model will be getting a fairly hard treatment though so the primer does need to be something tough – Army Painter Colour Primers are ideal!
Step 2 – Paint Base Colour
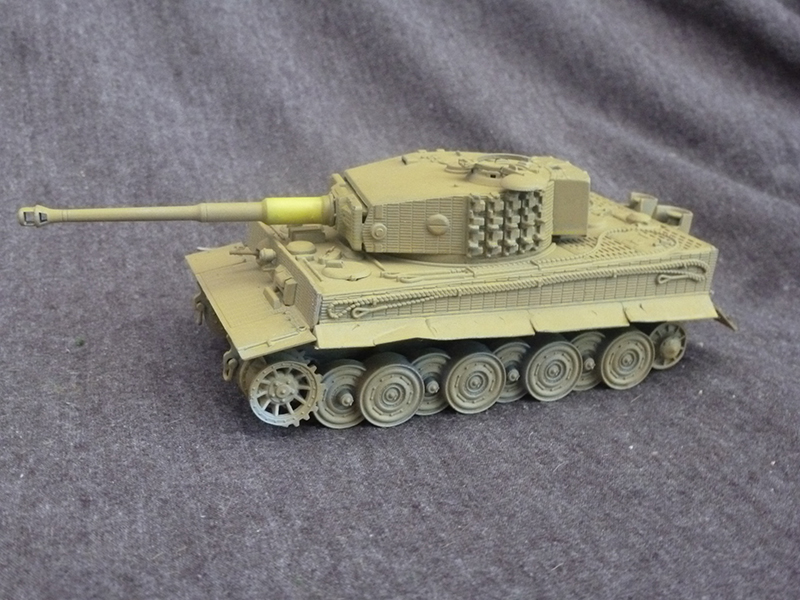
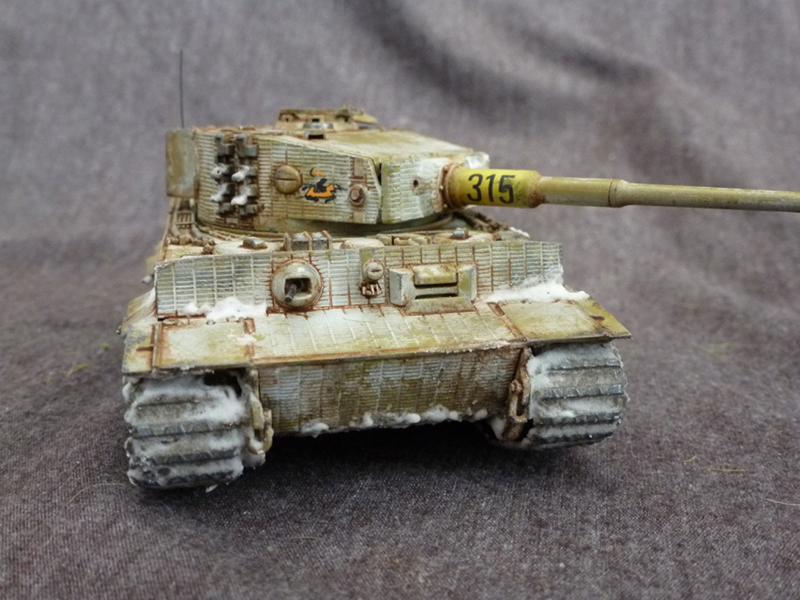
At this stage paint the vehicle whatever colour it spends most of its time, for a German vehicle post 1943 such as my Tiger this would normally be a sand yellow colour, and would generally have a disruptive pattern of green and brown, though this camouflage wasn’t always present. I like plain sand yellow vehicles so I left mine camouflage free. For my Tiger, I used Vallejo Middlestone.
Step 3 – Detailing
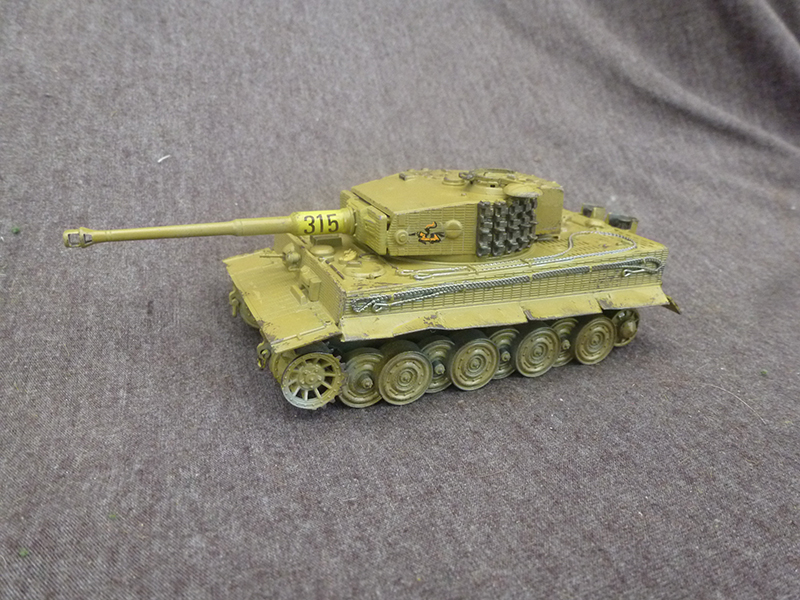
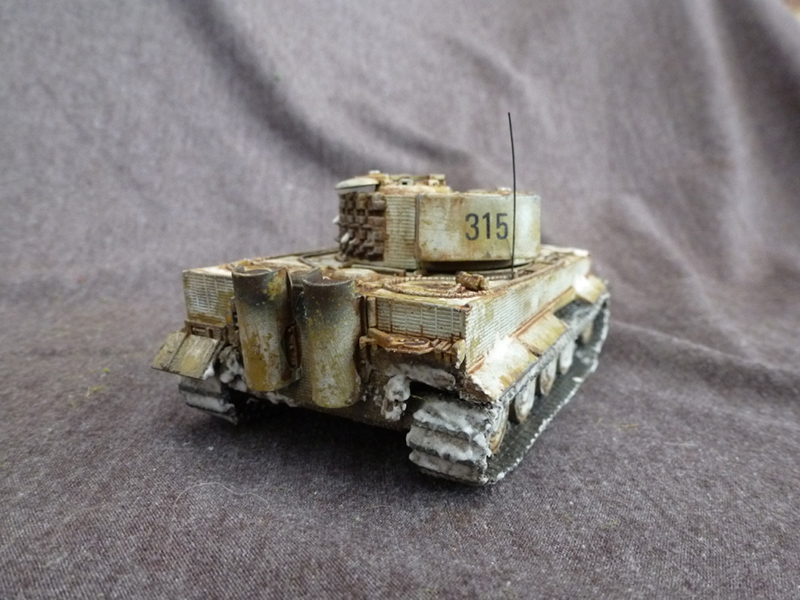
At this stage, I pick out all the things like tools, tow cables, spare tracks etc. These would normally be whitewashed over on the real vehicles, so painting them before the white goes on gives you a nice effect. I also use this stage to apply any transfers to the vehicle. Once the details are picked out and the transfers are dry, paint the tank with a gloss varnish. Vallejo Model Colour Gloss Varnish is perfect for this, and you can apply it either by hand or by spraying. It’s important to leave the tank to dry for at least 12 hours, for the varnish to full harden, in fact I’d recommend leaving it a day or two though before starting the fun stuff.
Step 4 – Dunk in water & cover in salt
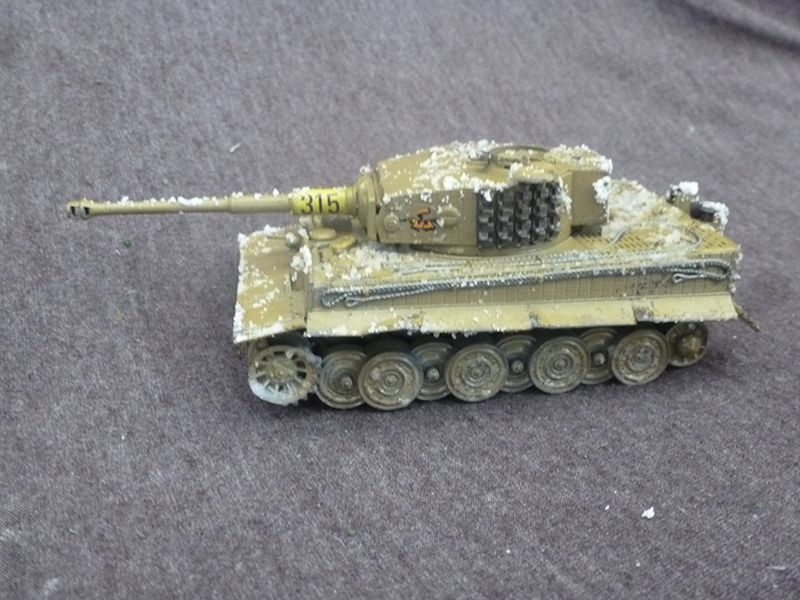
Yes you read that right. No I didn’t copy and paste it from a roast potato recipe. We’re going to be using the salt to protect the base coat areas and get the characteristic streaky, chipped look to the white paint. To do this, get two bowls, one full of water, one full of salt. Dip the tank in the water and whilst it’s still wet sprinkle salt over it, and also rub pinches of salt along the edges, areas of wear, upper surfaces, anywhere you would like the base colour to be showing through. The more salt you apply, the more battered and worn your tank will look. I also use blue tac to mask any transfers at this stage too.
Step 5 – Paint White. Leave for about 20 minutes then use a toothbrush to scrub off the salt
We’re now going to be painting the white tank white! I recommend using an acrylic white paint. You can apply the white with an airbrush, paintbrush or packing foam from a blister pack dabbed on. You will want the paint to be fairly thin, but not as thin as a wash. Don’t use an aerosol spray though as the paint hardens very quickly, and is very opaque so doesn’t give the streaky finish seen on most winter whitewash.
Give the white paint enough time to become touch dry, usually around 20-30 minutes with acrylic paint, and then use an old toothbrush or old paintbrush to scrub the salt off. Once you have as much of the salt off as you can, wet the brush and remove the last few pieces of salt. Remove the blue tac over any transfers too. At this stage, you should be starting to have a very nice looking tank! I strongly recommend re glossing the tank, ready for finishing the weathering…
.
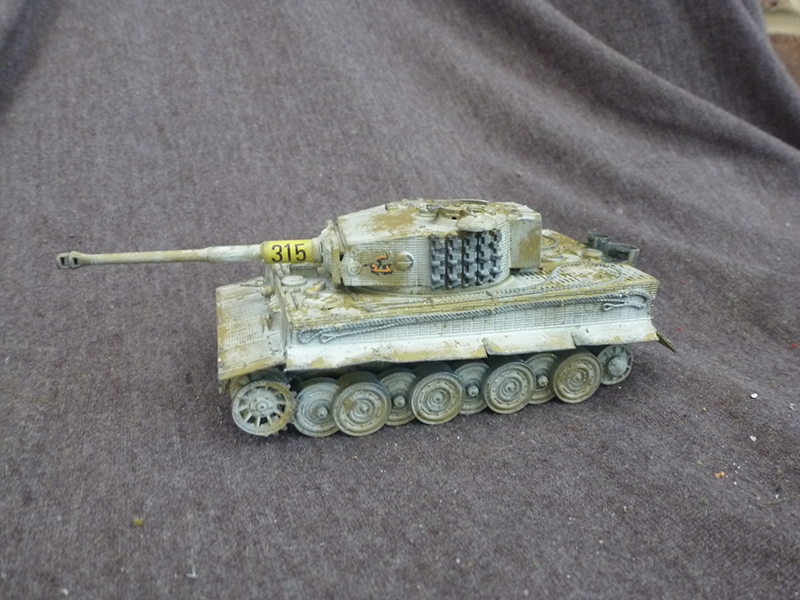
Step 6 – Paint a wash on
To add some depth and definition to your model, paint a wash into the recesses of the model. The gloss varnish will help the wash to flow better and will make it easier to remove any excess with a cotton bud. I make my own using artists oils, but Army Painter inks and Vallejo Sepia ink are all good options too.
Step 7 – Apply dirt/snow
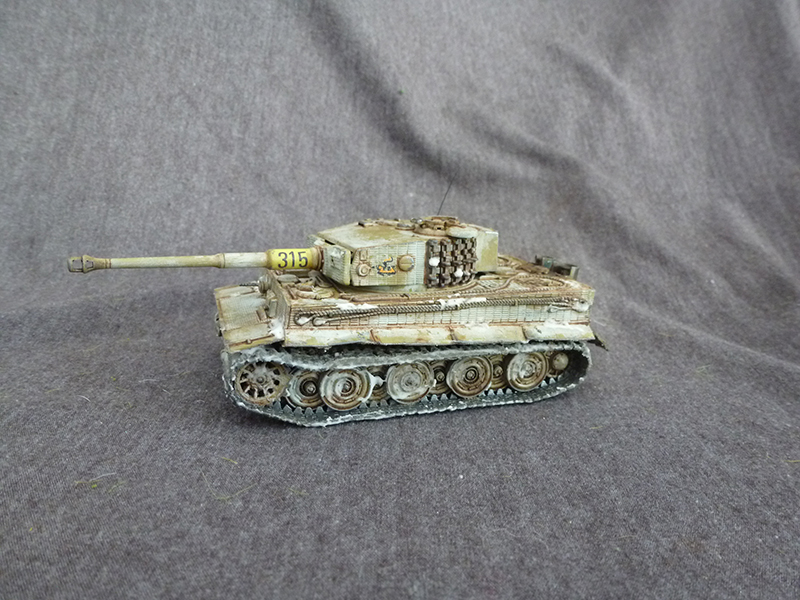
Nearly done! At this stage, you may want to add more mud or compacted snow to the vehicle, especially around the track suspension and lower part of the vehicle. My favourite way to apply mud is to use Vallejo Texture Paint, Dark Earth. Paint this thickly onto anywhere you want to be muddy, then whilst the paint is still wet use a fingertip to wipe the paint off again. Do not lick your fingers testing to see if it tastes chocolaty. I have already conducted this research and it doesn’t…
To add snow, mix baking soda with either gloss varnish, or preferably Vallejo Water effect, until it becomes a paste and use a cocktail stick to apply this to tracks, wheels, anywhere snow may congregate. Remember though that the back half of the tank is usually all engine and warm enough that the snow would melt, and that snow in all but the deepest recesses would be shaken off by the motion of the vehicle.
With that, we’re done! You can play around with adding details, more weathering oil stains etc, but this will give you a great looking tank without too much difficulty.’
Don’t forget to show us how you get on! – The Bolt Action Forum and Facebook page are a fantastic community of like-minded gamers and hobbyists – all keen to share their own projects, knowledge, and enthusiasm – so why not head over and take a look at what we’re all working on?
Andy Singleton