G’day all, Bryan here from the WWPD blog. I’ve been painting a lot of vehicles for my DAK lately, so I thought I would share a few tips on how to go about painting your own. This guide covers techniques you can use on almost any vehicle, from any nation in the North African or Mediterranean theatres.

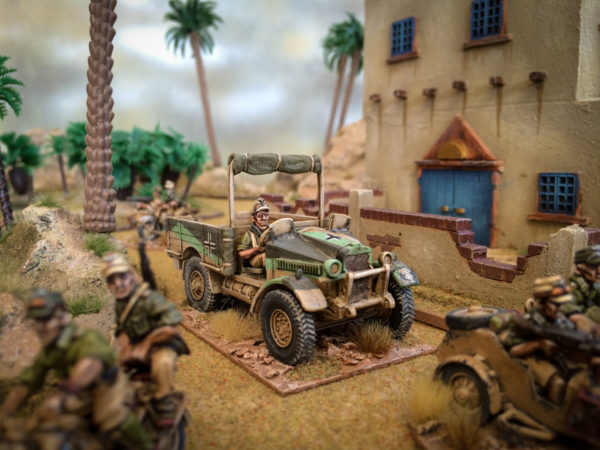
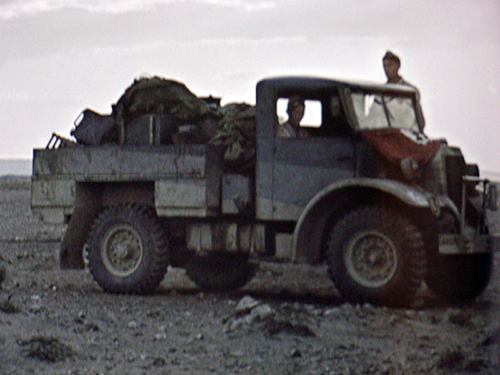
I’ve chosen an interesting subject matter that will allow me to showcase a variety of painting techniques for WW2 desert vehicles. The model is a captured British Morris truck in the unique ‘Caunter’ camo scheme of 1940-41. Captured vehicles were a common sight in the resource limited armies in North Africa on both sides. I’ve used the above photo as inspiration for this truck. The miniature itself is the Warlord Games Morris CS8 field tractor. I’ve simply swapped the supplied British head of the driver with a German equivalent wearing a field cap from the warlord figure head system.
Step 1 – Primer
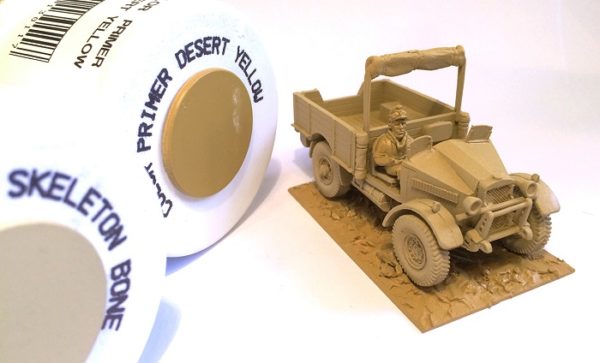 Let’s get straight into it. I have used Army Painter Desert Yellow spray to prime the vehicle and paint the base colour all in one step. You can start off almost all desert vehicles from any nation with this colour. After this dries, there is an optional step of giving the main hull some shading by applying an extremely light spray of Skeleton Bone. I do this as I do not have an airbrush, but this gives me a crude but acceptable lighter shade on the raised areas of the vehicle.
Step 2 – Base colours
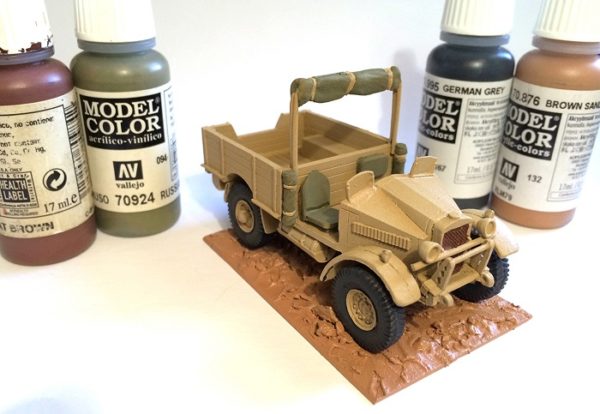
Next I apply the base colours that are not the hull. The tyres are painted with German Grey, the seats and tarpaulins are in Russian Uniform, and the radiator grill is done with Flat Brown. I often base my wheeled vehicles for durability and I have painted mine Brown Sand to start it off.
Step 3 – Drybrush
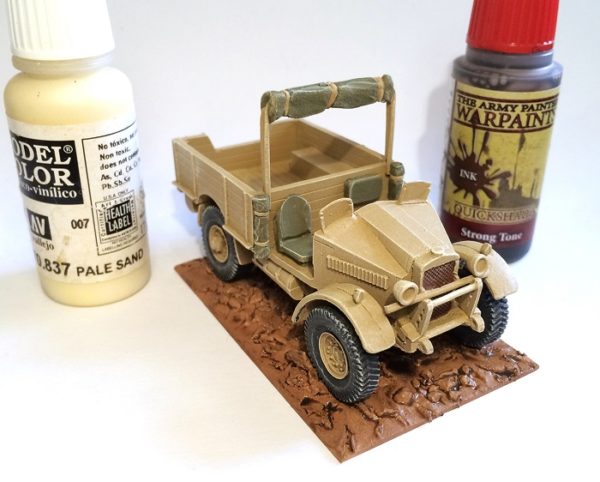
Now, using Pale Sand, I have given the entire model a very light drybrush to highlight those raised edges. The base was also given a wash of Army Painter Strong Tone ink.
Step 4 – Camouflage colours
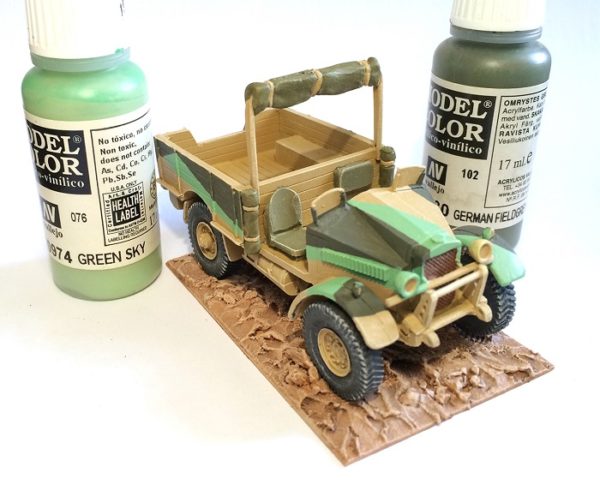
This is a step for Allied players only, especially British ones! I wanted to depict the really bizarre but iconic “Caunter” camouflage scheme the British and Empire troops used in the early campaigns of 1940-41. I think it just looks fantastic.
In my research I found all sorts of variations of the colours but settled on these two, a dark grey/green and a light blue/green. More specifically; Green Sky and German Fieldgrey. I watered down my paint slightly so as to achieve smooth edges on the areas I painted.
It may be worth searching for examples of the camo scheme as a bit of a guide as the shapes are in some interesting patterns.


Step 5 – Decals and Gloss varnish
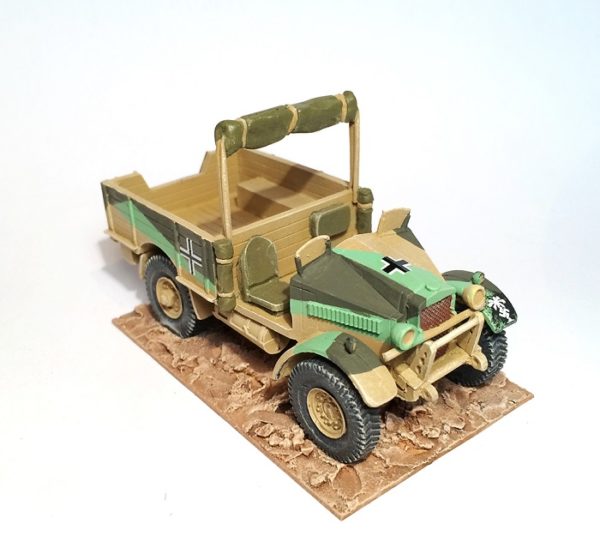
This is a straight forward step. Simply apply your vehicles appropriate decals. To help give mine the captured look I used a set of DAK decals alongside the German Balkankreuz set. The base was given a light drybrush of Dark Sand. At this stage I also gave my vehicle a solid coating of Gloss Varnish. I am about to use Enamel weathering products which require thinning and applying with turpentine, which will strip acrylic paint right off if you haven’t given it a protective coat of gloss varnish first.
I use gloss varnish rather than a matt, as it is a stronger barrier and also leaves the surface extremely smooth, which aids the washes I am about to employ. Leave for at least 24 hours to dry after applying the varnish.
Step 6 – Enamel wash
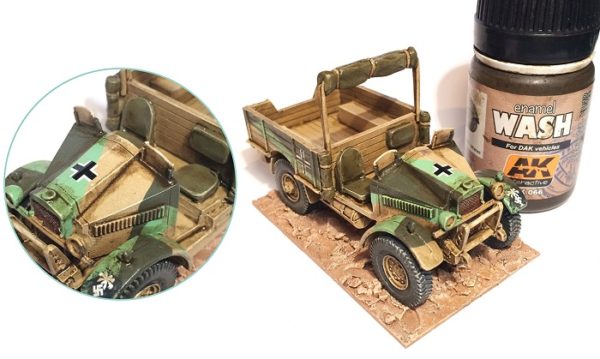
Next I use a wash to work into all the recesses of the miniature and create depth as well as some grime for a weathered look. Specifically I have used AK interactive Wash for DAK vehicles. I work this into the specific areas I want darker, pin washing them, not the entire vehicle. This is an enamel product, so you will need some artists turpentine or artists white spirit to thin this down and clean your brush out after. As the names suggest, you can pick this up at any art supply shop. Don’t worry about being perfect with the wash, just put it in the vague area you want it – the next stage we will clean it up. Leave this wash to dry for about 40mins to an hour.
Step 7 – Cleaning up the Wash
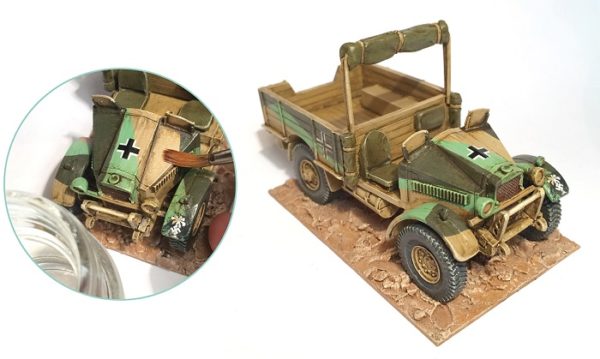
Using a brush I now ‘remove’ some of the wash. Simply dampen your brush ever so slightly with artists turpentine, and drag the wash along the flat areas of the hull away from the recesses. This will soften the wash effect and also create a streaking grime effect in one go. See the detail picture above on the left for an idea how I use my brush to do this. You should use hardly any thinner as it’s pretty harsh…better to go back several times and remove more and more wash with each one.
Step 8 – Dust
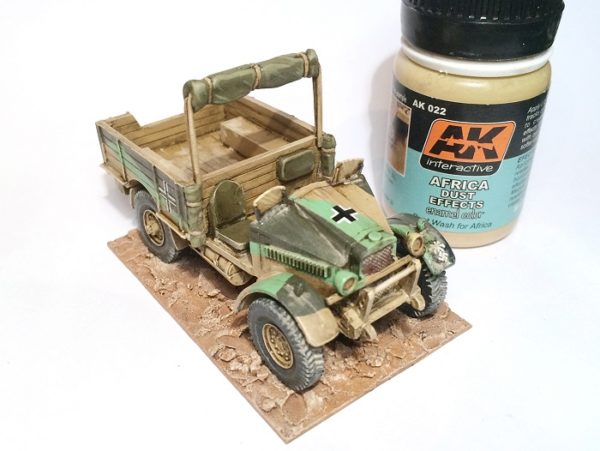
Using the techniques above, I now apply a dust product. Again it’s from AK Interactive. Pin wash it into the recesses or where you think dust would build up, let it dry for an hour and then remove any you don’t like using a brush and a tiny amount of the thinner.
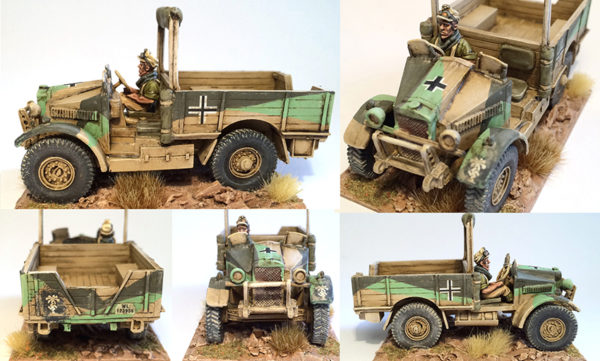
Step 9 – Finishing touches

To finish the desert vehicle off I added crew, in this case a DAK driver. He was painted using my recent guide here. After gluing the crewman on, I gave the model a coat of matt varnish. Lastly, because I based my vehicle I added some suitable flock and grass tufts to give the arid look – the Desert Basing Set is perfect for this.
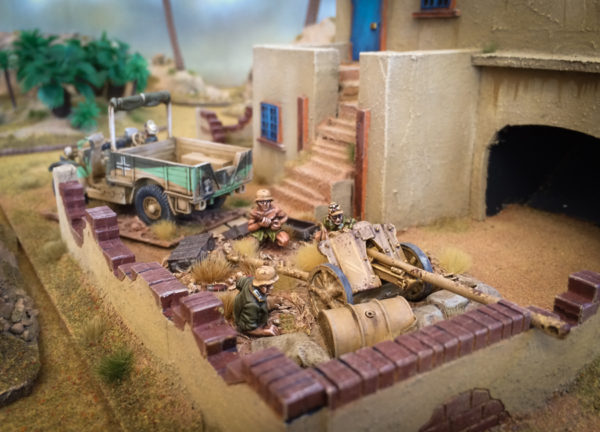
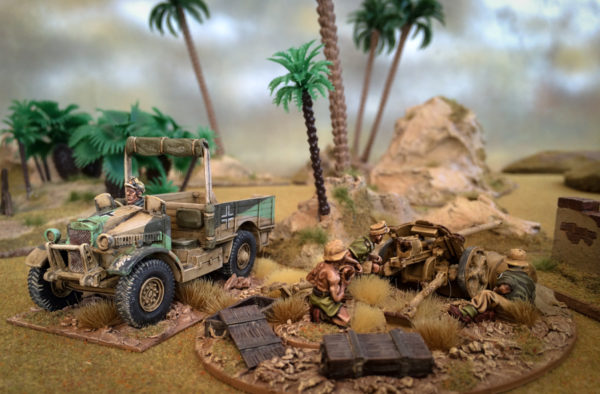
There are a few stages to getting your desert vehicles painted, but they are relatively fast, so these techniques are perfect for painting a few vehicles at once to save time overall. They can also be used for painting AT guns like this PAK38.
Bonus Step 10 – Chipping
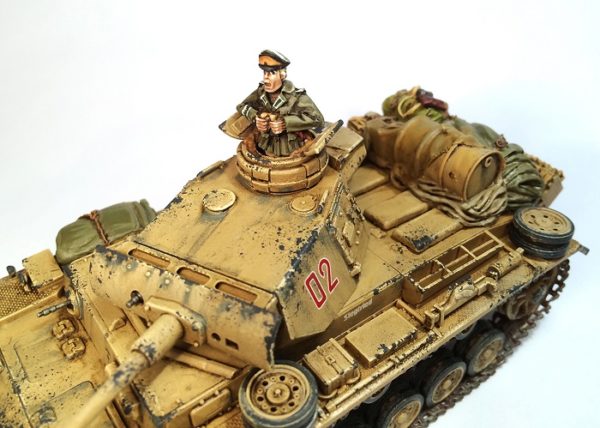
The truck example is finished, however, here is a great technique you can use for armoured vehicles to make it look like their paint has been chipped due to the crew climbing all over it and the harsh sandstorms that blasted the vehicles. Simply grab a piece of foam like the ones you get in blister packs with your miniatures. Dip it in some dark coloured paint that you think the vehicle would have as it’s hull primer colour (so a dark grey for this German Panzer for example). Sponge the paint off a bit on a rag or piece of paper to get most of the paint off the foam, then simply dab the foam onto areas of the vehicle you want to have chipping. You can see in the photo above how you get a rather organic and random effect – it’s simple and looks great. Try imagining where the paint would be chipped off – it’s usually on the edges of the hull. (See this technique in action in this video.)
There you have it, a basic guide you can apply to whatever vehicle you happen to be painting for the battlefields of North Africa and the Mediterranean.
Do you have an article within you? Are you itching to show your collection to the world of Bolt Action? Then drop us a line with a couple of pictures to info@warlordgames.com or share with all over at the Warlord Forum


