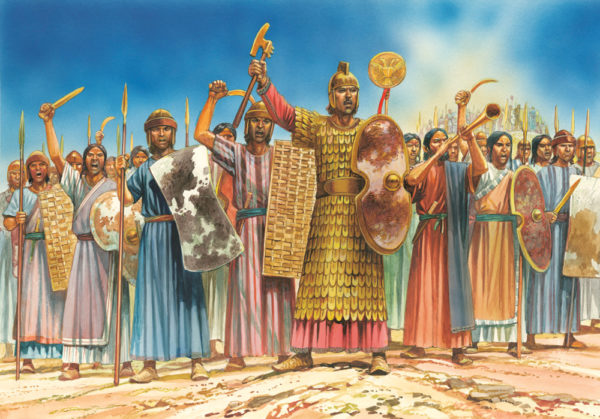
In this series of articles, Bronze Age expert Nigel Stillman discusses the Battle of Kadesh and the period of war and battle between the Hittites and Egyptians that led to it:

Hittites declare war on Egypt
With the death of his son, Suppiluliuma sent an army into Egyptian territory commanded by crown prince Arnuwanda. Egyptian forces were engaged and defeated and thousands of prisoners of war were captured and taken back o the Hittite kingdom. These Egyptian captives brought with them a virulent and persistent plague, which rapidly spread throughout the Hittite heartland. One theory is that this plague was already present in Egypt and had been one of the misfortunes that the Egyptians blamed on Akhenaten’s neglect of the old gods. If this was bubonic plague, it may indicate trade links going far into central Asia, following the routes used by the ancestors of the ruling aristocracies of Mitanni and other kingdoms of Northern Mesopotamia and Syria. There must have been a huge trade in horses (with their woolly horse blankets) from these regions, and Kadesh was on a direct long distance trade route from remote eastern regions to the port of Byblos in Phoenicia. Another possibility is some kind of malaria.
In the much-reduced Kingdom of Mitanni, Shattiwaza was deposed by Artatama’s son Shuttarna, and fled into Hatti. The Hittite king had supported Shuttarna’s father, but the son turned to Assyria instead. This kingdom, centred on the city of Ashur and ruled by Ashur-Uballit I, had recently asserted its independence from the King of Mitanni after years of vassaldom. In response, Suppiluliuma formed a Hittite-Hurrian army at Carchemish, commanded by Sharri-Kushuk and Shattiwaza. Battles were fought at Irrite and Harran, and Shattiwaza regained the throne of Mitanni whilst some Mitannian territory was taken over by the kingdom of Carchemish. However, Suppiluliuma died of the Egyptian plague and his successors, Arnuwanda and Mursilis had to defend their kingdom against enemies in the north and west.
In Egypt, general Horemhab became Pharaoh and began reforming the kingdom. Horemhab seems to have come to an agreement with the Hittite king Mursili II and, according to Hittite records, initially relations were good. Later on relations degenerated thanks to the detention of diplomatic envoys. Horemhab also possibly stabilised the volatile situation in Egyptian-held Syria and Canaan, where rebellious factions of Habiru had attempted to establish their own kingdoms during Akhenaten’s time. One of these had become the kingdom of Amurru. The others are possibly the origins of the later Hebrew kingdoms. Since Seti I later re-asserted Egyptian control here, it is possible that Horemhab was tolerant of these belligerent warlords as allies against potential Hittite expansion.
Assyrians Approach Kadesh (c. 1314 BC)
Now Assyria began to take over the eastern remnants of the former kingdom of Mitanni and expand westwards. The Hittite king Mursili sent general Nuwanza with a force to Kadesh, so that Sharri-Kushukh would have enough troops if the Assyrians turned up. The Syrian vassal kingdoms wanted to assert their own independence if possible, and changed allegiance from Mitanni, to Egypt and to Hatti according to whichever king was strong or in the vicinity with his army. When a rebellion broke out led by Tette of Nukhash supported by Kadesh, Mursili suppressed the rebellion, but Tette escaped and continued fighting with the support of Egypt. Sharri-Kushukh viceroy of Carchemish and Kantuzzili, with a Hittite force counter-attacked and defeated the rebels and their Egyptian allies before Mursilis arrived with further reinforcements from the Hittite’s northern frontier.
Rebellion broke out again in Syria when the Viceroy of Aleppo and the Viceroy of Carchemish both died. This time Assyrian forces arrived on the scene and captured Carchemish. The Assyrian advance was timed to coincide with attacks on Hatti from the eastern mountain kingdom of Azzi-Hayasa. Mursili recaptured Carchemish while the Hittite general Karunta crushed the rebels, and general Nuwanza repelled the raiders from Azzi-Hayasa. Mursili’s sons were made new viceroys. The rebellious Aitakama king of Kadesh was assassinated by his own son, who then recognised the Hittite king as his overlord. Mursilis agreed a treaty with Amurru and so it seems that both Kadesh and Amurru, formerly allied to Egypt were now allied to the Hittite king. According to the terms of the usual Bronze Age treaty at this time, a vassal kingdom had to provide a contingent of troops for the campaigns of its overlord, deny support or passage of the troops of a foreign power- especially one at war with the overlord, extradite fugitives such as rival claimants to the overlord’s throne and render tribute. In return, the overlord would support his loyal vassal with military force if he was attacked by a foreign power or was deposed in a palace coup, a frequent occurrence. Vassal rulers who broke such a treaty would be replaced by military intervention and this was seen as a just war in the eyes of the gods because a sacred oath had been broken.
The Egyptian plague was still ravaging the Hittite kingdom, and so Mursili ordered that the omens be consulted to find out why the gods were angry with the Hatti land. He knew that his father Suppiluliuma had a dubious claim to the throne and suspected this might be the cause of the misfortune. The oracles hinted at a different cause. The archives of the kingdom were scrutinised and it was found that Suppiluliuma had broken a treaty oath with Egypt when he attacked Amka and the plague was thus a direct result of initiating an illegal war. Already Kadesh was revealed as a far from auspicious place for Hittites and Egyptians (or for that matter Mitannians) to fight over!
While these events unfolded on the Hittite’s southern front, they were also defending or expanding their kingdom westward against Arzawa and the Achaeans, northwards against the Kaska tribesmen and on their eastern fronts against Assyrian incursions. When Muwatalli succeeded to the Hittite throne, he decided to shift the capital from Hattusas, which was dangerously near to the Kaska frontier, to the city of Tarhuntassa in the south of his kingdom. He put his brother Hattusili in command of the northern frontier at Hakpissa. A treaty was made with king Aleksandush of Wilusia, ruling at Troy, to secure the western front and deter Achaean incursions. Now Muwatalli could turn his attention to the south where Egypt was clearly preparing for war. Meanwhile in Egypt, Horemhab had reformed the country, expanded the army by creating another ‘army’ making two armies (there would be three armies in the following reign of Seti I and eventually four armies available to Ramesses II.) Horemhab, having no heir to succeed him appointed the general Ramesses (the first) as his successor and his son Seti was clearly a talented commander. Thus the stability of Egypt and its military strength was secured and a new dynasty would be in charge.
Campaign of Seti I (c.1284 BC)
It is usually thought that Seti I campaigned in the region of Kadesh, defeating the Hittites and recapturing Kadesh. Maybe he didn’t capture Kadesh on the Orontes but rather another place called Kadesh. A study of Seti’s various inscriptions at Karnak and the Beth Shan stelae indicates that he certainly campaigned in Lebanon and secured Egyptian control of the coast and cedar mountains, and he captured Hittite prisoners in actions along the border. His other campaigns in Canaan were directed towards the Galilee region around Beth Shan. Here, the Shasu, usually regarded as the Biblical Edomites, were coming out of the eastern highlands and attacking and driving out the Kharu (Hurrians) settled in the region. Seti intervened and defeated the Shasu. As part of the campaign, he captured the town of Kadesh in Amor, depicted as located on a rocky outcrop and different to the way Kadesh on the Orontes is depicted (as it is a tell rising up from a flat plain, surrounded by the Orontes and a branch stream.) Also the defenders are dressed as Syrian Hurrians rather than Hittites. A section of the temple wall recording Seti’s campaigns is missing and this may have depicted his push towards Kadesh on the Orontes. In the 1920’s a fragment of a stela of Seti I was found in excavations at Kadesh, which suggests that he captured or negotiated the submission of the city, and so the stela would have been set up to record this and mark the border. He may have had to fight a Hittite force or overcome a Hittite garrison. Since the stela was later broken up, perhaps Kadesh reverted to Hittite control soon afterwards. Kadesh was allied with the Hittites by the time of Ramesses’ campaign.
Ramesses II prepares for war.
Ramesses II succeeded his father Seti on the throne. Ramesses may not have been the first in line for the throne, since on Seti’s Libyan war scenes the figure of a prince has been reworked to become Ramesses, who then claimed to have been on that campaign with his father. Perhaps the older prince did not survive to succeed, or perhaps the army liked to have a big say in who became pharaoh, but was over-ruled in Ramesses favour. Throughout the Kadesh texts of Ramesses you get the feeling of underlying tension between the army and Ramesses leadership. Ramesses likes to tell off the commanders, and claims to have rescued the army at Kadesh. This may hark back to the circumstances of the succession and reinforces the idea of a headstrong and impetuous commander-in-chief, although certainly one capable of acting fast and boldly.
Early in his reign, Shardana pirates from far away Sardinia came in ships and raided the Egyptian coast of the Nile Delta where they were captured by Ramesses and his forces. Ramesses immediately recognised the fighting qualities of the ‘rebellious hearted Shardana’; ferocious sword and buckler warriors who ‘no one can withstand’ and recruited them into his personal bodyguard. Clearly they must have been intercepted, separated from their ships, outnumbered and surrounded, but put up such a fight that Ramesses offered them the chance to fight for him. The event was recorded on Ramesses fourth stela at Tanis. They would soon prove their worth for him in battle.
In his fourth year, Ramesses marched north along the Canaanite coast and reached Amurru, advancing as far as the DogRiver (Nahr El Kelb) where the Egyptians carved an inscription. There are three such inscriptions here, now much weathered and one over-carved by the French army in the 19th Century. Ramesses secured the allegiance of the King of Amurru, Benteshina, who deserted his former overlord the King of Hatti. This annoyed Muwatalli greatly, and would have been taken as just cause for war by the Hittites. The Hittites subsequently regarded the war as fought against both Egypt and Amurru. Muwatalli made preparations for retaking Amurru and fighting Egypt. The battle of Kadesh would be fought because Kadesh was the Pharaoh’s next objective, and this time the Egyptians would be opposed by all the might of the Hittite King.
Read the other Sections of this article:
History: The Battle of Kadesh part 1
History: The Battle of Kadesh part 2
History: The Battle of Kadesh part 3
History: The Battle of Kadesh part 4
History: The Battle of Kadesh part 5


