Behind closed doors, things are progressing at pace for the up-coming release of Beyond the Gates of Antares – with more new models (and races!) being worked upon in the Warlord studio. We have some extremely exciting news coming soon – so keep watching the Warlord Newsletter, and make sure that you’re a member of the official Facebook group to keep up-to-date with the latest news!
Warlord writer, Sam Phillips has been preaching the gospel and spreading the word, busy converting members of his local gaming group – and this week begins a two-part Battle Report in which he’s pulled out all the stops, with a HUGE 3-way Battle Report – so sit back, and prepare for some serious action!
![]()
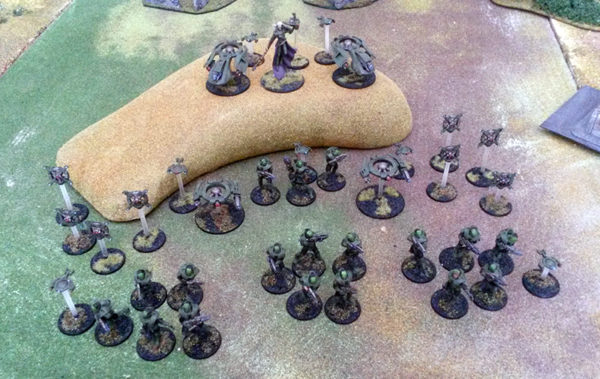
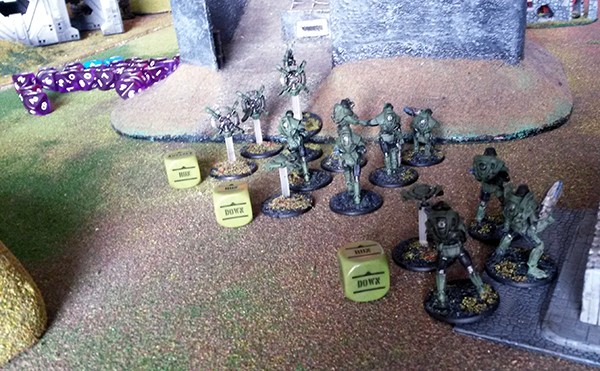
Sam: After our initial first forays into the universe of Beyond the Gates of Antares, I decided that we needed to see how large a game we could field, so utilising my entire collection of Antarean armies, I proceeded to hunt down two of our regular members at my local club – I took control of the Concord, while Jack Lashbrook played Boromites and Chris Horgan commanded the forces of the Algoryn Prosperate.
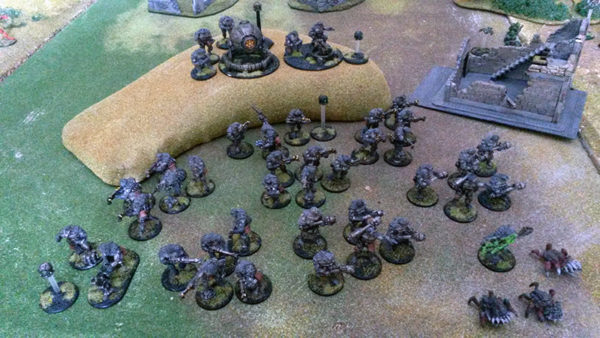
We had a healthy 11 units in each army (he ‘standard’ being about 5). This was a large battle and we decided to use some of the advanced rules. We also decided as this was going to be a massive fight to the finish that we should deploy all forces on the board, taking it in turns to set up each unit. We felt this would be appropriate as we predicted that the game would take a while to play!
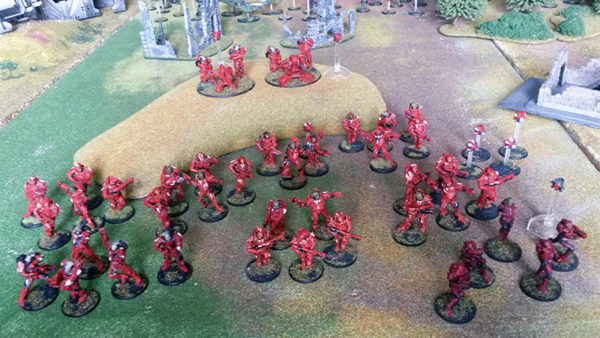
The scenario chosen was Disputed Ground, and we set up the battlefield accordingly, with a few more pieces of terrain thrown in for good measure! Each army set up within their own area, with both Jack and Chris setting up their heavier weaponry on the nearest hilltops – gaining fantastic vantage points, with myself holding the low ground. I set up my units as close to cover as possible, and prepared for the inevitable barrages of fire!
With the scenario chosen, the forces deployed, and snacks at the ready – the fight for the compound began…
Turn 1
Jack set up his Boromite Mag Light Support team very close to the Algoryn Assault squad, perhaps hoping to grab the first dice out of the bag – which promptly went to the Algoryn! The Assault squad opened up with their weapons at close range and destroyed the entire team! First blood to Chris…
My C3 strike squad moved up into cover and shot one of the nearest Boromite gang fighters dead, earning them a pin marker. Next up the Lavamites, enraged at the audacity of the Algoryn Assault squad, launched themselves into combat against them. Both sides opened up on each other before contact was made, with each side attempting to gun (or spit) down the other. The Lavamites managed to down two Algoryn, whilst the Assault squad killed the handler. With losses on each side, combat was engaged. Both sides drew the combat after killing each other in equal measure, and with a single lone survivor remaining on each side, a second round of fighting began – the result being that both sides took a Courage test, and both fled the table!
One of the Algoryn infantry squads moved up to the ruins, seeking shelter from any revenge fire. Seeing them do this, the nearest Concord Plasma light support drone opened fire on the unit, pinpointing their leader and shooting him dead. The C3 commander ordered the units surrounding him to sprint straight for the objective, hastened by the fact that both he and his men were easy targets standing in the open, with both the Boromite Heavy Frag Borer and the Algoryn Plasma Cannon taking commanding positions on each of the hills.
The Algoryn Heavy Plasma fired a salvo at the Heavy Frag Borer, hoping to take the threatening cannon down, but had no effect. The Frag Borer had better luck, immediately firing back using the Fractal Cannon, locking onto one crewman and killing him outright. The Boromite X-launcher lobbed a standard shot into the nearest C3 Strike Squad, but failed to get through the Concord’s Hyper Light Shielding.
The Boromite Gang Workers managed to take out a single Algoryn infantryman in the squad that previously lost its leader. The next Boromite squad exchanged shots with the same Algoryn unit, but neither hit their mark. The third Gang Fighter squad on the Concord left flank managed to kill one of the C3 troopers, his armour buckling under the weight of intense fire. Meanwhile the NuHu along with the two Plasma Cannons flanking it, moved into a better firing position, covering the left hand side of the main objective.
Seeing this, the Algoryn command sprinted into action, taking three infantry squads with them to better threaten the C3 now setting up defensive position within the compound objective. The Boromite Gang Workers moved to intercept the NuHu and the plasma cannons, but stayed just out of sight. The C3 light plasmas moved up into a better firing position, with one opening fire at the Algoryn light Plasma Cannon, killing one crewman
Turn 2:
The Algoryn got the first draw – firing at the Boromites taking cover in a trench, killing one unfortunate enough to look over! The Heavy Frag Borer, having previously locked onto the Algoryn Plasma Cannon opened up once more, but missed its target. The NuHu initiated its Nanodrones to form a protective cocoon around the creature, giving it added protection (+6 Res!)
The Boromites advancing towards the objective opened up on the threatening presence of the NuHu, who survived thanks to the effects of the accompanying drone. Meanwhile the C3 squad to the left of the NuHu lost one member to Boromites and the C3 light Plasma Drone managed to wipe out the Algoryn light Plasma Support on edge of the battlefield!
The Algoryn infantry in the centre of the table managed to kill one gang worker out in the open, whilst one of the C3 squads nearest the compound managed to then wipe out that unit! The Concord Targeter Probes on the left flank race across from cover and latch themselves onto the Boromite X-launcher and Gang Fighters, making them a better target for the C3 squads. The C3 squad nearest to them took advantage of this, and slaughtered the remaining fighters, earning another victory point for the Boromites.
The Boromite Overseer and his bodyguard ripped one of the Targeter Drones from the air, whilst the Gang Fighters once again attempt to kill the NuHu, to no avail. Seeing the effects of what a Targeter Probe can do to a marked squad, the Algoryn launched their own at the Concord, attaching to one of the nearby C3 Strike Squads. With one of the Plasma Cannons killing a solitary Boromite Gang Worker and the Concord establishing a further hold of the compound, the second Concord Plasma Cannon set an ambush, ready to kill anything that moved within its sights.
Turn 3
The turn began disastrously for the Concord, with the Boromites focusing fire at the NuHu – and this time, due to the Buddy Drone’s effects having worn off, and no order given, the NuHu was hit, failed all its rolls (including re-rolls) and died!
The Concord light Plasma Drone killed 2 AI infantry, with the assistance of target probes and their bonus to shooting.
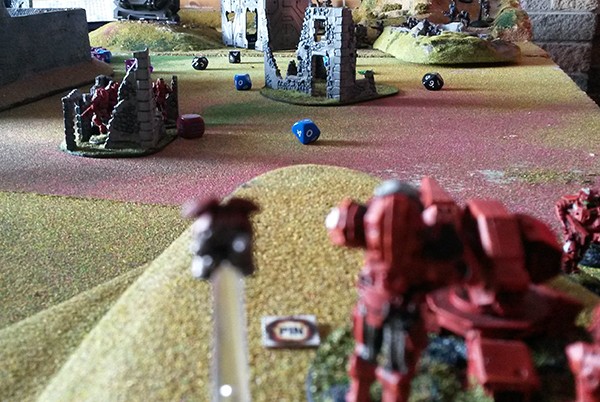
The Algoryn Infiltrator squad fired an Arc Round into the middle of three squads, the Boromite Overseer, Gang Workers and Gang Fighters, making it difficult for them to shoot, which meant they would either have to attempt to shoot through, or move around the projectile. Even the Frag Borer could not get through!
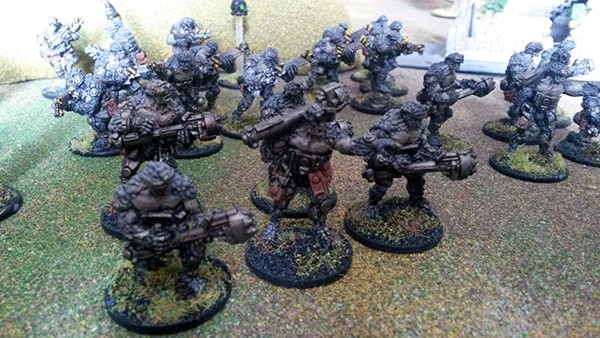
The Algoryn lost two of their own to focused Boromite fire, including the Infiltrators who lost three of their number to the encroaching Gang workers. The Algoryn X-launcher on their left flank fired an Arc round at the C3 forces gathering around the compounds perimeter, deterring anyone from shooting successfully. A vicious firefight ensued between the Boromites and Concord, each side scoring a number of kills but no unit was broken…
In part two – the epic conclusion to our game – who will take the compound? Who will have all the glory? You will have to wait and see!