Recently, we received an email from one of our customers, with a couple of rather nice conversions of some mobile gun platforms… we liked them so much that we asked the proud hobbyist if he’d like to create a quick step-by-step guide, so that others might follow in his footsteps (or should that be ‘…follow in his tank tracks’?).
So – without further ado – it’s over to Jakob Lotz, to talk us through his Zis-30 conversion!
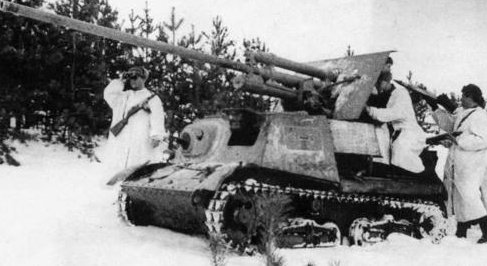
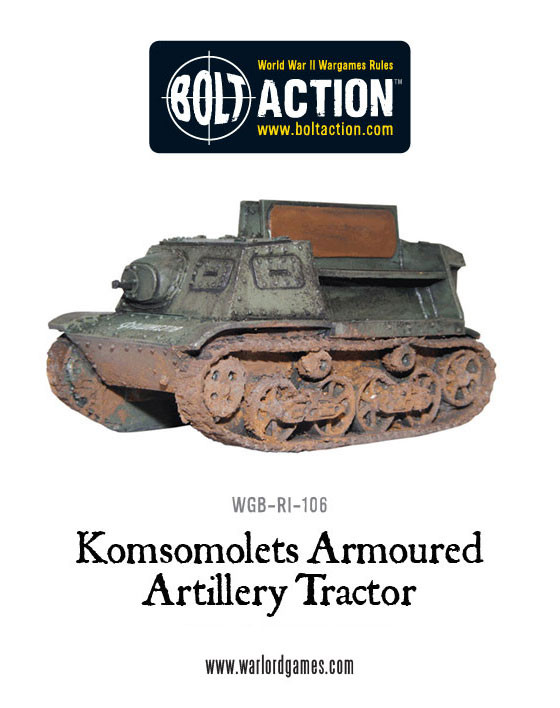
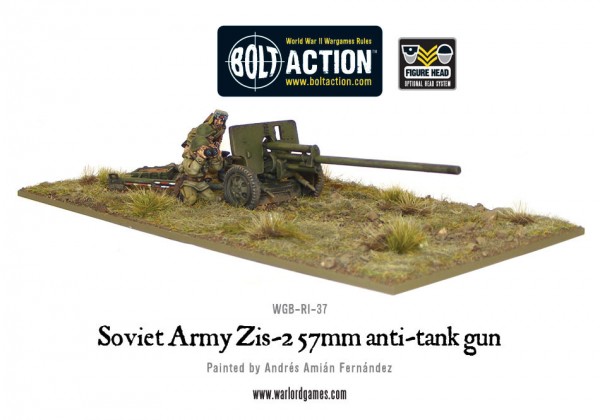
The ZiS-30 was a light self-propelled anti-tank gun based on the Komsomolets armoured artillery tractor. The ZiS-30 was one of a few hastily designed armoured fighting vehicles created by Soviet industry shortly after the German invasion of 1941. It was little more than a 57mm ZiS-2 anti-tank gun mounted onto the Komsomolets chassis. There were problems with availability of both the chassis and guns, which meant that despite its good off-road capability and the power of its main gun, only about a hundred Zis-30s were built.
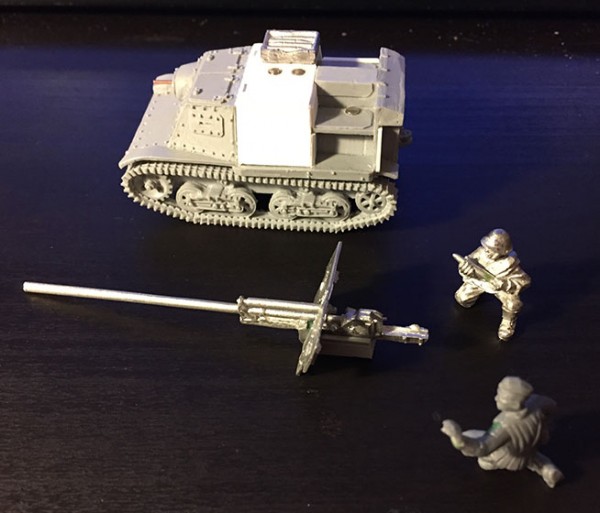
What you need
- One Soviet Komsomolets armoured artillery tractor
- One soviet ZiS-2 57mm anti-tank gun
- One kneeling soviet infantryman from the soviet infantry plastic kit
- Plasticard
- Green stuff
- Piercing saw, craft knife, wire cutters, drills, glue etc
How to put it all together
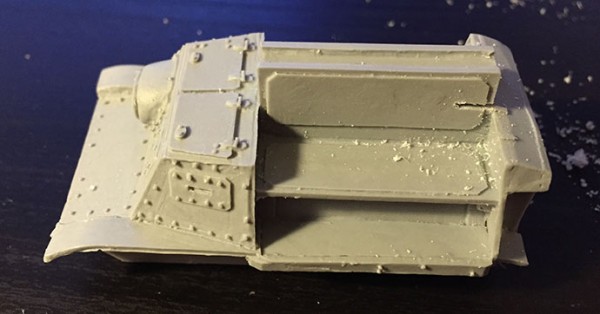
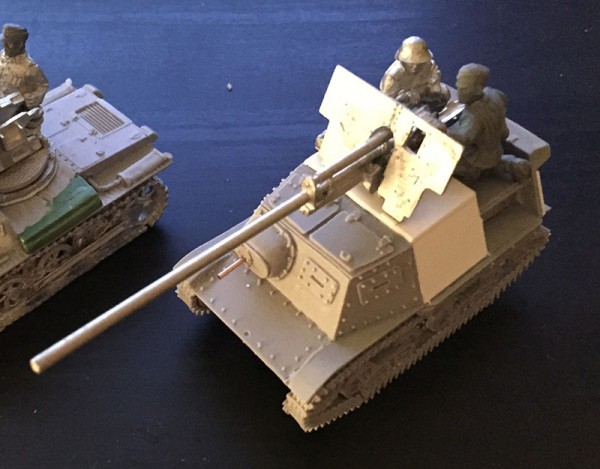
First of all remember to clean all the resin parts in some warm water and soap. Then take your hobby saw or similar tool and cut away the top-part of the benches as shown below. Be careful, and try to cut as level as possible. You will need the upper part being cut off for later so the use of a saw is really recommended.
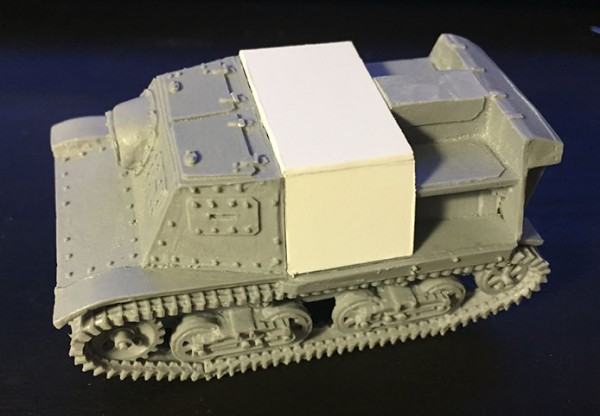
Next make a 1mm deep indentation in the forward half of what is left of the bench back rest and add 1 mm thick plasticard as shown below. You might have to cut away an ”indentation” in the seats as well in order to get a good fit for the plasticard ”side panels”. Finally add some plasticard to close-off the open parts facing backwards, and fully enclose the area.
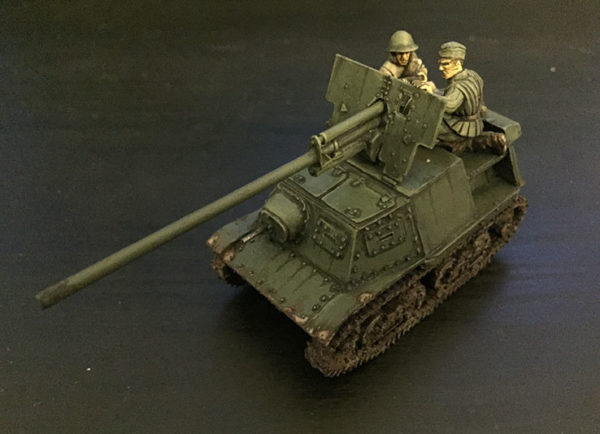
Next – take the piece that was left after you cut off the bench’s back rest and cut it in half – and mount the ZiS 2 gun onto it – as it turns out the gun fits perfectly into the upper part of the back rest. Then add on the gun shield, using some green stuff if needed. I also drilled 3mm holes into the bottom of newly made ”gun mount” and in the corresponding place in the chassis in order to fit a couple of magnets so that the gun is removable for transport and such.
The kneeling crewman holding the shell from the ZiS 2 kit fitted perfectly – I then made an extra crewman from the Soviet plastic infantry kit. I had to reposition his hand and fill out the resulting gaps with green stuff, but there really is no wrong way to model this extra crew man, simply go with whatever looks good.
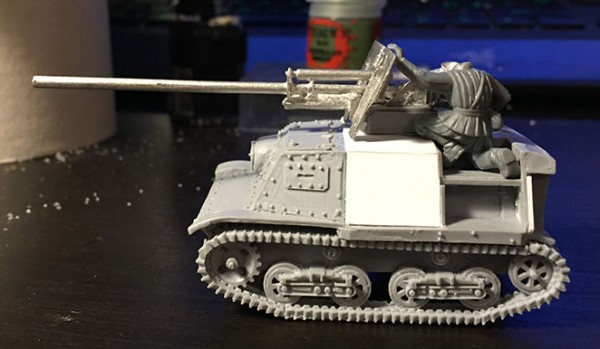
I also added the ammo box from the ZiS 2 kit as an extra detail – don’t forget to add the hull-mounted Machine Gun to tackle any German infantrymen!
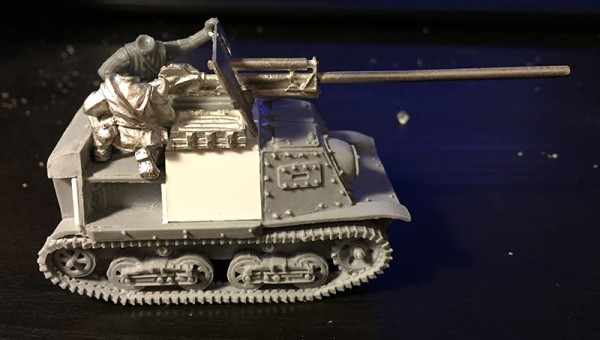
I also magnetised the crew for good measure!
The completed model ready to be painted
The model was then base coated black and then with Army green (Army Painter primer).
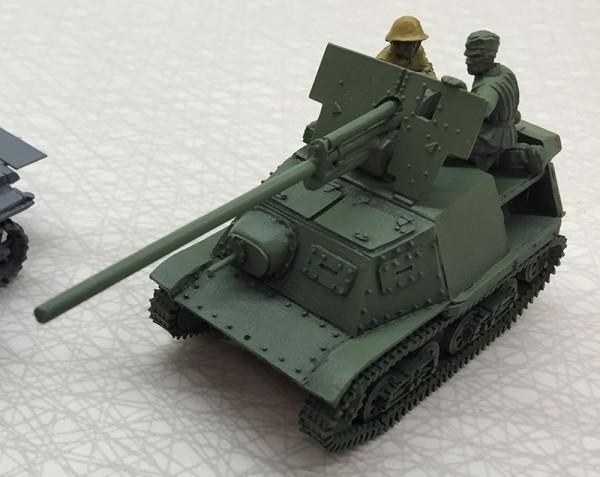
I drybrushed, highlighted, washed and added mud and finally I had a ZiS-30 ready to knock out those pesky German Panzers!
How to use it
Rules for the ZiS-30 can be found on the pages 49 and 50 in the Armies of the Soviet Union book – armed with a Medium Anti-tank Gun, and with a Damage Value of 7+. It makes for a potent anti-tank platform… particularly given its small size – it’s able to sneak through the rubble of those shattered Eastern Front ruined cities, getting into places that larger vehicles can’t – then it’s simply a matter of point and shoot!