With the 72nd anniversary of the D-Day landings rolling around this year Andy Singleton of Volleyfire Painting decided to do something to raise some money for charity:
![]()
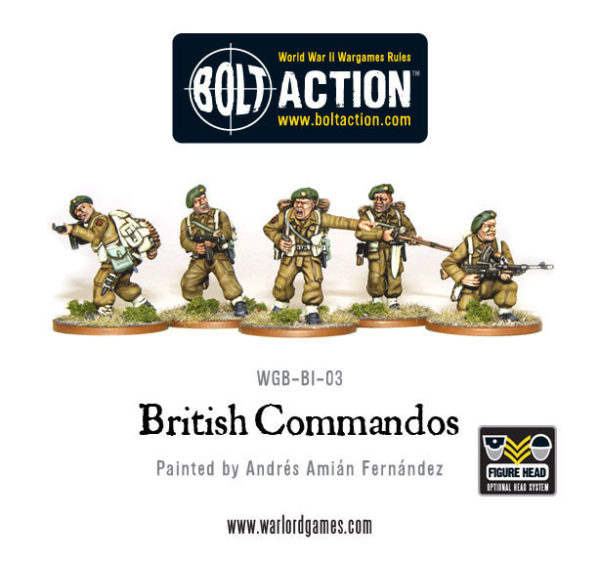
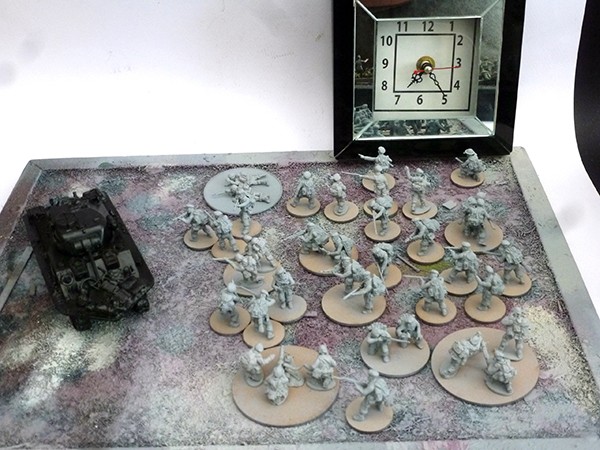
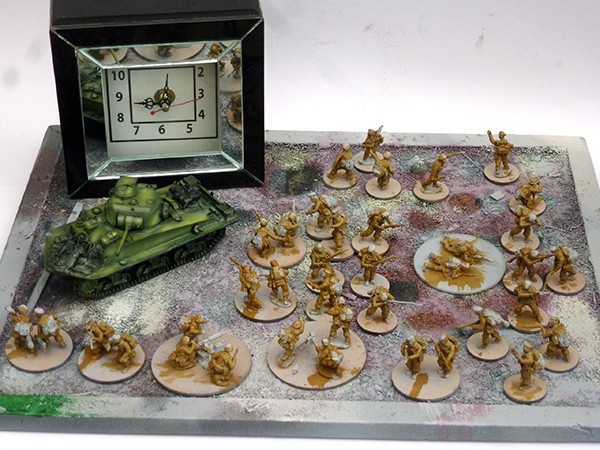
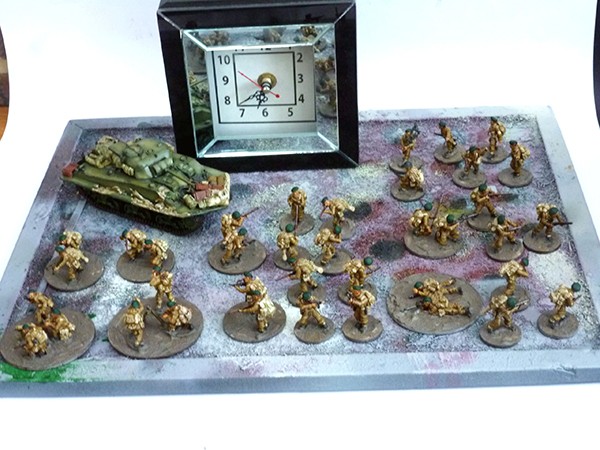
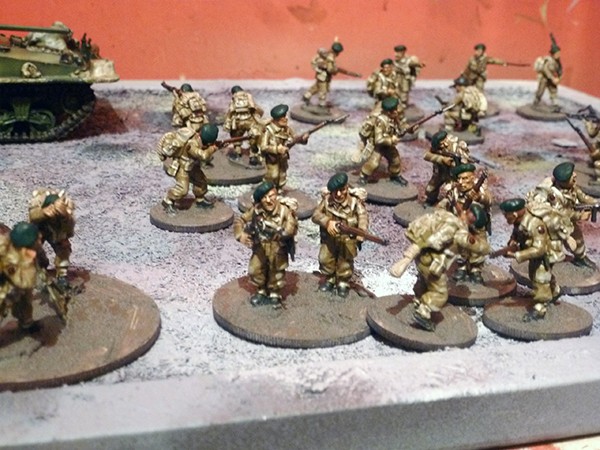
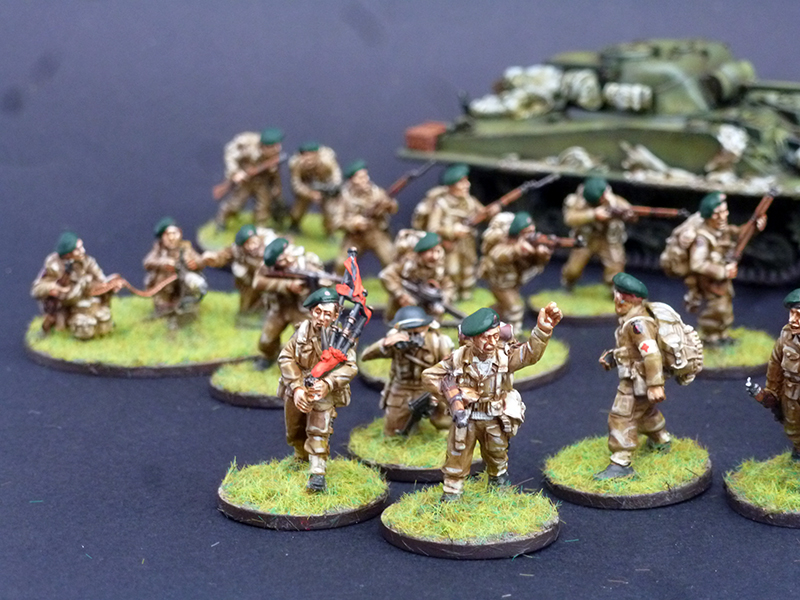
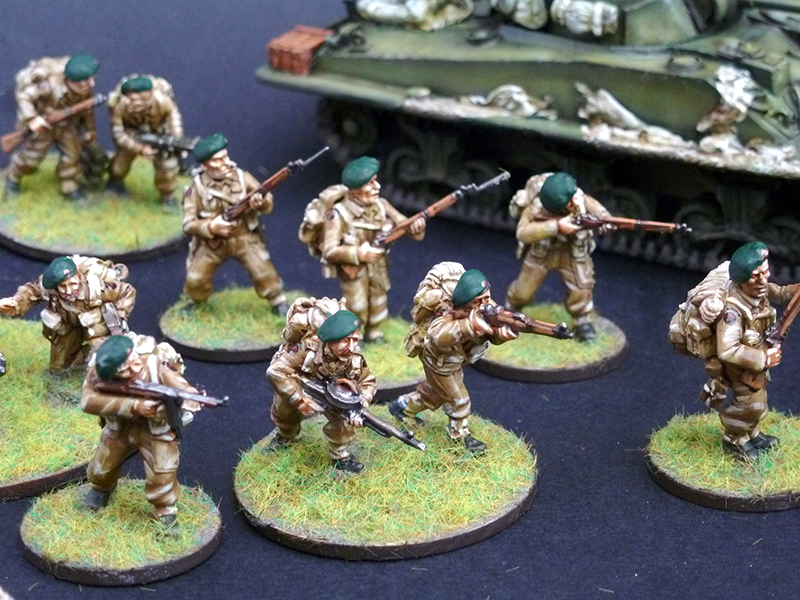
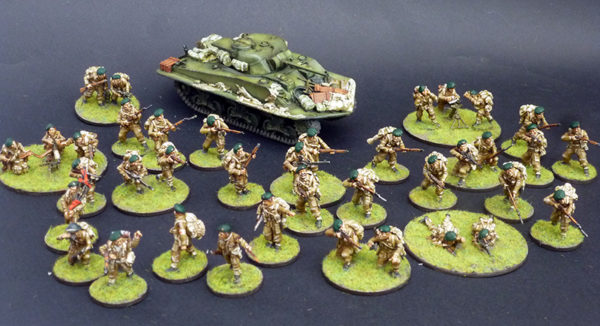
Andy: Once I had decided to raise money for the Royal Marines charity it was just a question of how, after a bit of pondering the simple answer absailed into view, I would ask anyone and everyone that I could to sponsor me to paint Warlord Games marvellous Royal Marines Commando range, a total of 38 figures, over the course of the 6th of June.
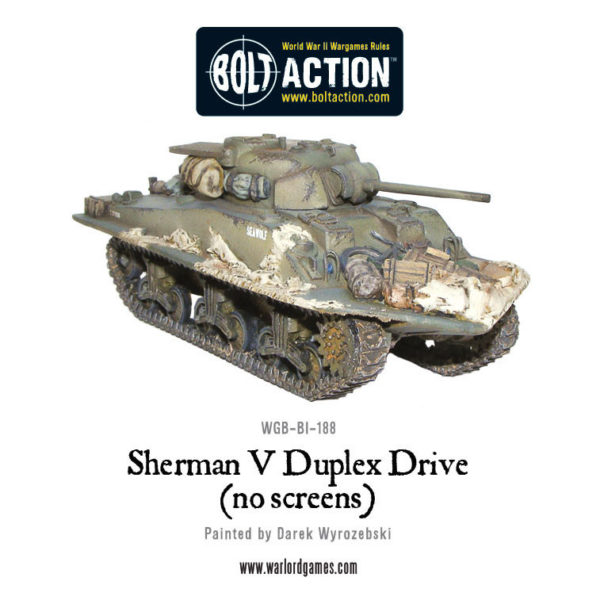
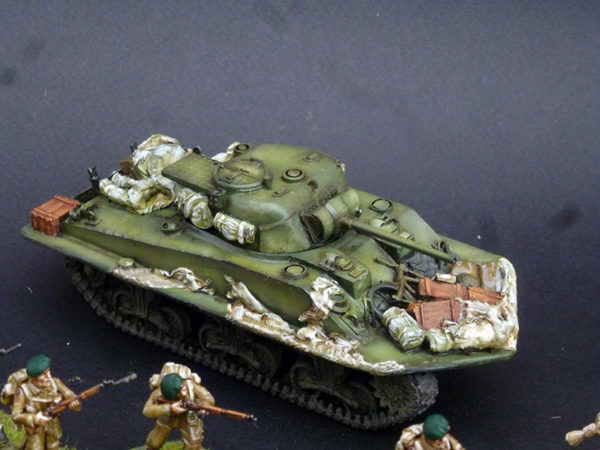
To make this more of a challenge I added a DD Sherman to the pile too. After a chat with my friends at Warlord, a box had arrived at my door, with an intimidating amount of models inside…
Due to technical constraints in getting primer to dry, all the models were prepped and prepared on the 5th of June, and then left ready for H-Hour. Read on to see the techniques and colours I used to get this task completed:
D-Day
07:30
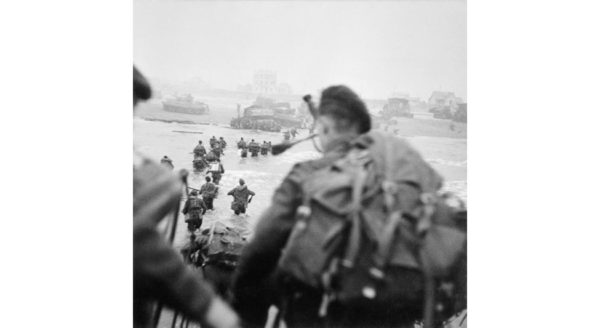
At 07:30 on the 6th of June 1944, 45 Commando Royal Marine began landing at Sword Beach in Normandy, with their objectives being to neutralise German strongpoints, before moving on to reinforce the Paratroopers who had landed in the night at Pegasus Bridge.
Coinciding the painting session to start at around the time of the first Commando’s hitting the beach, I began by painting all the figures with Vallejo English Uniform, without worrying too much about being neat, the goal being to give a fairly smooth, even colour.
Whilst the uniforms were drying, I set about airbrushing the tank. I had primed this black to act as a natural shade, and then gave the beast an all over coat of Vallejo reflective green, before spraying Russian Uniform over most of the armour panels, leaving some of the reflective green visible at the edges and lower parts. On top of this I sprayed Vallejo middlestone around the high points, and edges again of the tank, before mixing some Vallejo Pale sand in to the middlestone, and focusing this on the very sharpest edges and highest points. I then gloss varnished the tank and put it to one side to dry.
09:00
With the tank having most of its paint applied now, I turned my attention to the webbing. Simply painting it with Vallejo Middlestone (I use a LOT of this…). After the webbing had been painting I then painted a layer of highlights onto the uniform using the middlestone again. Once all the figures had received their first layer of highlights, I then mixed some Vallejo Deck tan into the middlestone, at a ratio of about 2 parts middlestone, to one part deck tan, this was then painted along the higher parts of the highlights. Finally, I mixed even more deck tan into the middlestone, and applied this to the very edges and higher points of the figures.
Finally, I blocked colours into the tanks stowage, using middlestone for the tarps and canvas pieces, and Vallejo Mahogany brown for the wood work.
11:30
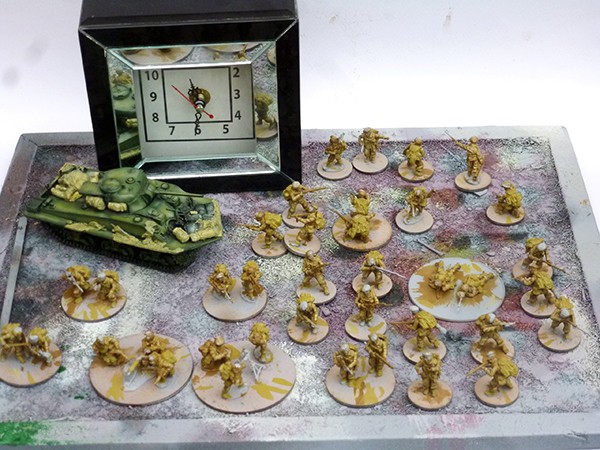
With a substantial amount of work now completed on the uniforms, I turned my attention to highlighting the webbing. This proved to be a fairly time consuming process, and ate quite a bit of time. The process was the same as with the highlights on the uniforms, except I used Vallejo Pale Sand rather than Deck tan as the highlighting colour.
13:20
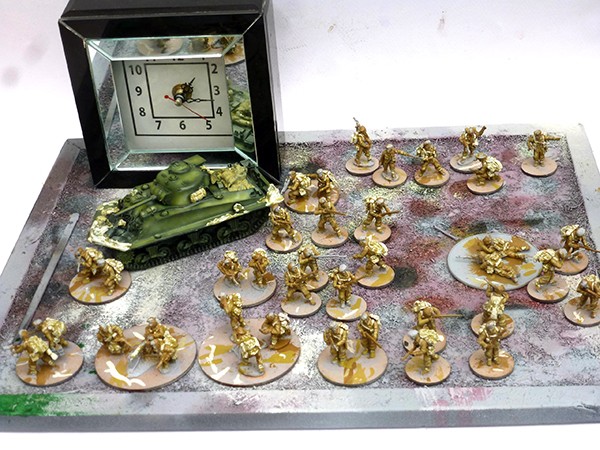
With the webbing painted, I started working on the flesh tones, I used a base of Vallejo Dark Flesh, painting this all over the areas of skin tone. Over this I then painted Vallejo sunny skin tone onto all the raised areas of the flesh. As a final highlight a layer of basic skintone was applied, painting this on the nose, upper cheeks, chin and forehead.
After the flesh areas were blocked in, all the wood work on the weapons was painted Vallejo mahogany, as were the entrenching tools and mugs hanging off the models webbing. For the metal areas I used Vallejo Gun metal, and then put some Orange brown onto the highlight areas of the woodwork.
14:45

With the previous hours blistering pace leaving me at a confident point, I had a quick bite to eat before carrying on painting the boots, bayonet scabbards and berets with Vallejo black grey.
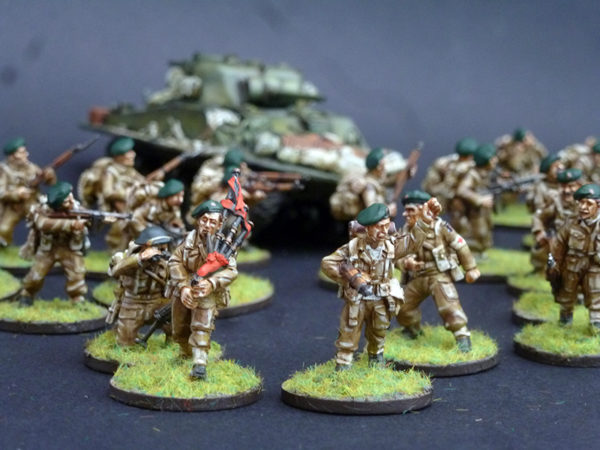
The Royal Marine Commando’s famous and very distinctive green beret was a critical point to get right, as I knew I’d never live it down if I got the tone wrong. To get the correct colour I painted Vallejo Game Colour sick green over the entire beret, leaving a narrow black grey bad around the base between the head and shaped part of the head gear.
To get the colour to really pop, I then used a coat of Vallejo game colour green ink, which sent the green to the sweet spot. I didn’t add any further highlights, as I didn’t want to alter the shade that the ink had created.
16:25
With the figures starting to come to life, it was time to start detailing them. First stage of this was to use Army Painter soft tone ink over boots, webbing and uniform, this provides a subtle shading effect, without altering the rest of the colours too much.
For the weapons, a coat of Army Painter Dark Tone ink was applied to both the woodwork and the metal parts, and a coat of Army Painter Flesh Ink was used on the flesh areas. At the moment I think this can only be obtained in the Army Painter ink sets, but is well worth giving a go in my opinion. I also used the soft tone ink over the Shermans stowage. The tracks of the Sherman were also painted at this stage, using Vallejo German camo black brown.
18:40
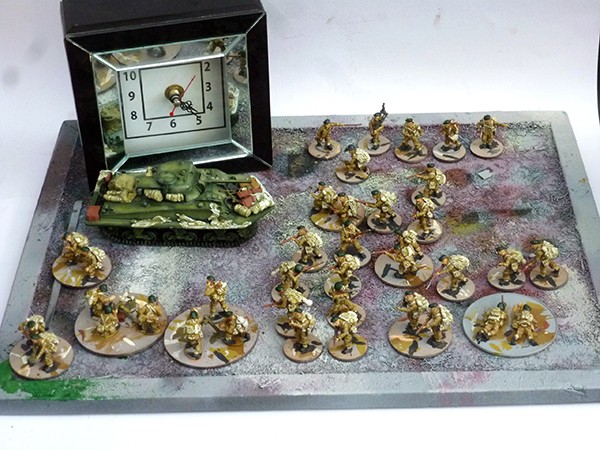
With the figures now shaded, it was time to start getting some initial basing work done. I use Vallejo Texture paints. This stuff is a fairly thick paste, in a variety of colours. With my Commando’s I used the Dark Earth set. I had toyed with the idea of doing beach bases, however the techniques I use for sand were too time consuming for this project sadly.
I also began the finishing process on the Sherman, by applying a brown enamel filter from Mig productions.
20:15
After a frenetic 95 minutes I had applied the Commando flash transfers to all the figures, being sure to take note of the arm the decal was intended for. Once the transfers were on, I applied a final highlight to the uniforms with Vallejo Deck Tan, applying this only to the highest points of uniform folds and creases.
21:50
Another frenzied period of painting. This time I’ve painted some Vallejo pale sand onto the edges of the webbing and packs, as well as picking out the ropes in pale sand as well. Skin tones have also been highlighted Vallejo basic skin tone. Finally, I have also painted MIG dark brown wash for green into the recesses and details.
23:35

One of the most time consuming parts of any figure is the basing, and these were to be no exception. I used Warlord’s newish Summer Grass static grass, going for a simple grassy finish for now. To crown the Commandos, I mixed some Vallejo bronze and German camo black brown to give me a very dark bronze colour, and painted each figures cap badge. With this final task, the figures were finished, and it was time for tea and sandwiches.
After a pretty much solid 16 hours of constant painting, the entire force was done. They may not be my finest painting, but they have a lot of love in them.
I’d like to express my deepest thanks to everyone who has supported in this project, it means so much and helps to support an incredible cause. So far we have managed to raise over £560, and you can read the project long from the day at the just giving page https://www.justgiving.com/fundraising/Andy-Singleton2, and you can learn more about the Royal Marines charity at their website https://theroyalmarinescharity.org.uk/
Finally I’d like to extend a special thanks to the crew at Warlord Games, you guys are superstars!
Do you have special event planned? Are you itching to show your collection to the world of Bolt Action? Then drop us a line with a couple of pictures to info@warlordgames.com or share with all over at the Warlord Forum
The table below shows the paints I used in the project for the figures, and these can be used for any British forces in Battledress, not just Royal Marines.
| Area | Paint used | |
| Uniform | Base | Vallejo 921 English uniform |
| Mid | Vallejo 882 Middlestone | |
| Highlight | Vallejo 882 Middlestone + 986 Deck Tan | |
| Ink | Army Painter Soft Tone | |
| Highlight | 986 Deck tan |
| Webbing | Base | Vallejo 882 Middlestone |
| Mid | Vallejo 837 Pale Sand (Also known as Sand light) + Vallejo 882 Middlestone | |
| Highlight | Vallejo 837 Pale Sand (Also known as Sand light) | |
| Ink | Army Painter Soft Tone | |
| Highlight | Vallejo 837 Pale Sand (Also known as Sand light) |
| Skin | Base | Vallejo 927 Dark Flesh |
| Mid | Vallejo 845 Sunny Skin tone | |
| Highlight | Vallejo 815 Basic Skin Tone | |
| Ink | Army Painter flesh wash | |
| Highlight | Vallejo 815 Basic Skin Tone |
| Berets | Base | Vallejo Game Colour 029 Sick Green |
| Ink | Vallejo Game Ink 089 Green | |
| Badge | Vallejo 998 Bronze +Vallejo 882 Black Brown |
Vallejo 981 Orange Brown
| Weapons | Base | Vallejo 846 Mahogany |
| Mid | Vallejo 981 Orange Brown | |
| Metalwork | Vallejo 863 gunmetal | |
| Ink | Army Painter Dark tone | |
| Highlight |