Chief Paint Miner at Volley Fire Painting Services, Andy Singleton is becoming something of a regular here on the Warlord Games website – with a huge range of articles sharing tips, tricks, and step-by-step guides on how to have your models tabletop-ready in next to no time!
Lately, he’s been pouring over our most recent Bolt Action theatre book, ‘Duel in the Sun’ – and making plans to bring some of his Panzer IVs into the Desert setting…
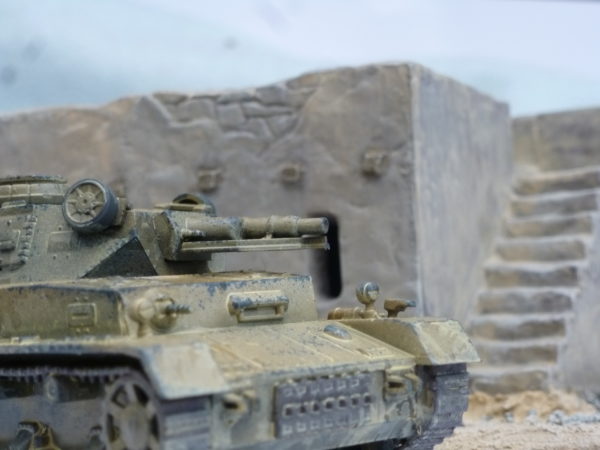
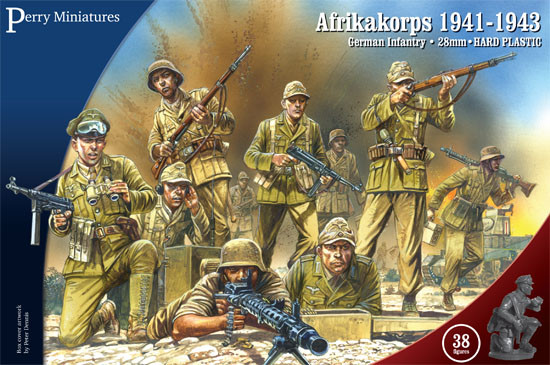
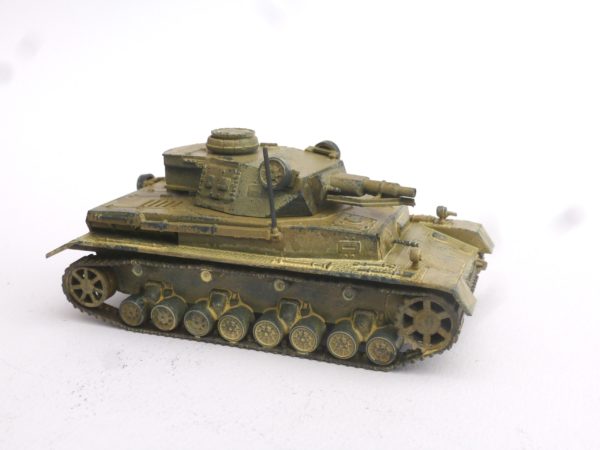
Andy: There is something very distinctive and charismatic about military vehicles that served in the desert, and of these, the vehicles of the Deutsches Afrika Korp are amongst the very most popular. Painting a single tank can be a rewarding distraction from painting an infantry force, however painting an armoured platoon can be daunting. Today, I’m going to show a way to get a DAK vehicle painted in no time.
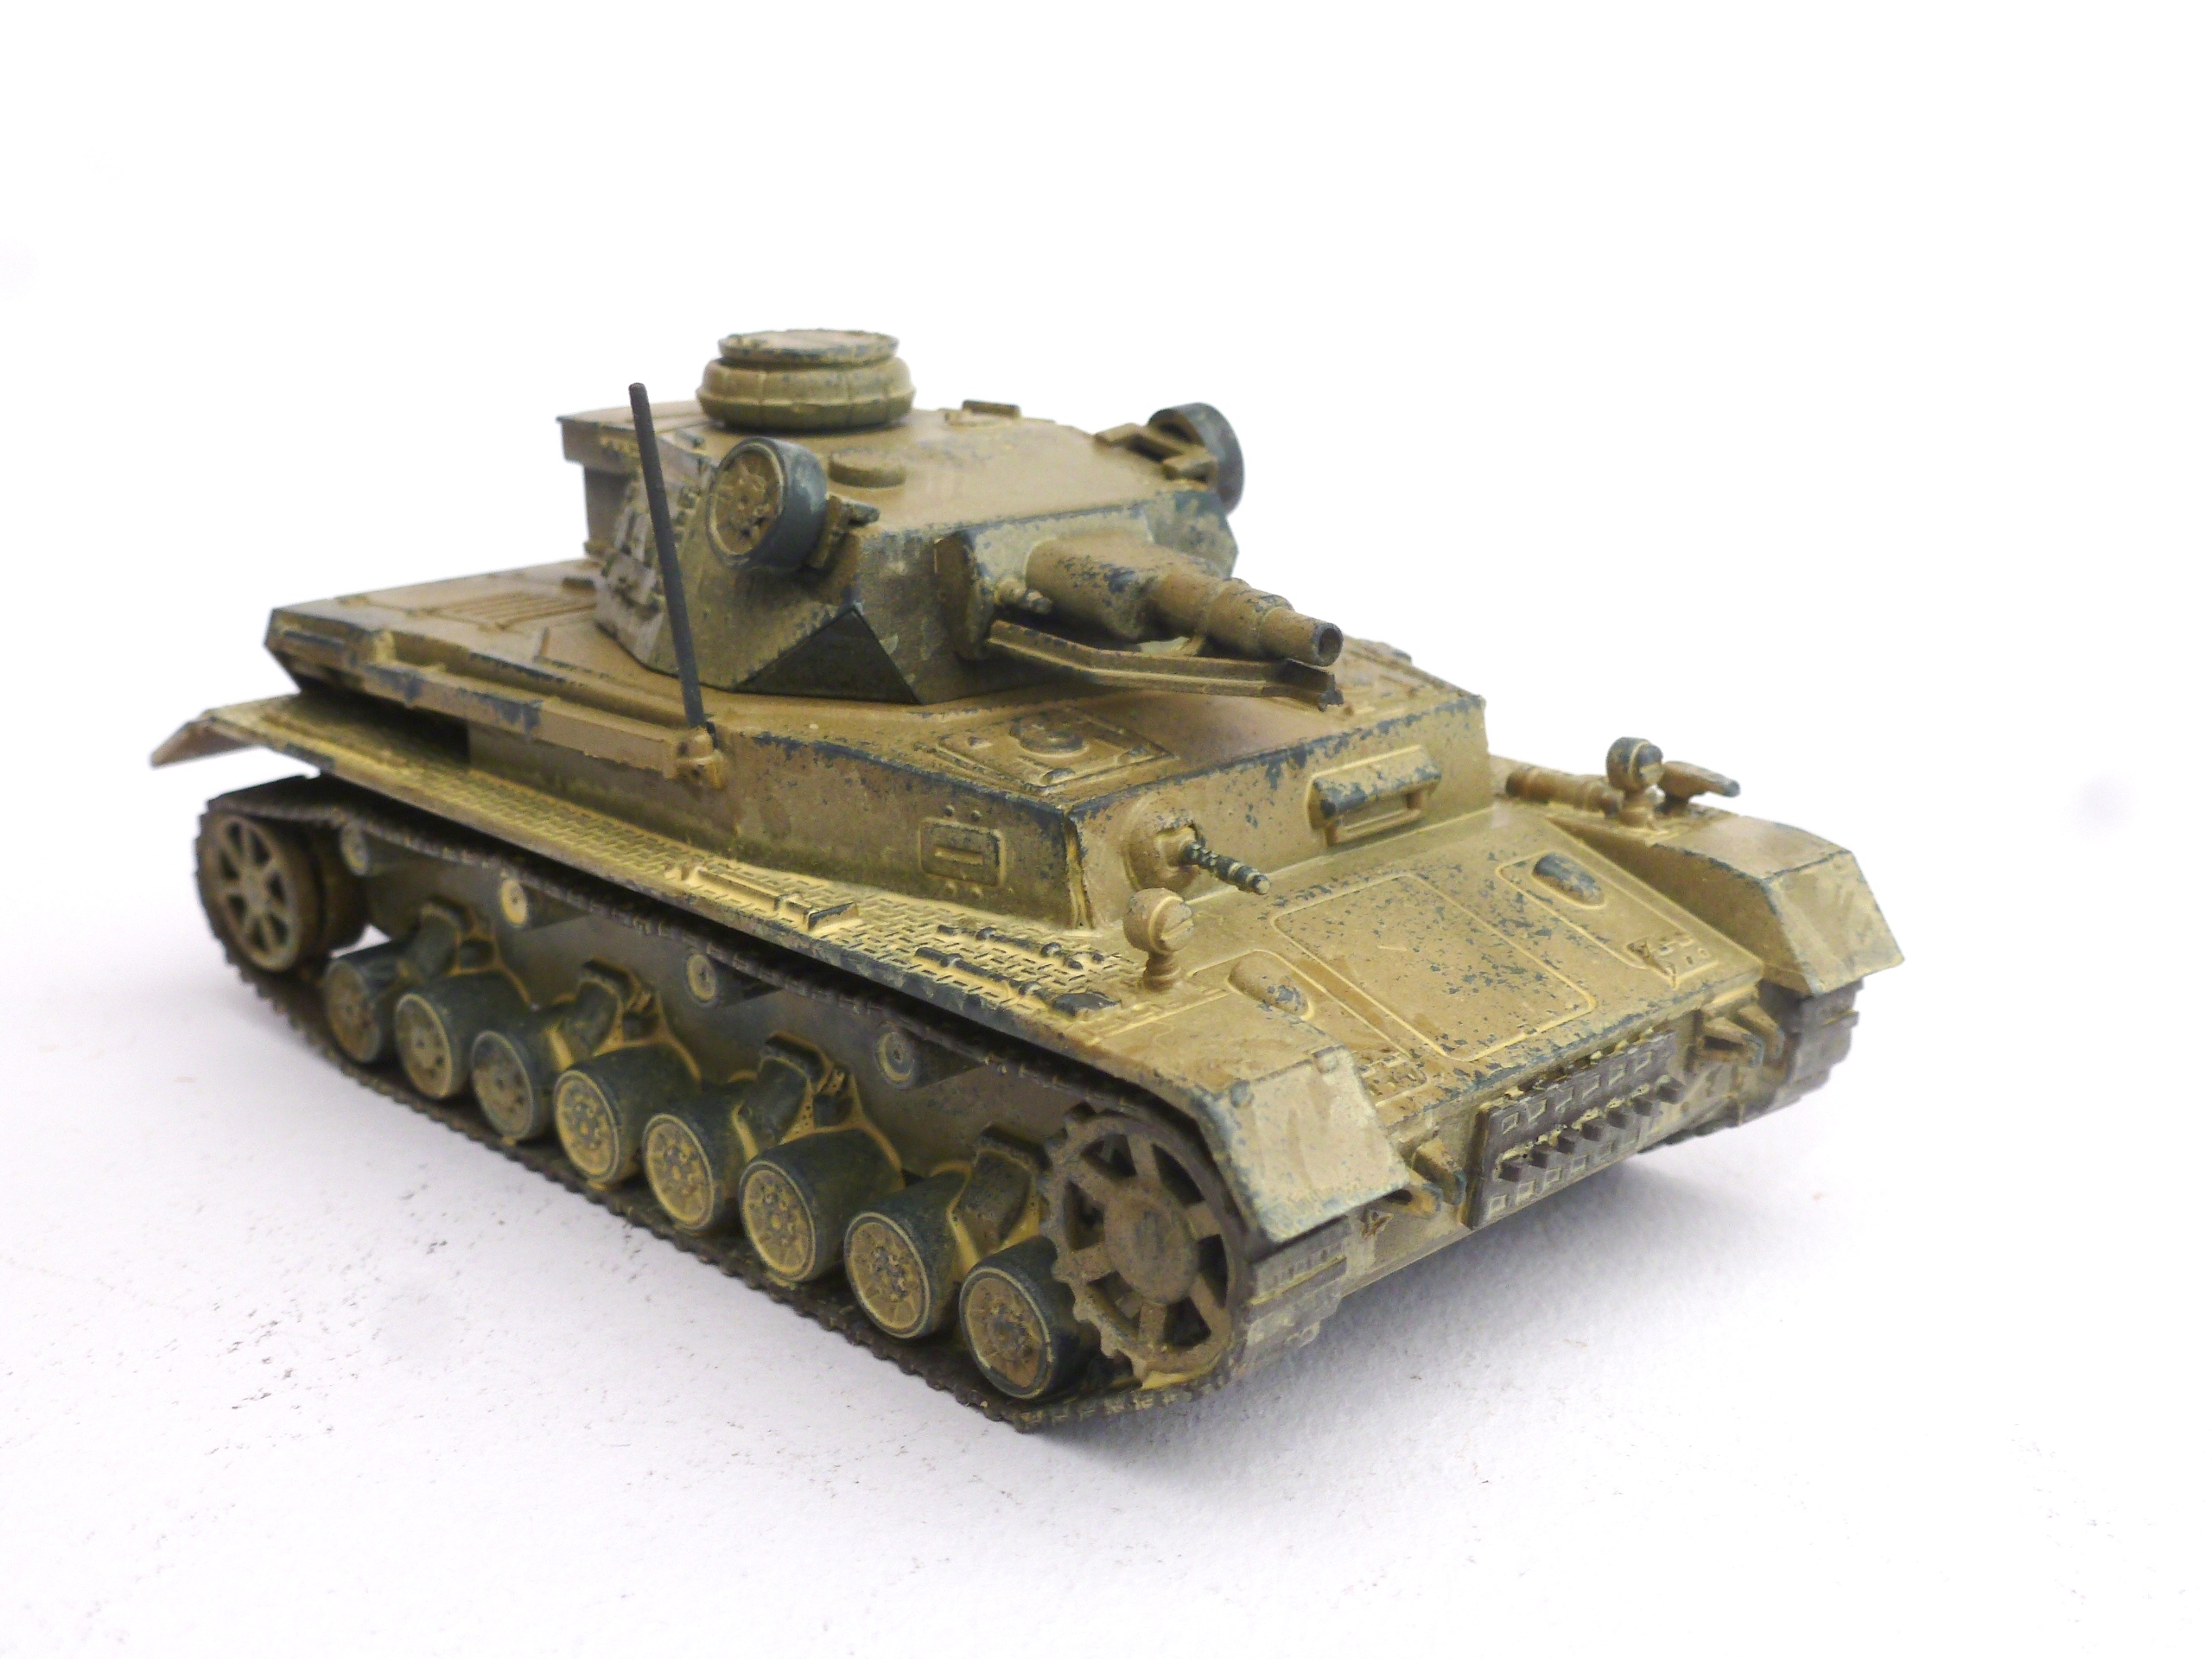
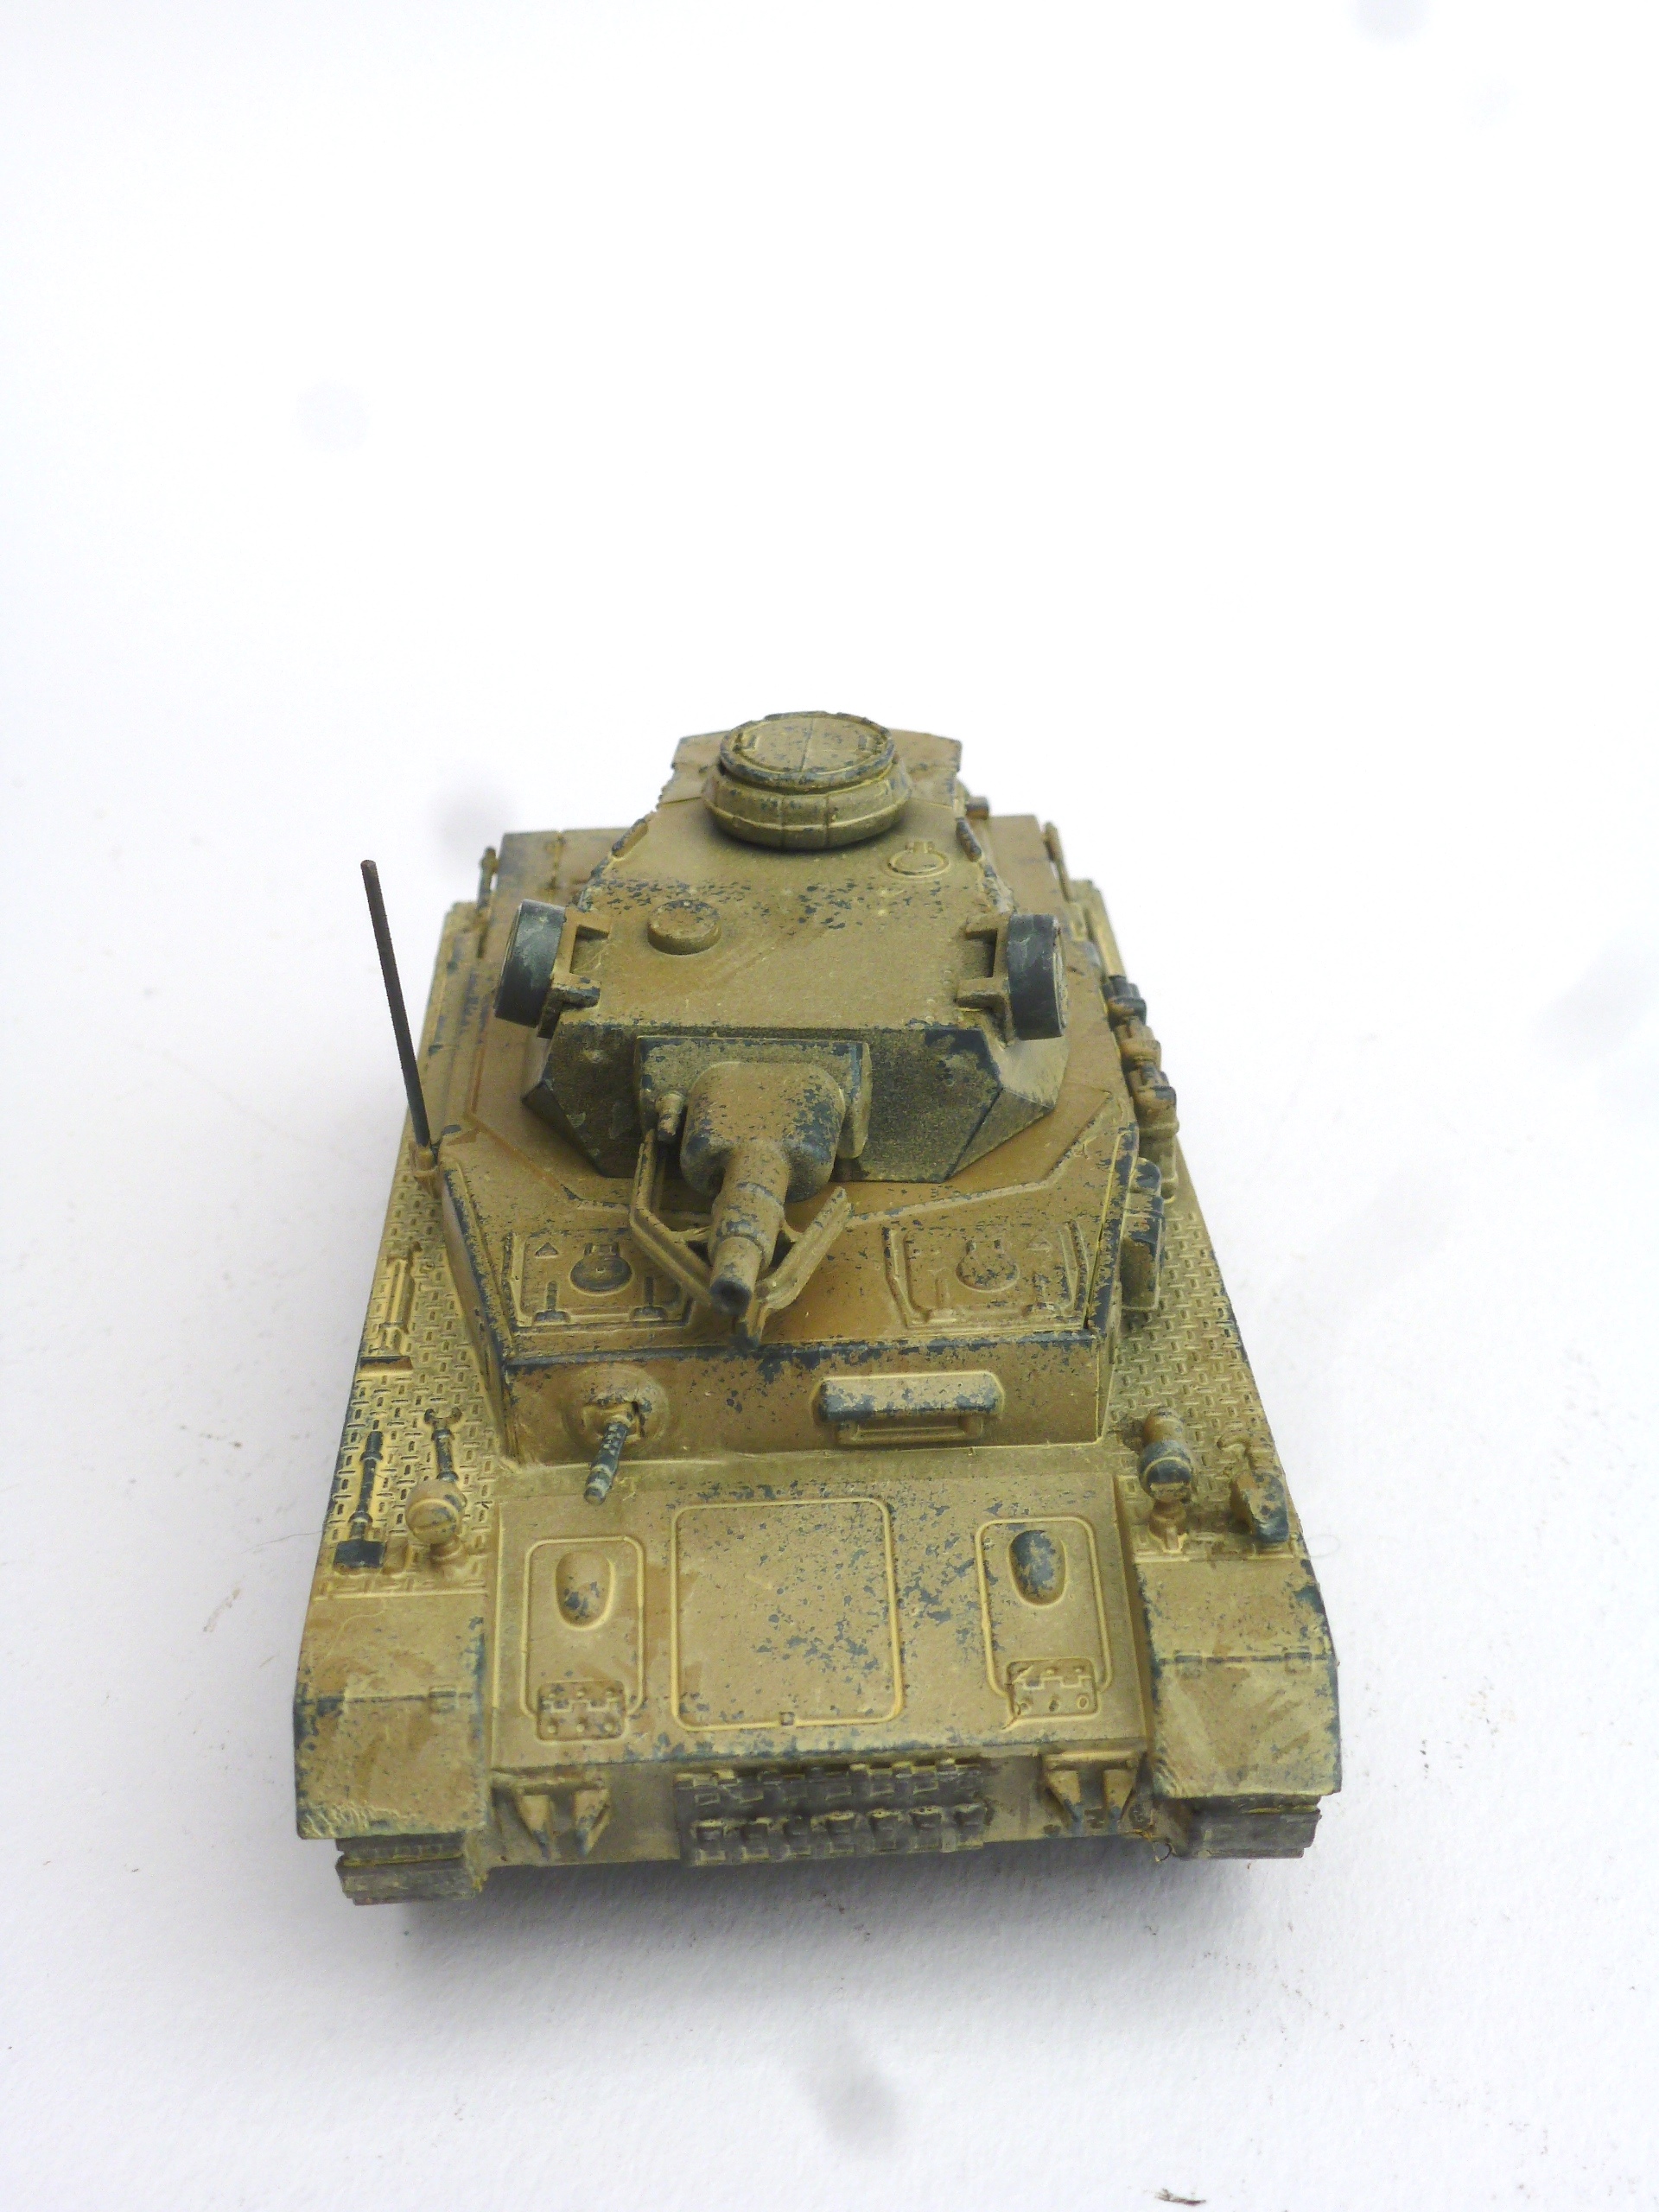
The Afrika Korp arrived in Africa in 1941, and their vehicles retained the very dark grey finish seen in Europe. This was hastily covered with dust, and mud before being given a proper paint of a dark yellow sand coloured paint. Due to the harsh environment of the desert, this sand coloured paint often chipped and faded, leaving a very unique appearance to the machines used by the Afrika Korp.
When painting any military vehicle, but especially one serving in the desert it’s important not to get too hung up on the ‘right’ colour, as between the effects of sun fading, dust, and general wear and tear, no two parts of a vehicle would necessarily be the same colour, let alone a platoon or company of them.
Step 1 – Build, then prime your model black.
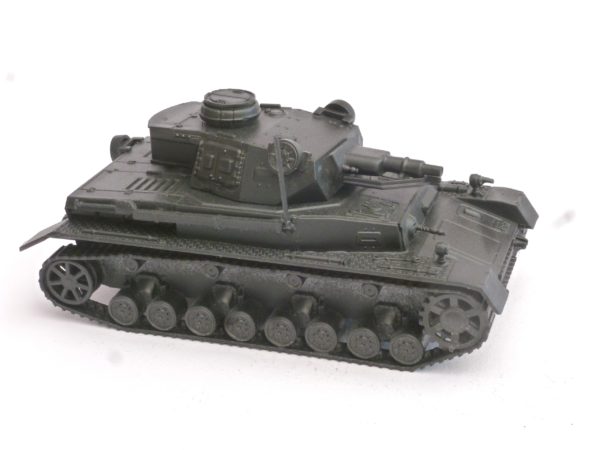 I like to build my models with all the stowage added prior to painting, as I find this aids the bond of the parts and stops things coming loose later on, although in this case I’ve gone fairly light on stowage. The Black primer serves to act as a simple shadow stage, though you could you use a dark grey spray if you wanted too as well. With a resin model though you will need to put a priming layer on anyway, so to speed things up just I’d just go straight for the black primer.
Worktime: 45 seconds-1 minute
Drying time: 2-3 hours minimum
Step 2 – Spray your model a sand colour

Hold the spray can about 30cm’s from the model, at about a 45 degree angle, and lightly dust the paint on, it may take several passes, but you’re trying to still have some of the black showing through in the recesses and deeper areas of detail, and don’t want to swamp the model. I’ve used an unbranded Dunkelgelb from a re-enacting supplier, however the Army Painter Desert Yellow primer spray would be my go to choice of the easily available spray cans.
I’d recommend adding the transfers at this stage as well
Worktime: 1-2 minutes
Drying time: 2-3 hours minimum
Step 3 – Chipping
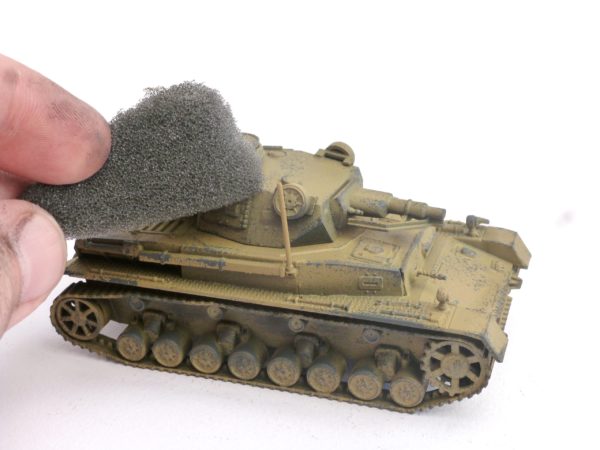
Using the foam from a blister pack, dip the foam in some dark grey paint, my preference is Vallejo Black Grey, but really anything dark and grey will work fine. Dab the foam over the edges of the model and around any hatches. The more you add the more battered and worn your vehicle will appear.
Worktime: 1 minute (at most)
Drying time: 30 minutes-(1 hour to be sure)
Step 4 – Paint the details
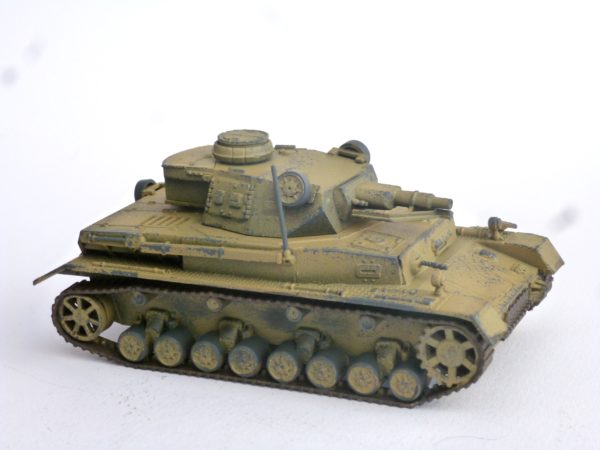
I’ve picked out the tracks in a dark brown, using Vallejo German camo black brown, and the tyres with Vallejo black Grey, along with the machine gun barrels. At this stage you could pick out the tools as well, however I decided not too as they were often painted over with the sand paint anyway.
Worktime: 2-3 minutes
Drying time: 30 minutes-(1 hour to be sure)
Step 5 – Dust wash
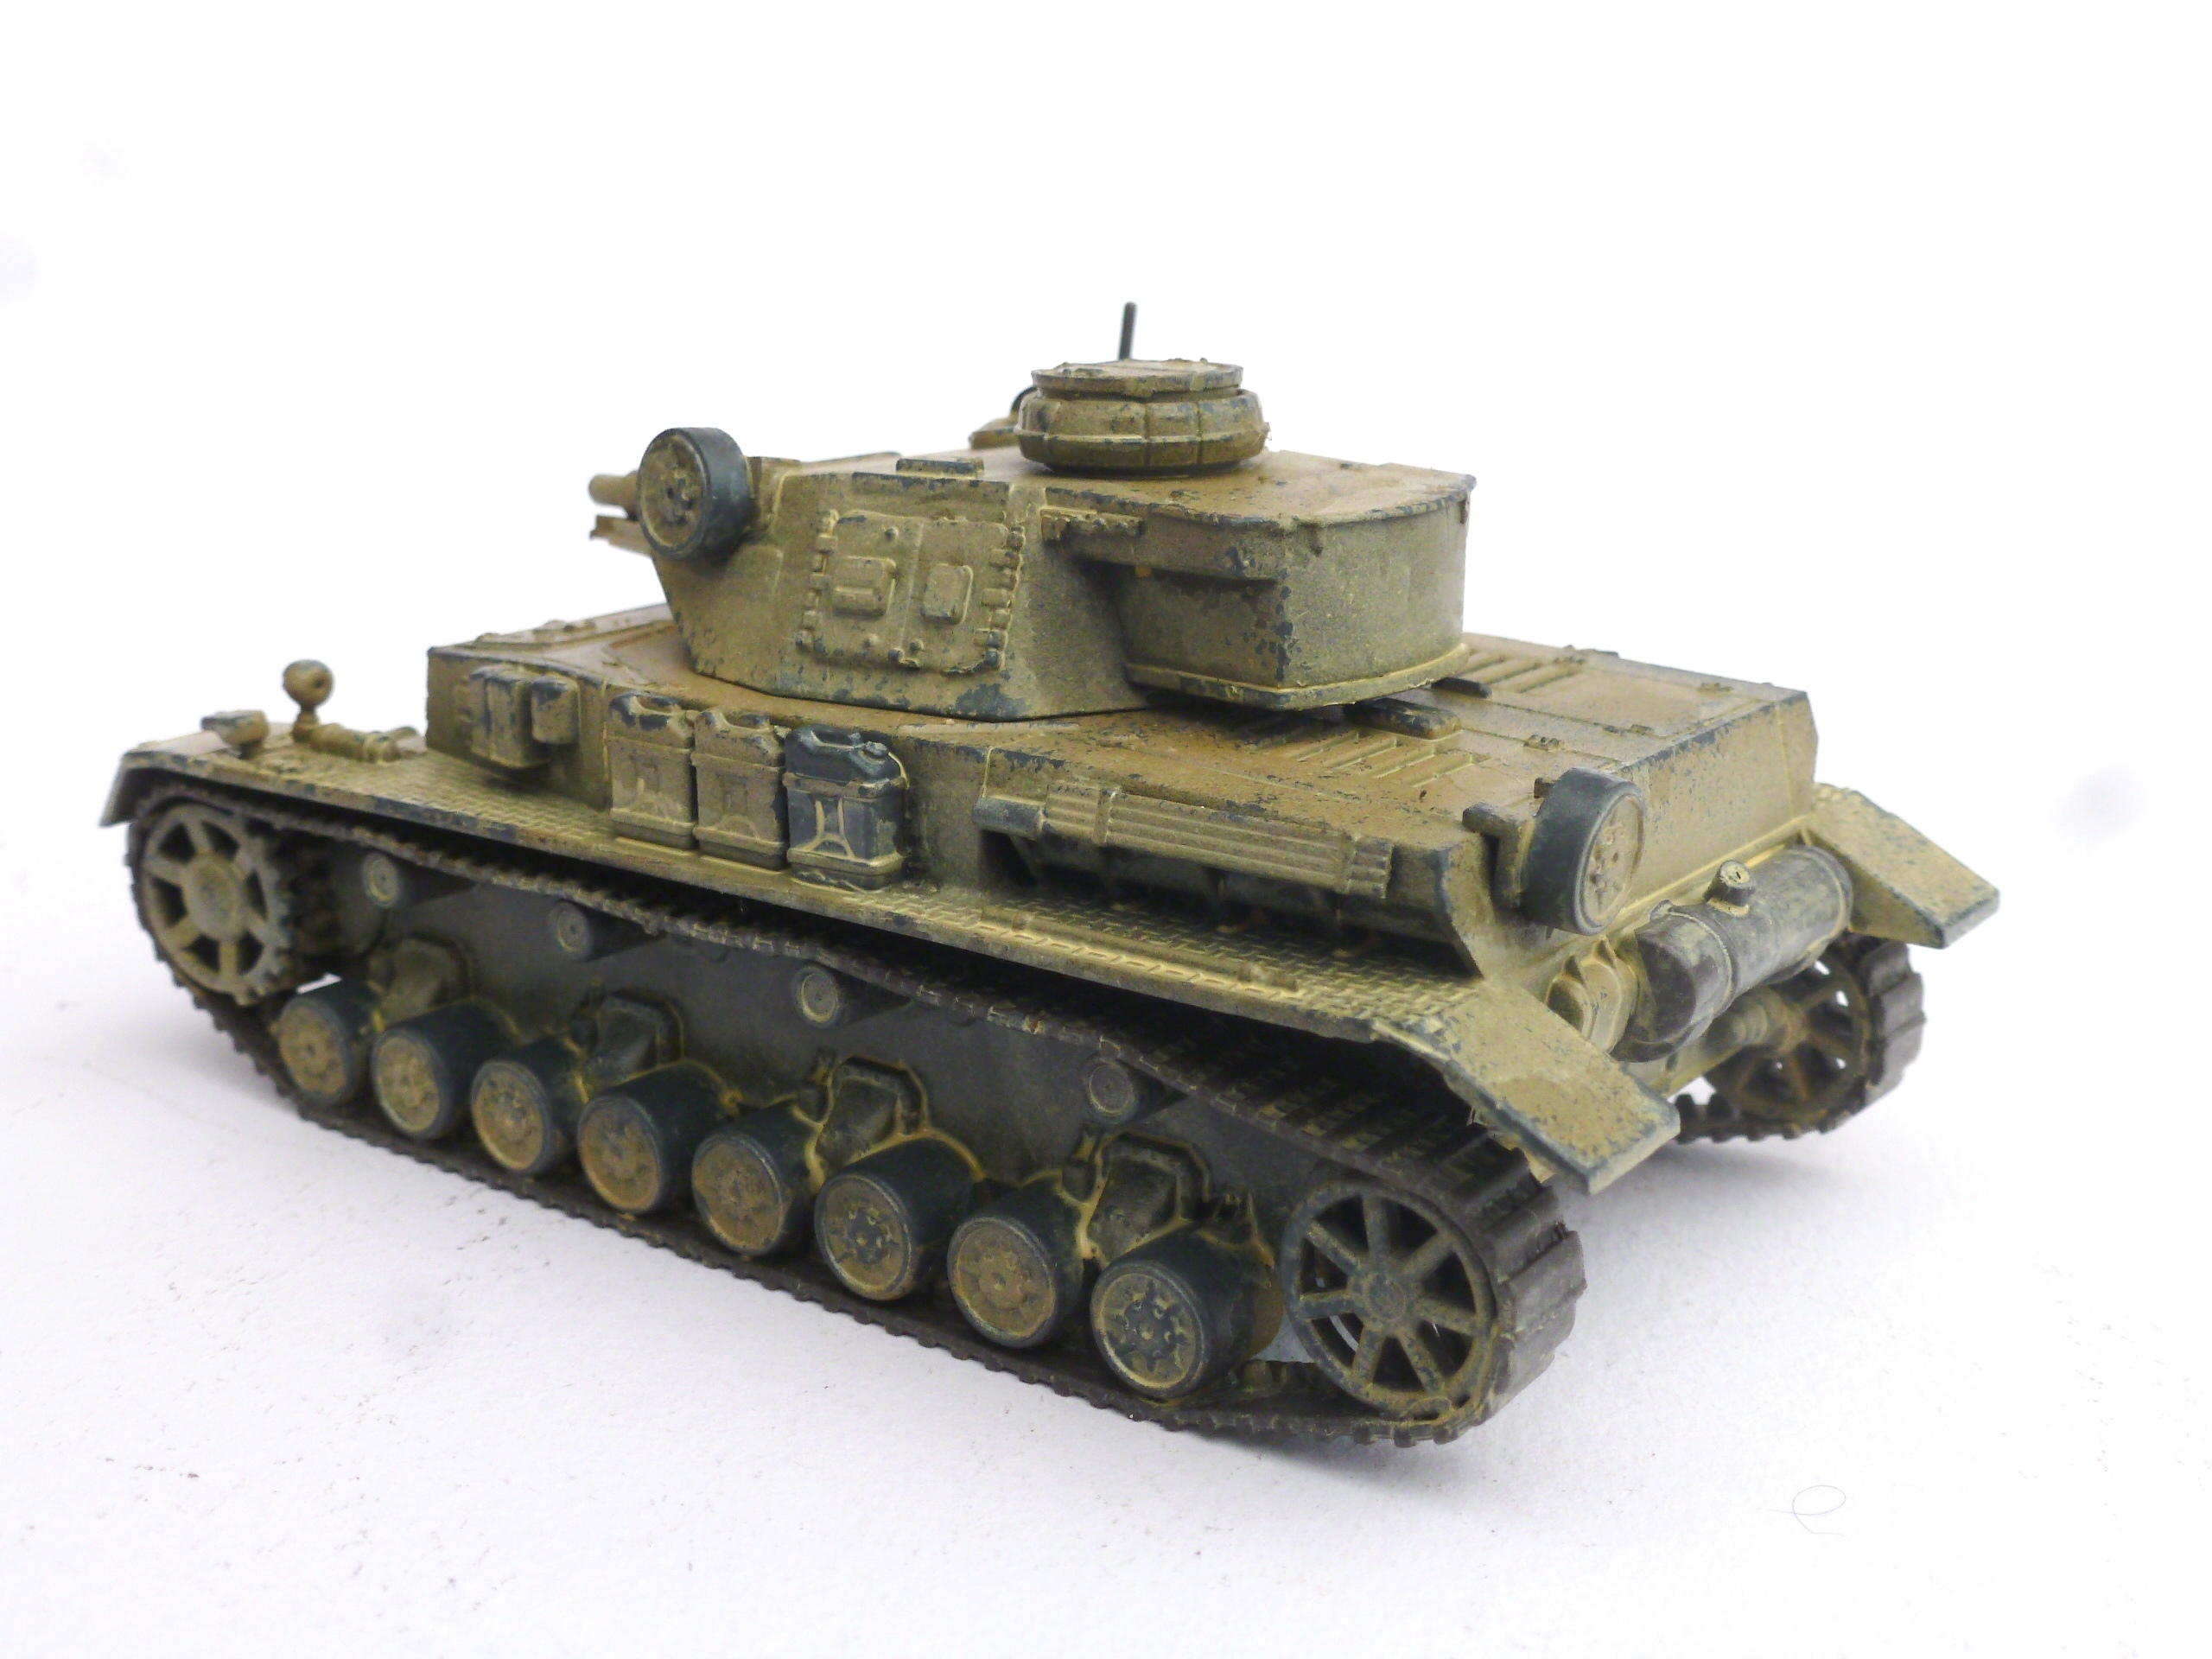
Dust tends to be very fluid, and get into all the crevices and recesses. When replicating this on a model the traditional putting a dark wash over the model can neutralise this effect or render it hard to see, unless applied in a fairly precise and time consuming way. As speed is the order of the day here, I mixed up a very thin wash by mixing Vallejo Buff with some Pledge Multi-Surface Wax, which you can get from any supermarket, or even over the internet.
Alternatively, you can just mix the paint with water, and what you are trying to achieve is a very dilute mix, with the consistency of milk. Paint this over the entire model, allowing it to flood into the detail. If the paint starts to pool and form puddles use your brush to draw that paint away, once your model is dusted up to the level you want, leave it to dry, and you’re done!
Worktime: 2-3 minutes
Drying time: About 45 minutes to an hour.
You can of course go into more detail, adding extra details and highlights, however for a quick finish this will get you a nice and table ready platoon in no time at all. Excluding drying time, from opening the box to done was probably maybe an hours work, over the course of a day whilst working on other projects, and is also ideally suited to batch painting.
If you’re gearing-up to explore the Italian and African campaigns with Das Afrika Korps, take a trip over to the Warlord webstore – where you’ll find a hug variety of units ready and waiting to re-supply and reinforce your Bolt Action collection…