With the release of the new Sd.Kfz 251/1 ausf. D kit from Warlord Games, I made a suggestion on the Facebook pages about converting one up to an Sd.Kfz 251/21 Drilling. I was contacted by Warlord Games asking if I would do the conversion myself. I have never done any “fabrication” conversions before, but the staff at Warlord threw down the gauntlet, so I agreed.
Let’s go into the history of the beast…
The difference in the new 251/1 ausf D chassis, when compared to the earlier ausf C: From early 1943, the D model was developed with the purpose of halving the number of angled body plates, simplifying the design and thus speeding up the production. D models can be easily recognized by their single piece sloping rear (with flat doors).
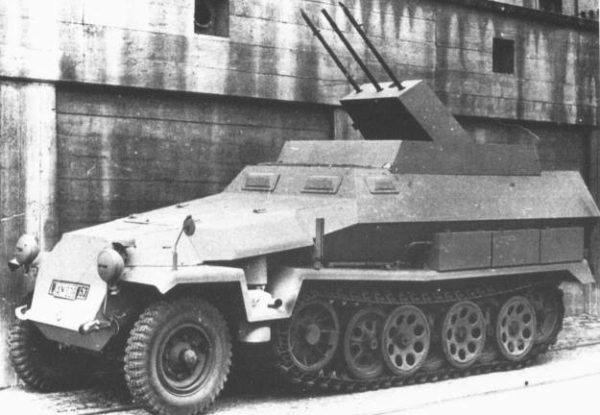
The 251/21 Variant was the Schützenpanzerwagen (Drilling MG151s) anti-aircraft variant equipped with a triple-mount (“Drilling” in German means “triple”) of MG151 autocannon; early version being MG151/15 mm cannon, later being MG151/20 mm Luftwaffe cannon. This was a stop gap measure to help with the overwhelming allied air superiority. The Drilling cannon were adopted and put on a number of vehicles ranging from Opel Blitz trucks, to Horch Field Cars, and even some Panzer III chassis.
In Bolt Action
| Cost: | 116pts (inexperienced), 145pts (Regular), 174pts (Veteran) |
| Weapons: | Three Turret Mounted Light Autocannon with 360 degree Arc |
| Damage value: | 7+ (Armored Carrier) |
| Transport: | None |
| Special Rules: | Open Topped, Flak |
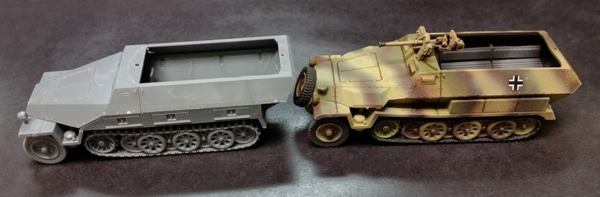
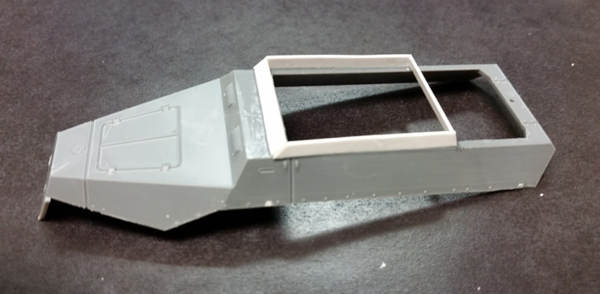
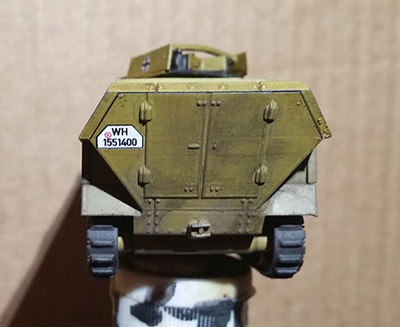
So, having never fabricated anything before, bear with me as this was a learning experience. First out of the box, I assembled the Ausf. D, except I didn’t glue the top of the chassis down. Above is a picture of the Ausf D on the left with an earlier war model of the 251 from my collection. They are nearly the same size, the slanting rear area making it seem longer, but it does have more open area on the top. I did not put the rear seats in at this point as I wanted a clean slate to work with.
Step 1
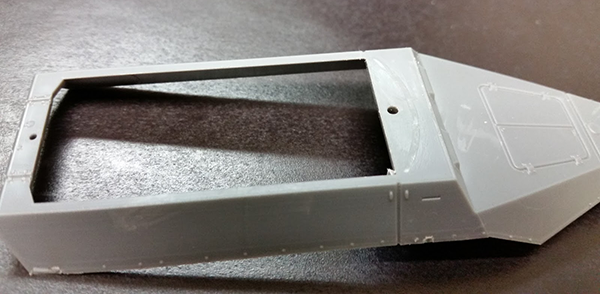
I shaved off the ridge in front where the front MG42 would have been mounted to make it flush with the chassis.
Step 2
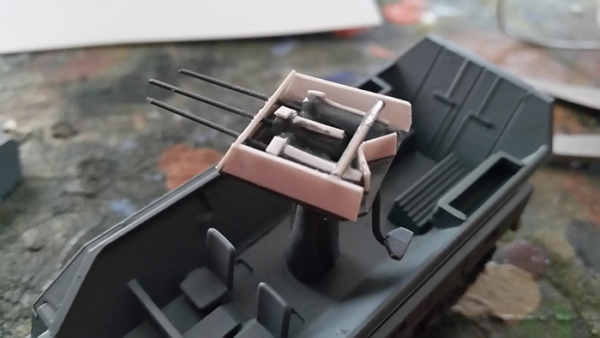
Using plasticard, I created the raised “shielded” area where the turret will go.
Step 3
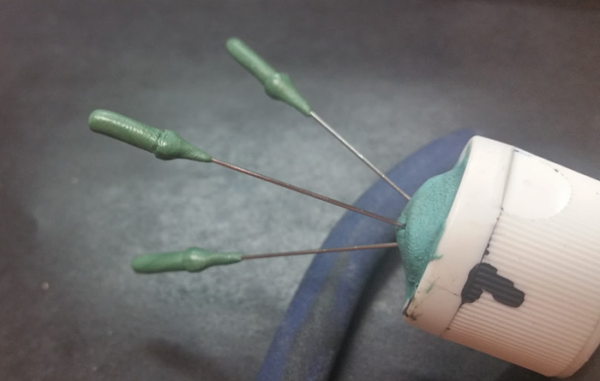
Using Brass rods (I actually used 3 of the Polish Lancer Lances from Warlord Games) I made the conical gun housing and the bulk of the MG151 using green epoxy.
Step 4
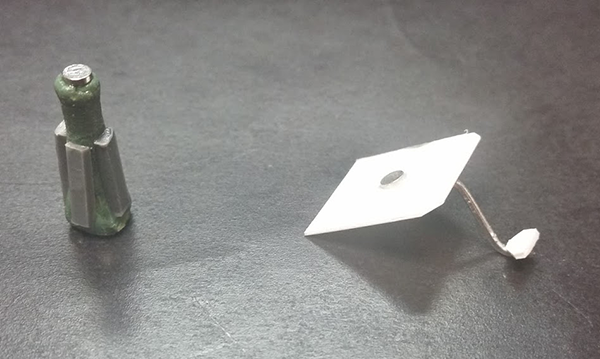
Using a plastic tube as the base, I wrapped the pedestal with green epoxy and pressed in three sections of leftover sprue from the Ausf D kit. At the top, I placed a magnet. In reality, the gun mounting attached directly with the gun, but for the purposes of this conversion, I put a base platform below the guns with a magnet on top so the turret would be a little more robust for gaming purposes. Using a piece of paperclip and some plasticard, I also added an attached gunner seat to the turret platform.
Step 5
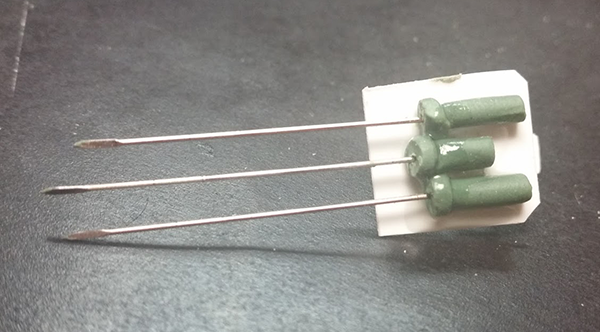
I then trimmed down the gun flanges, and filed the bottom of the guns flat and mount them until they were all flush and in line with each other. I test fit the turret for sizing purposes and cut the gun barrels with a side cutter to the appropriate lengths. I cut the stock seats in half and installed them in the back of the ausf D interior.
Step 6
Using Plasticard, I created the “turret” and drilled out the holes for the MG151s. I cut small strips of card and added to the top of the gun to add some “details” to this small gun trio. Once again the paperclip was used as a brace at the back of the turret, and lastly I added the small angled section to the back of the turret as in the pictures of the Drilling. While not completely accurate, the effect of the turret is pulled off effectively. ( I think!)
Step 7
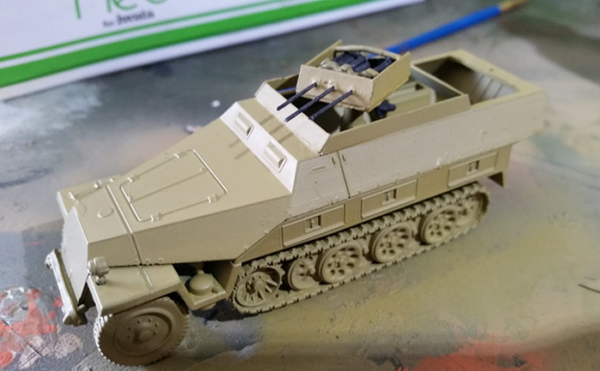
I primed and painted the chassis (still not glued together) with Middlestone with my Airbrush. The MG151s were now painted in black and the front of the guns were painted in matching Middlestone, as per my reference pictures.
Step 8
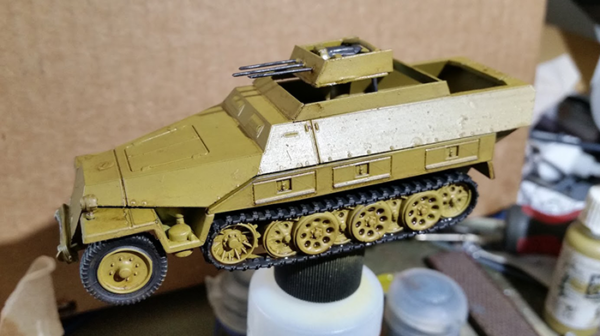
Next came the wheels and tracks – which I painted in a flat black, then I hit the entire model with a flat varnish. After it dried, I used a Burnt Sienna oil wash over the entire model. At this point I also glued the top of the chassis to the base of the chassis.
Step 9
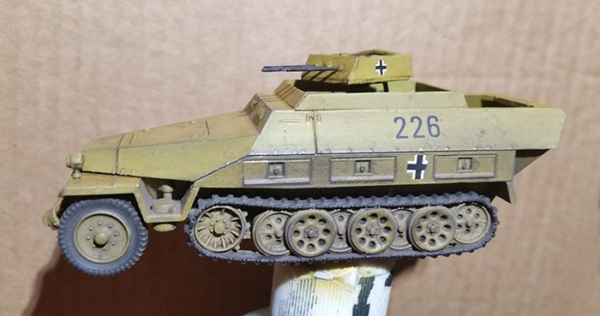
After the oil wash dried, I hit the model again with a flat varnish spray. I added the Decals that came with the Ausf D. I then hit the model with some pigment powders (of my own creation) to add some dust and grime. I sealed it once again, and my 251/21 Drilling was completed. The turret is magnetic and freely spins around the model, even with the attached seat!


Fantastic work, we think you’ll agree! – Keep watching the Warlord Newsletter, as we regularly feature step-by-step conversion guides such as this…
A huge ‘Thank you’ to Brian for his work – we hope to hear more from him in the future!