This painting guide shows how Chris Southern of Myrmidon Studios goes about painting our plastic Imperial Roman Legionaries. Check out Chris’ blog for more of his excellent work. He accepts commissions too should you be looking for someone to put paint to your metal mountain.
Over to you, Chris…
Normally painters will paint highlights and shadows by highlighting edges and putting shadows in all of the recesses. However, I use ‘zenithal light sourcing’ just like traditional canvas painters, where the light source is placed above the model and the highlights and shadows are painted appropriately.
To get an idea of how this works, just place an unpainted model underneath a lamp and take note of where the highlights and shadows naturally fall. This technique has become known as ‘hyper realism’ within the painting community in recent years.
Most experienced painters add water to their acrylic paints on the palette until it is the same consistency of milk. This can be quite tricky at first but not only saves on paint and stops detail from being filled in, but also allows a whole variety of different techniques to be used with greater control.
I used a mix of Vallejo’s Model Colour and Game Colour ranges and Games Workshop’s Citadel Colour paints. Enough of my prattling – on to business…
Step 1: Preparation
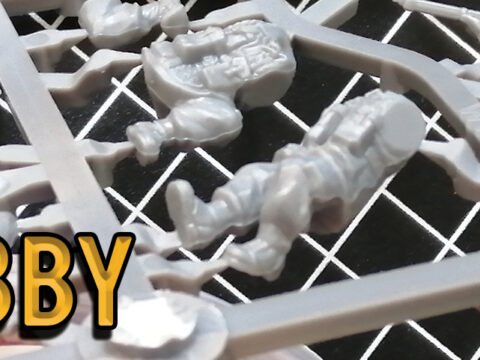
First thing to do was to cut the components from their sprues, clean up the mold lines and assemble the models.
I find side-cutters are the best tool for removing parts from sprues with a sharp modeling knife to remove the minimal mould lines found on the Warlord plastics.
Once done the models were glued to MDF bases. With the scutum shields being painted separately great care was taken to make sure the models would rank up when these were eventually attached!
I find it a good idea to number the bases underneath so that you can remember the order that they fit together as a unit once on the table. Nothing is more frustrating than spending ages trying to tessellate a unit when you should be getting stuck into your opponent on the tabletop!
The last part of the prep work was to cover the base with a sand and PVA mix, making sure that the lump of the pre-cast base doesn’t stand out (just add a little more PVA around the edge once dry). If you prefer to use a pre-coloured flock then hiding the pre-cast base can be done with Milliput or similar modeling putty.
Step 2: The armour
After priming with Army Painter White Base Primer spray the first thing I decided to paint was the segmented armour as not only are they the defining feature of the Imperial Roman legionary but also cover a large portion of the model.
I then painted the metal areas dark brown. It didn’t need to be an even covering as this just allows the metallic basecoat to be painted a lot quicker – it takes several thin layers over white otherwise. Now, people are probably wondering why I didn’t prime with a more traditional black undercoat but bear with me as I’ll explain later on in this guide why it’s quicker using my methods to have a white primer instead of black!
The metals were then basecoated with Boltgun Metal and then highlighted using the traditional layer technique by adding gradually larger amounts of Mithril Silver. Once the highlights were complete the shading and toning of the metals began.
Blue glazes were first used to change the reflections of the glare spots of where the metals would catch the light the most; this represents the reflection of the sky. Then the shadows had brown glazes added to help darken them in a more natural way representing the reflections from the ground. Finally, black glazes were used to enhance the darkest shadows as well as to add contrast.
The glazes change how the metals look from different angles as well as from under different light sources just as you find happens in real life (look at the back of a spoon and move it around under different light sources and you will see what I mean).
Once the shading had been finished the glare spots (edges of metal plates, etc,) were tweaked adding Vallejo Metal Medium pure metal flakes to Mithril Silver. This mix is as bright as enamel paints (without the need of smelly spirits to clean your brushes!) and really brings out a bright shine when the light catches these areas.

Step 3: The Tunics
After having a chat with Warlord’s Paul Sawyer we was decided the tunics were to be done as natural wool. The colour of legionary tunics is a hotly debated issue and we felt a break from the usual red would be an eye-catcher. It’s very probable that legions in the field wouldn’t always receive the ‘traditional’ red tunics, being issued with cheaper, undyed woolen garments instead.
The tunics were given a base coat of Vallejo Pale Sand (slightly lighter than GW’s Bleached Bone) and then shaded with carefully placed washes of Vallejo Yellow Ochre. This technique involves wiping off the excess from the brush so that the paint won’t flood the area and will stay where it is placed.
A little purple was then added to the Yellow Ochre to turn it brown and finally a tiny amount of black to darken it further. Green glazes where then added to represent the unwashed wool (just look at real sheep, they aren’t that clean!) not enough to turn the tunic green, but enough to change the tone.
The highlights were then brought out with thin layers of Vallejo Ivory (by using the paint quite thin you can get smooth blending with layering without having to constantly add more paint of another colour) this method of layering is often referred to as ‘feathering’.

Step 4: The Flesh
Next up was the skin. This was basecoated with a mix of two parts GW Elf Flesh to one part GW Dwarf Flesh with just a little Vallejo Olive Green added to tone down the pink look.
Pale Sand was added to this mix for the highlights, gradually adding in more Pale Sand. It uses less paint if you add the darker colour to the lighter colour – adding a lighter colour to a darker colour uses a lot of paint to achieve a noticeable colour change.
As these Romans where to be part of the foreign horde that took part in the conquest of Britain we needed to represent the fact that they would feel the cold more than their woad-covered adversaries.
The highlights were created by gradually adding in more pale sand (remembering to keep a consistency of skimmed milk) to the original flesh mix. They looked quite pale at this point, but the next stage – shading – would add in much needed colour and tone.
The shading was started with GW’s Bestial Brown (using controlled washes, remember to wipe off the excess moisture from the brush so that it doesn’t flood the area with paint) and then adding a little purple into it. Lastly purple glazes were used to add more depth to the shadows and give a cold feeling within the skin (when people are cold they have a bluish tinge to their skin as opposed to the reddish tone when they are hot).
Stubble was added to the faces of a few legionaries to show their ‘on campaign’ status by mixing a little Vallejo Medium Blue with the skin base coat. To make it look like they haven’t shaved for a few days just add a little black. When using this technique just take your time and use thin coats, as it is easier to add more instead of trying to tone the effect down.
The eyes where then added in by base coating them Pale Sand (white is too stark and very unnatural-looking) and then adding the pupil with black (a little trick is to paint a black line covering the middle third of the eye and then tweak it with Pale Sand on either side.
Lastly thinned Ivory was used to highlight certain areas of the skin (knuckles, bridge of nose, cheeks, etc) that catch the light a lot more.

Step 5: Wood and Leather
The leather items were base coated with Vallejo Khaki and then with washes of GW’s Snakebite Leather. They were shaded with Vallejo Charred Brown and the highlights were then tweaked with a thin Ivory along the uppermost edges that would catch the most light.
Painting the wood of the pila javelins was a similar process. It was basecoated with Khaki, shaded with Vallejo Cobra Leather and then Vallejo German Camo Black/Brown was used to finish the shading and dull it down for a more natural look.
An Olive Green wash was used on various parts of the wood to enhance the natural feel and show that they are well-used weapons. The green should not be noticed from afar, it is important to keep it subtle so as to aid shading and add character.
Step 6: Shields
The bronze on the scutum (and also on armour clasps, pteruges and helmet details) was created by adding Olive Green to Dark Gold. To this basecoat a Light Gold was added for the highlights. Shading was done with washes of Olive Green and then black. Finally, Metal Medium was added to give that extra ‘ping’ to the glare spots.

It was during this stage that Paul and I were chatting about a post on the Warlord forums where ‘Suetonius Paulinus’, one of the forum dwellers, had posted a pic of his Roman legionary and the ground effect was so effective and so simple we decided it should be adopted for our miniatures! Quite simply, it is Hornby’s Forest Floor scatter with Woodland Scenics Course Turf mixed in before application. PVA the base, dip into tub, and hey presto – one finished base! A little static grass here and there could be added for a little more variety of colour if you so wish.