Steve May guides us through making these common rural buildings – ideal to enhance your tabletop!
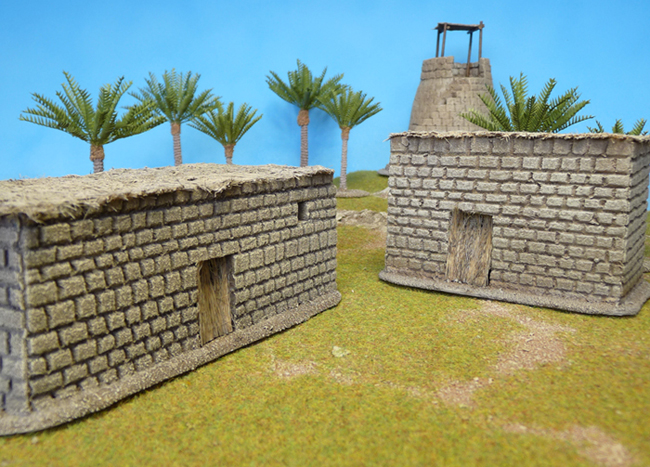
Steve: In this article I will talk you through how to make a mud brick house, typical of those that would be found throughout rural Mesopotamia.
The remains of these houses show them to be relatively small and usually rectangular in shape. The walls would be made of sun dried bricks and the roof made from reeds, sometimes with mud covering them. This would allow smoke from the internal fire to seep away without the need for a chimney.
Windows would be uncommon, as they would rarely be used in daylight hours. Small holes could sometimes be present for ventilation. As wood was too valuable to used for the construction of simple homes, reed mats are likely to have been used to cover the doorway.
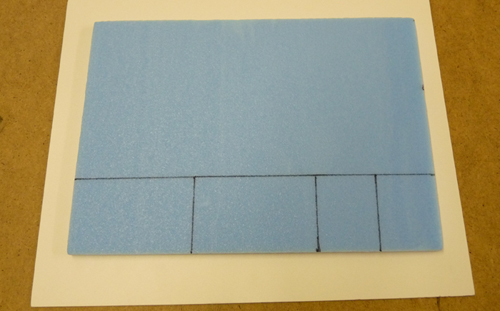
Step 1: take a sheet of Styrofoam (I used the 10mm thickness) and mark out the dimensions of the walls.
These can be any size or height, but should be rectangular.
Cut these out using a sharp knife (this is important as a blunt knife will tear chunks out of the foam rather than cleanly slice it) and a steel safety rule.
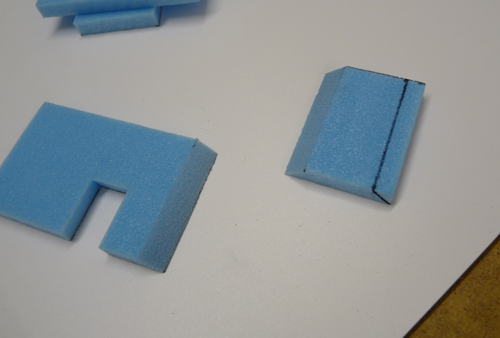
Step 2: Make sure there is a 45 degree angle on each wall edge, so that they fit together to form a sharp corner.
To do this, draw a line the same distance away from the edge as the foam is thick. For example, this sheet is 10mm thick, so a line was drawn 10mm from the edge.
Again, using a sharp knife and a steel rule, cut an angle from the far corner of
the outside wall to the line you have drawn, as shown in the photo.
Do this to every end of each section. You can cut a doorway in one section at this point too.
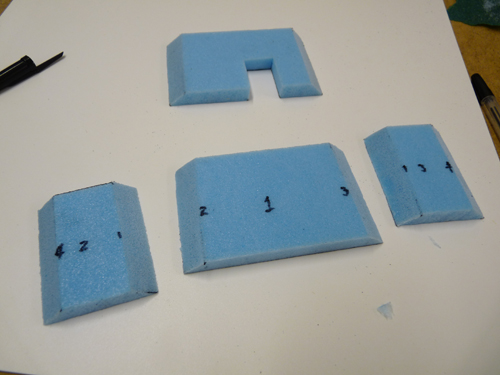
Step 3: When finished, it should look something like this.
Its a good idea to number each wall section at this point, so know which wall goes next to each other (it helps me anyway!).
Step 4: On the external wall face (the opposite to the one you cut the angle on) score horizontal lines across using a ballpoint pen.
You can either do this by eye, or in 5mm intervals, marked using a ruler.
This is where the numbers come in useful, as you can make sure the lines match the corresponding wall.
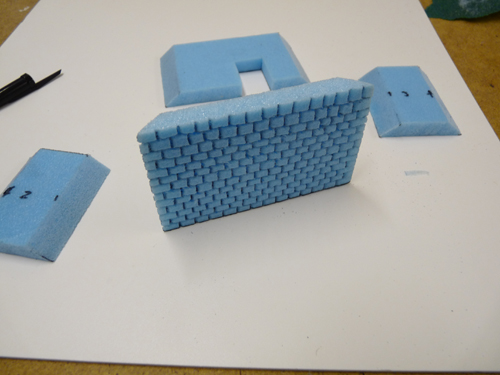
Step 5: When you have finished the horizontal lines, mark the vertical ones, to define each brick.
Remember, no vertical line should be in the same place as the one below it.
Again, the numbers on the back help with this as you can make sure each wall end matches the size of the brick on the next (where the brick is long on one edge, the corresponding brick edge on the adjacent wall should be small.
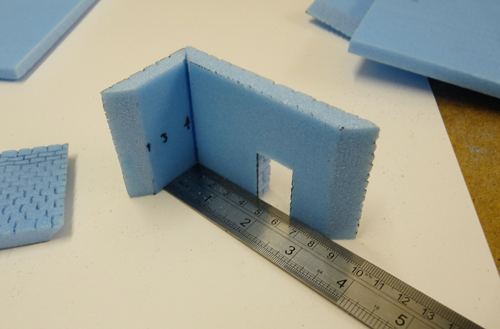
Step 6: You can now start sticking the walls together.
I prefer to do this in two halves, using the edge of the steel rule to make sure that the walls join at a 45 degree angle (you will notice that the angles on my walls are not very good, which is why I rely on the ruler!). Make sure the join on the outside shows no gap.
Use specialist Polystyrene glue (not superglue, Polycement or UHU, these all melt the material!). UHU sell a specialist glue which is very good.
White (PVA) glue, doesn’t work too well as the Styrofoam is not porous, and air cannot
aid the drying.
Try not to use too much glue or it will leak out of the joins!

Step 7: When each section is dry, you can stick them all together. I wrap an elastic band around them to make sure the joins are tight.
When these are dry, I cut another section of foam out to use as a roof and glue it
in place.

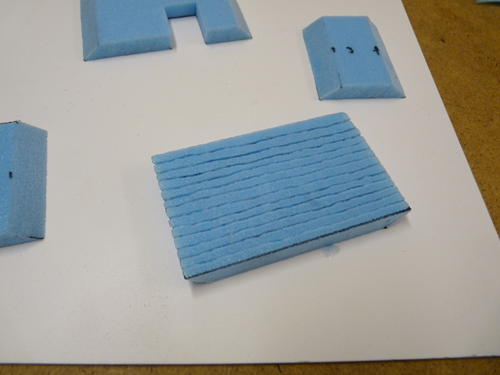
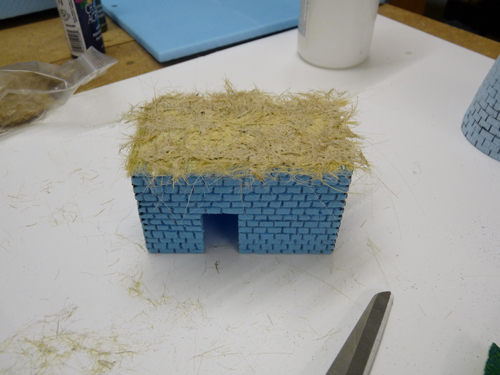
Step 8: Now for the reed roof. Cover the roof in slightly watered down PVA glue, or other water based glue and cover it in long modelling grass. When dry, remover the fibres that have not stuck.
This is to create the base for the roof.
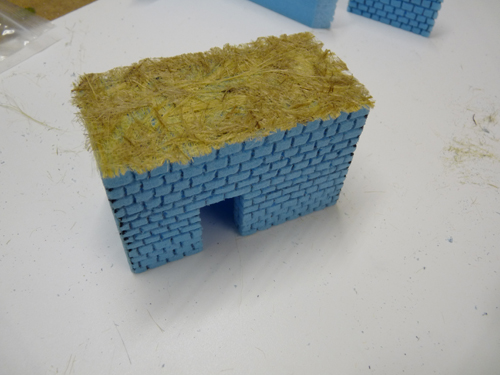
Step 9: Next, cover the roof liberally in watered down glue and cover it in long and short modelling grass. This should soak up the glue and make it solid. Mare sure you cannot see any of the foam through the grass.
Step 10: When thoroughly dry (this may take overnight) trim down the edges. Don’t make them too neat though!
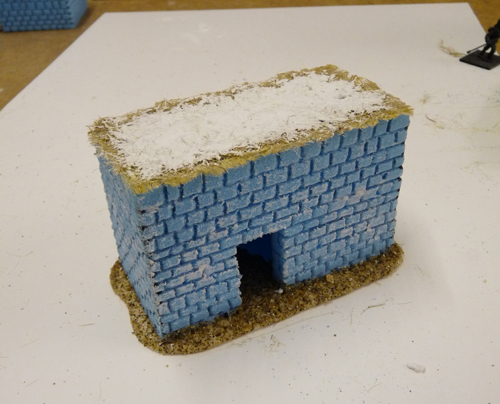
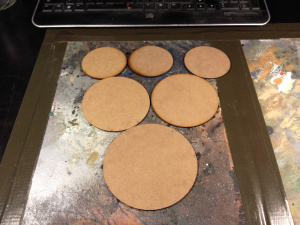
Step 11: When everything is dry, you are ready to base the building. I cut the base from foamed PVC. This is light weight, easy to cut and sand and does not warp.
You can use thick card, or hardboard for this too.
Using ready mixed filler, I covered the centre of the roof, to represent rammed earth (this is optional).
The base was covered in PVA and then in sand.
The walls were given a ‘drybrush’ of filler to add to the texture (this is optional
too).

Step 12: Last, but not least, the door!
Get a small piece of plastic film and cover it in watered down glue.
Pile a sheet of long grass on this, and then soak more glue on top.
Its a good idea to do this at the same point as the roof as it takes a long time
to dry.
When it is dry, you can peel it off and shape it to fit the door.
Painting:
Base coat the building with a medium-dark brown and highlight with successive shades of brown, each lighter than the last. I took this highlight up to a bone, almost white, colour.
Its important that the walls are the same colour as the ground, as that is where the material came from!
You can white wash the walls if you like. I personally think that only the more wealthy would have done this, but it can make a building stand out a bit more.
I painted the reed sections with a beige colour. When dry, I gave them a light brown wash.
Another finish, certainly for the wealthy, is bitumen. This was very common in Western Mesopotamia, and it didn’t take people long to discover the waterproof properties of it!
To represent this, paint the building a gloss black. You can give it a very light dry brush to represent dust. This can look a little odd, but it will certainly catch peoples eye!