Jakob Lotz takes us through a fantastic conversion to add a little flavour to your German forces:
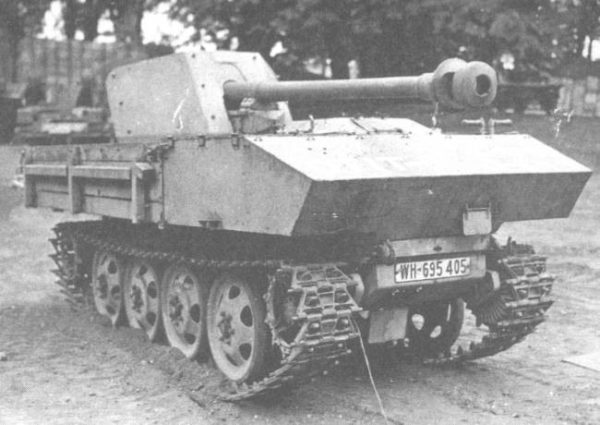
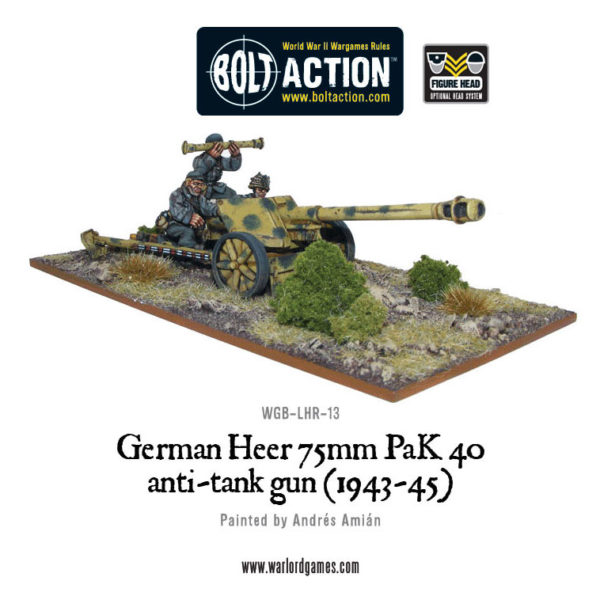
During 1943 as the German Wehrmacht was forced onto the defensive it became increasingly clear that there was a great need for mobile anti-tank assets to counter the the ever present threat of soviet armour. As such a proposal to fit the 7.5 cm PaK 40/1 anti-tank gun on top of an RSO chassis was explored by the German armed forces. After seeing the blueprints, Hitler ordered a limited production run for combat testing.
The project was carried out by Steyr. Most of the RSO chassis remained unchanged, but the front driver’s compartment was replaced with a low, lightly armoured superstructure. The result was a lightweight, cheap to produce, and highly mobile infantry anti-tank weapon. The RSO/PaK 40 offered little in the way of protection for the crew, but this also meant that the overall cost was greatly reduced in comparison to the more conventional panzerjagers in use with the Wehrmacht.
Although the vehicle was intended for use by the infantry anti-tank units, all pre-production vehicles were issued to armoured units (Panzerjager Abteilungen 743 and 744, and 18th Panzergrenadier Division), due to the urgent need for replacements. The RSO/PaK 40’s low speed and light armour inevitably resulted in problems, however despite these shortcomings the RSO/PaK 40 was declared usefull vehicle, and large-scale production was quickly authorised. Despite the decision to have Steyr shift its entire production line into RSO/Pak 40, no specific order reached industry, and only the approximately 60 pre-production vehicles were ever manufactured.
WHAT YOU NEED
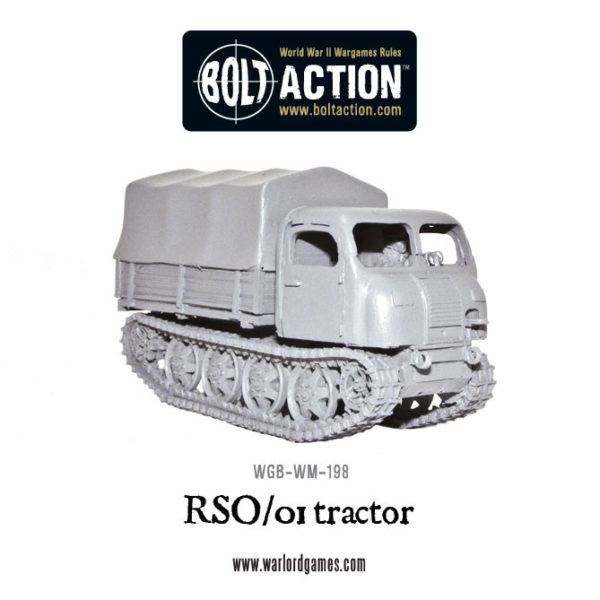
– One RSO
– One German Heer PaK 40
– Plasticard.
– Piercing saw, craft knife, wire cutters, drills, glue etc.
HOW TO MAKE YOUR OWN
As allways it should be remembered that conversion work allways requiers equal measures of improvisation, patience as well as trial and error. As such what I am trying to do here is to give tips, hints and inspiration rather than a complete guide to every single step and minute detail of the convertion process.
Vorwerts!
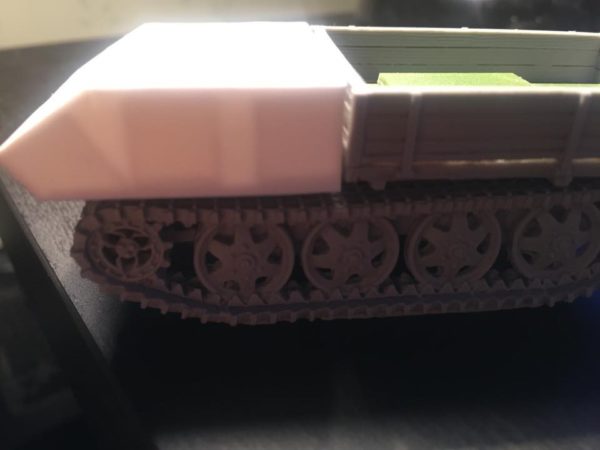
Step one clean all the resin parts in some warm water and soap. Then take your piercing saw or similar tool and cut away the driver’s compartment as shown below.
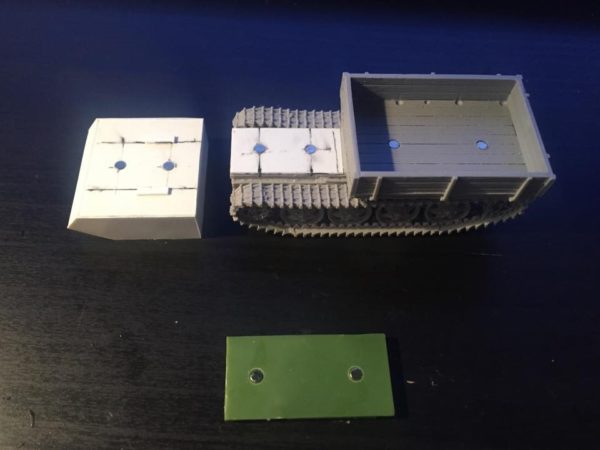
Next we have to build the new armoured compartment. I started out with a baseplate of approximately 2 mm thick plasticard cut to a rectangular shape about 30 mm in length and 35 mm in width. Please note! If you plan on magnetising the armoured compartment like I did then I would recommend adding the magnets to the armoured compartment’s baseplate before you start building the armoured compartment.
I then cut up three equal lengths (about 35 mm in lenght) of plasticard square tube (the tube itself is roughly 10 mm squared). On one of the tubes I cut away part of the side and glued it to the front of the baseplate creating an angled front. After that I glued on another of the tubes on the oposite end of the baseplate.
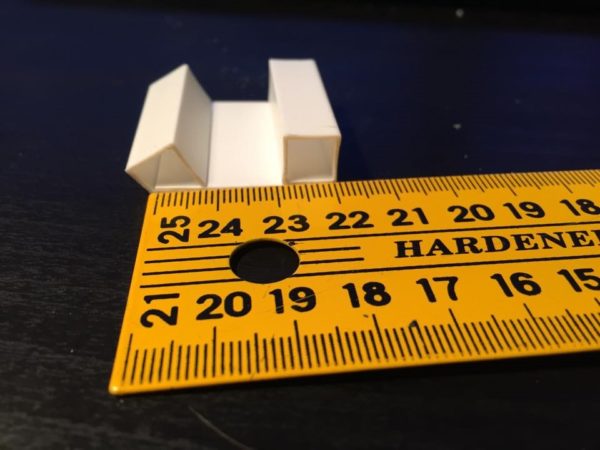
After I had glued on the front and back tube I then added the third tube length in between the two previous ones and then covered the whole thing in sheets of approximately 0,5 mm to 1 mm thick plasticard. The finished product as well as the internal structure is clearly visible in the photo below.
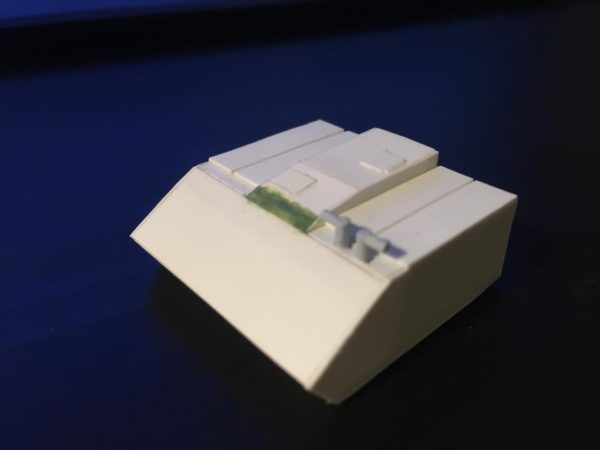
The next step was then to add a thin piece of plasticard to level the area where the driver’s compartment had previously been situated. After this I then added magnets to the RSO chassis, the flatbed on the rear of the RSO and to the baseplate upon which I would later mount the PaK 40. I also added to ”followers” to the bottom of the armoured compartment to better hold it in place. If you look carefully you should be able to make them out in the following picture.
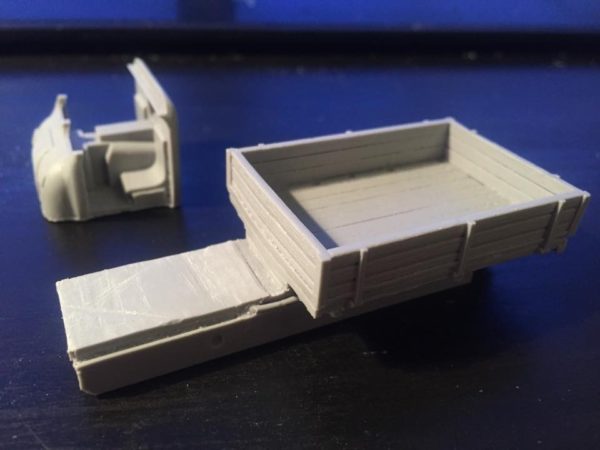
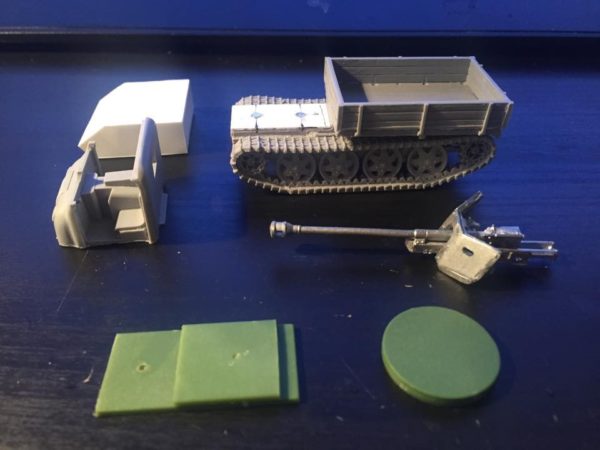
With the armoured compartment mostly done I had the following pieces in front of me. Now with any conversion work one has to decide exactly how detailed one wants to be. Since this was to be a table top gaming piece I decided not to go to crazy on certain details that wouldn’t be showing too much anyway. As such I didn’t really spend any time at all on the mounting for the PaK 40 gun. I simply took two rectangular bases and two round bases and cut them as needed and then glued them together and voila I had me a gun mount. Obviously there is nothing stopping anyone from doing a better job than I did. But this worked for me and that’s the main thing.
I then added the little housing in the center of the armoured compartment as well as the ”hatches” to either side of it. I also drilled two small holes and added the steering leavers. Getting these things ”right” can be a bit tricky. However thankfully the internet is often full of great reference pictures that can help you out. So just find yourself some reference photos of the real thing and then try your best to emulate what you see in these pictures and hopefully you will end up with something similar. This is what I ended up with.
And so I had all my individual magnetised pieces done and ready for assembly.
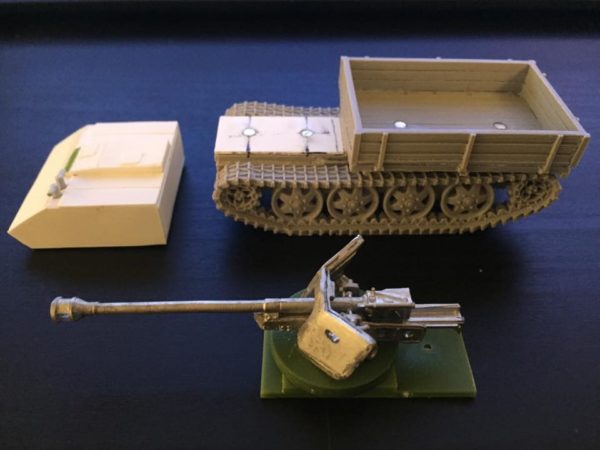
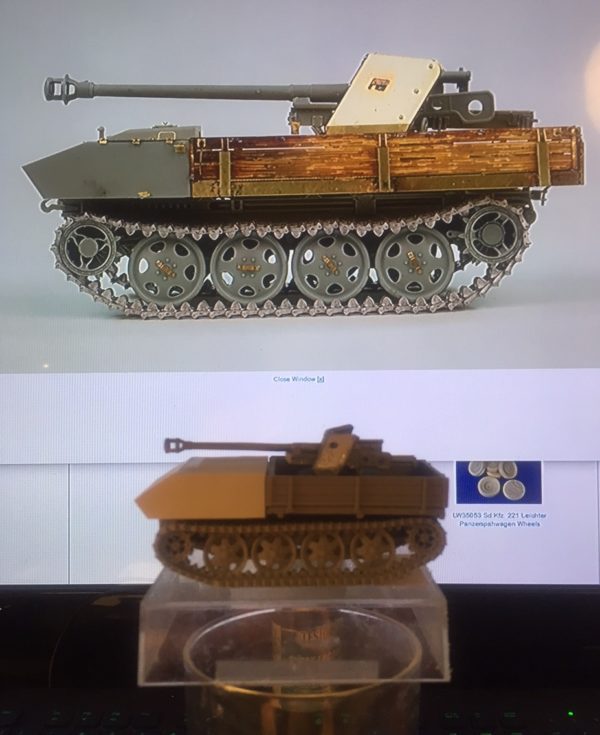
Now all that was left was a quick basecoat of black and Army Painter Desert yellow as well as some detailing and a fair bit of weathering mostly done with different washes and texture paints. And thus I had me a RSO/PaK 40 ready to punch some holes in unsuspecting enemy tanks.

We’ll be looking at a few more lovely pieces from Jakob soon, If you’ve got some conversion ideas then drop us a line with a couple of pictures to info@warlordgames.com. In the meantime, have a go at this little conversion with the following models:
Do you have an article within you? Are you itching to show your collection to the world of Bolt Action? Then drop us a line with a couple of pictures to info@warlordgames.com


