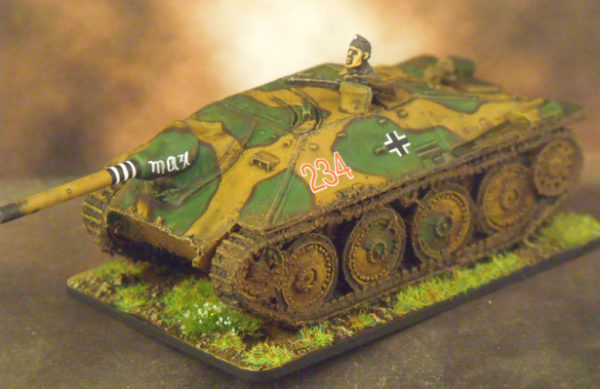
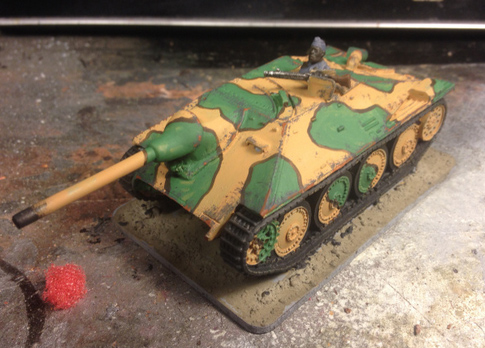
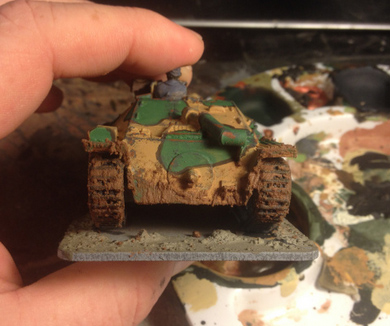
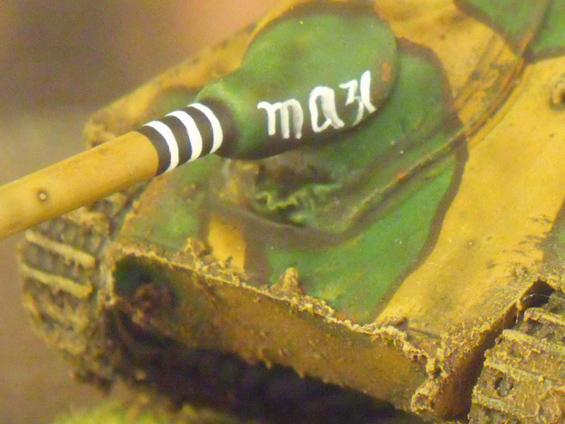
Dan Hoyt, of the redoverblue blog has been hard at work on a factory’s worth of Bolt Action vehicles, and very kindly offered to share a few tips – firstly, the ‘Baking Soda Mud Technique’ – as used on his rather lovely Hetzer…
 Dan; I have referenced my “Baking Soda Mud Technique” in several posts recently and the development of this technique has been showcased on several posts, including my recent Warlord Games Unic P107 halftracks, Polish Armour, and American Armour. I feel at this point I have perfected my technique and it is ready for explanation as a Guide article. I do not claim that the idea of using baking soda as an ingredient for simulated mud is original, as I have seen it in several other modellers work.

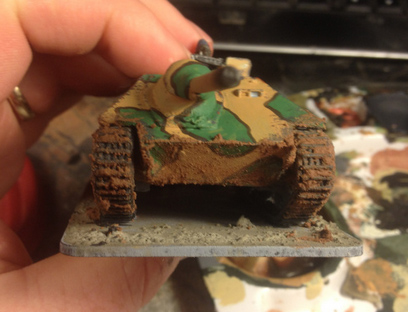
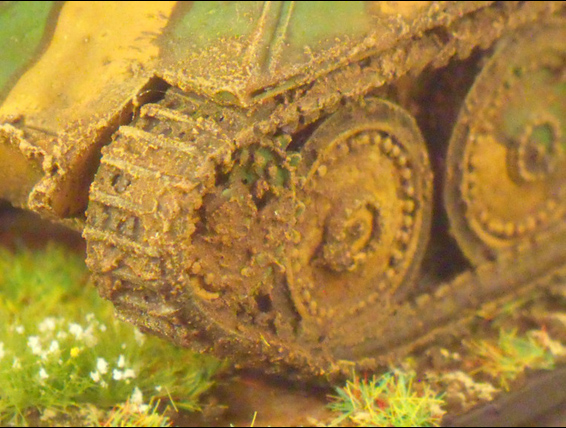
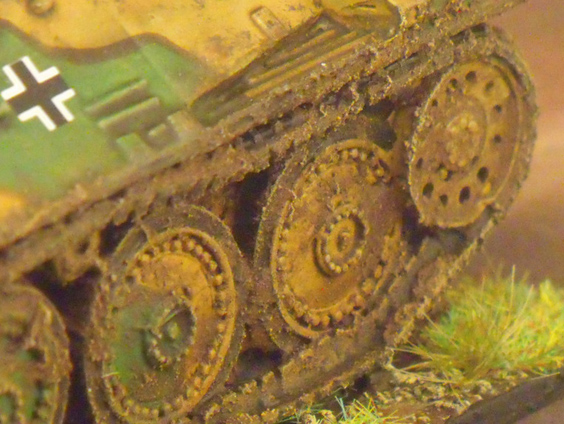
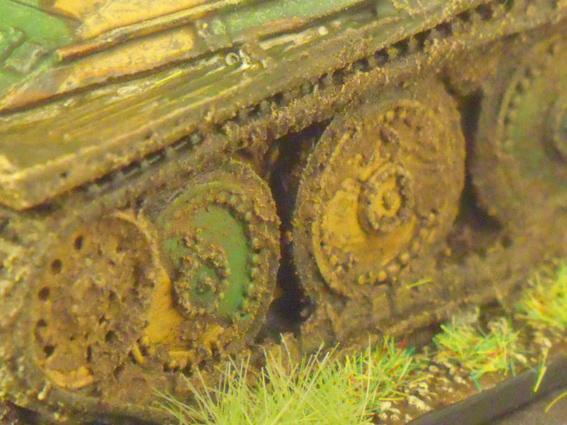
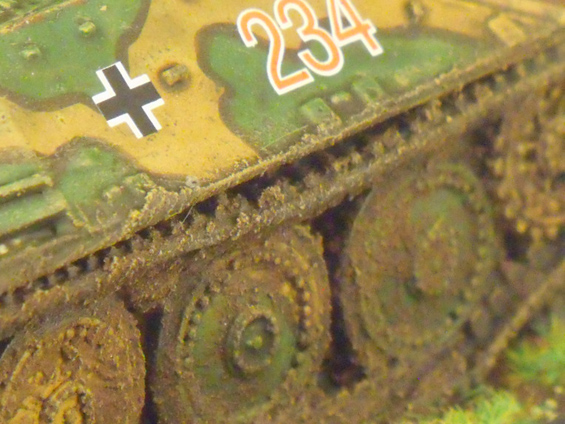
A few examples of different amounts of mud being applied using the Baking Soda technique
This technique can be tweaked and modified depending on the level of “dirtiness” required, as well as the colour and consistency of the mud. This technique is great for adding some depth or character to your vehicles, as well as covering up any casting errors or damage in the tracks, wheels, or undercarriage.
Materials Required:
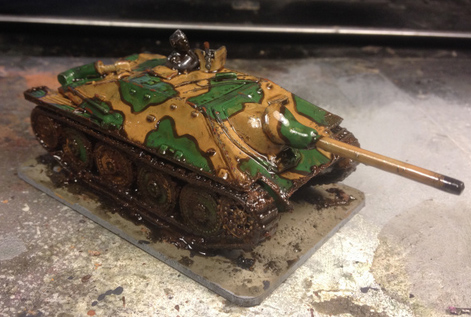
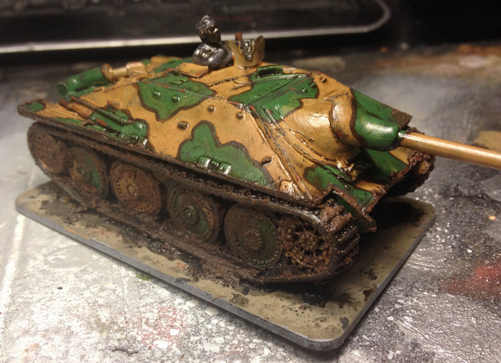
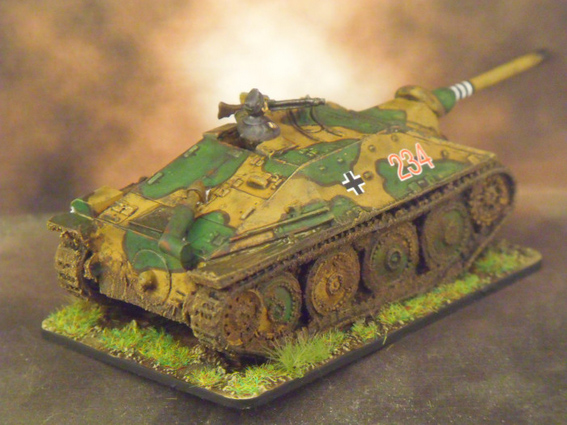
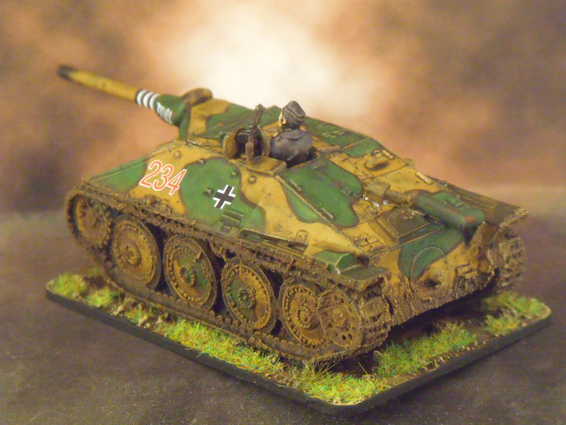
– A model to work with (for this article we will use the wonderful Jagdpanzer 38(t) Hetzer model from Warlord Games)
– Whatever paints and tools required for preparing this model and painting it (this article will focus solely on the “mudding” of the vehicle rather than painting the entire model)
– Acrylic paint matching the colour of mud required (I chose DecoArt’s Americana “Light Cinnamon Brown”, which is about the equivelant to GW Bestial Brown)
– A basic desert yellow (DecoArt’s Americana “Desert Yellow”)
– A sandy off white (DecoArt’s Americana “Bleached Sand”)
– Baking soda (the same stuff you would put in your fridge or bake with)
– Clean water
– Army Painter Dip (Strong Tone)
– Paint Thinner (mineral spirits)
– Paper towel
Tools Required:
– Medium sized scrap paint brush
– A separate paint brush for working with the dip and paint thinner
– A mixing vessel or pallet
Step 1: Paint the Model

As stated above, I will not focus on the painting of the vehicle. For this model, I block painted the basic colours as well as some basic weathering. Depth and shading will be added via the Army Painter Dip later in this tutorial.
Step 2
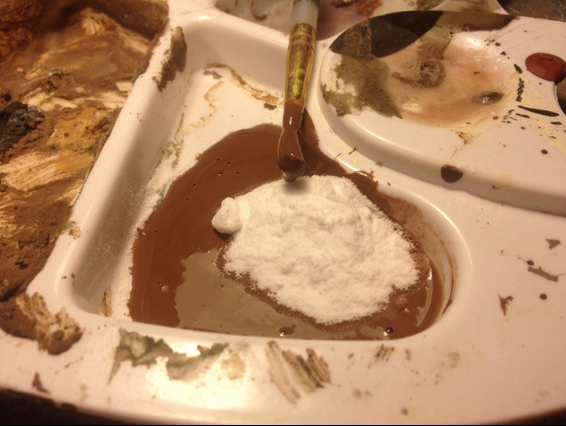

The mud itself is quite easy to mix, consisting of only three ingredients: paint, baking soda, and water. Start by mixing a small amount of paint (about the size of a nickel) with water at a 1:1 ratio. Once these are mixed, begin adding baking soda. Start with a small amount (about a teaspoon). Continue mixing and adding baking soda until you have a paste around the consistency of toothpaste.

Taking your previously painted model, apply the mud using a scrap brush to the running gear and tracks of your vehicle (or wheels) as well as any other areas that might attract any mud. I have learned at this point less is definitely more. Therefore do not go overboard with your mud application. I recommend using a drybrush and stipling brush technique when applying your mud. You will notice that though there is paint in the mixture, it will not be a 100% solid colour (the original colour of the vehicle will show through). Since the baking soda dries out the mixture quite quickly, you may need to add a couple drops of water during application. Once you are satisfied with the mud coverage of your vehicle allow it to dry. I have found that at least 8 hours is needed to ensure that the baking soda mixture dries thoroughly. Since baking soda is involved, there are some weird chemical reactions and sciency stuff that comes into play that I don’t quite understand. The big point is to let the mixture dry; DO NOT CONTINUE TO STEP 4 UNTIL THE MUD IS 100% DRY. If you apply anything onto the mud before it is dry, some pretty weird reactions can happen, including a breakdown of the mixture as well as a wacky white-ish substance that tends to be secreted. YOU HAVE BEEN WARNED.
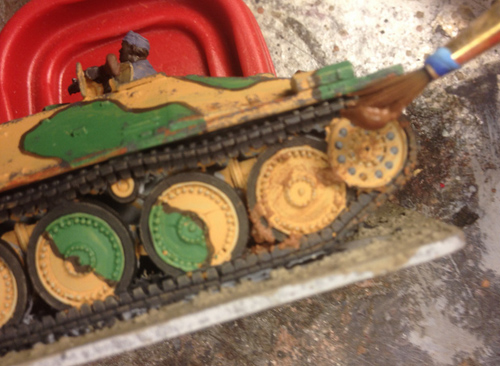
Step 4: The Dip
The Army Painter Dip series of products are wonderful things. I use them on almost everything I paint, including vehicles. Some might question the wisdom of dipping an entire tank, which would be challenging. I instead apply the dip with a brush and thin it with paint thinner (mineral spirits). Though the Army Painter has a series of washes with the same shading qualities as their dips, I still prefer using the dip with a brush. I find that it creates a much more durable finish (once dulled with a matt varnish) in addition to adding depth. This durable finish is especially important with baking soda mud. With your mud mixture thoroughly dry (see the warning above) you will notice that it is fairly chalky, brittle, and fragile. The dip will “seal” the mud as well as add some excellent depth. Though you could use an acrylic wash on the mud to add depth, you would not get as durable a product.
Though I apply the dip to the entire vehicle, for the purpose of this technique you can restrict it to just the muddy areas. When applying the dip, I keep an open jar of paint thinner (mineral spirits) close by with a thick pad of paper towel. Before dipping my brush in the dip can, I soak it in the paint thinner and then apply. This thinning of the dip allows it to flow into the recesses and take on the same characteristics as a conventional acrylic wash. As you apply the dip, use your brush to soak up any pooling varnish and wipe it on the paper towel. Leave your vehicle to dry (at least 12 hours) before progressing to step 5.
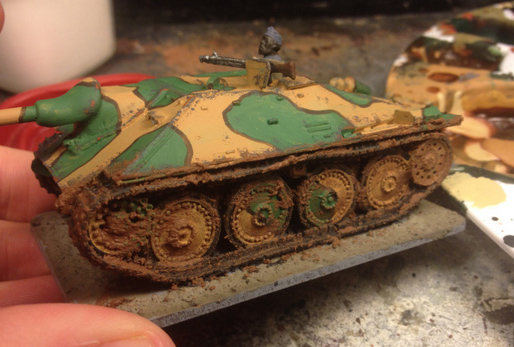
Step 5: Drybrushing and finishing touches
Apply a medium drybrush of desert yellow followed by a light drybrush of bleached sand. This will pick out and add some depth to the mud. At this point the mud itself is complete and you can finish the model as you see fit, but do not forget to apply a matt varnish at the end. I finished the model by applying a couple highlights to the rest of the model and then picked out any details, such as the crew commander and kill rings followed by basing.
I am very happy with the final technique I have developed and will continue using it on all further vehicles for my WW2 project. If you liked this Guide and want to see more, then please let me know in the comment section below. Follow me on Facebook or WordPress!
Until next time,

If you want to recreate Dan’s fabulous work, the Hetzer can be bought direct through the Warlord webstore…
…and if you do so, please share your photos and experiences with us – either on the Bolt Action Facebook Group, or the Warlord forums!