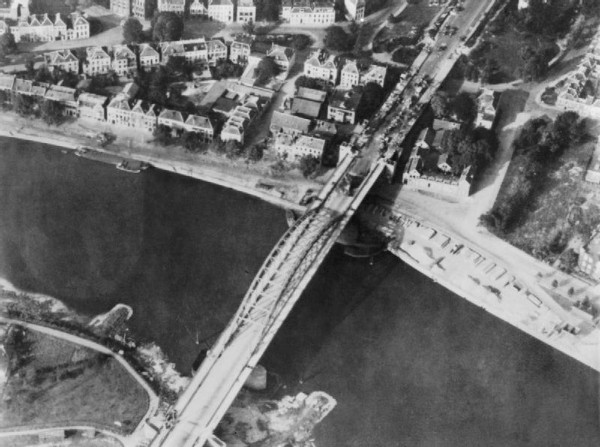
On the 17th September 1944, preceding a bombing run from the Allies, the first British units landed near Arnhem. The British 1st Airborne Division, commanded by Major General Roy Urquhart landed some distance from their objective. The 2nd Parachute Battalion managed to get into the town relatively unscathed, despite delays in getting to the north end of the bridge which was hampered by jubilant Dutch civilians. Frost and his men would follow the riverside roads to the centre of Arnhem, where they would secure the railways bridges, main road and a pontoon bridge, supported by the 3rd and 1st Battalion Parachute Regiment.
The Airborne under Major Frost by this point had made it onto the road bridge, but had been surrounded and cut off from the rest of the division. The Germans attempted to force their way through them, but the paratroopers fought an intense two hour battle, in which the Germans lost a large number of their vehicles as well as their commanding officer, but would continue the assault throughout the day.
Miscommunication would hamper the British, as the Dutch SS Wach Battalion was fighting an intense battle with the Kings Own Scots Borderers. The second drop had also been hampered by British fog and began their drop later than scheduled under enemy fire. Fortunately, they dropped in such numbers that the Dutch SS fell back against the airborne units. The units present had to change their plan and the South Staffordshire and the 11th Paras were ordered to Arnhem to help the 1st and 3rd Paras breakthrough across the bridge.
By the 19th September the British had hoped to tackle the German forces head on, with 1st and 3rd Parachute Battalions and the south Staffordshire and the 11th Paras linking up. The bridge however was thought to be lost, which turned out to be false. The 1st Paras and remnants of the 3d led the assault, with the 2nd South Staffs on the left flank and the 11th Paras following them. The Germans opened fire on the formation as soon as the sun rose, catching the unfortunate British forces in a deadly three way crossfire in open ground. The 1st was almost destroyed under heavy fire, with the 3rd Parachute Battalion falling back, whilst the 2nd South Staffs were cut off and almost wiped out, with only around 150 men escaping. The 11th suffered a similar fate, and was overwhelmed. The remaining men of the four battalions retreated and joined up with the 1st Airlanding Light Artillery Regiment, where they made an ad hoc defensive line.
The battle gave Urquhart the chance to escape his hiding place, where under intense fire from the other nights battle had meant he had to seek shelter in a civilian’s house. He had no idea to t extent of the German forces arrayed against them until the four battalions had been almost slaughtered. He managed to get back to Divisional HQ, where we discover they were out matched. Delays back in England would add further insult to injury, as bad weather stopped the Polish Glider borne units reinforcing the British positions.
North of the railway line, the 10th and 156th Paras fought against the well defended German positions, attempting to hold the high ground there. With no headway gained, they were ordered to retreat, making sure they would not cut off. They fought a fighting withdrawal with the Germans hounding them all the way back to one of the landing zones, joining up with Kings Own Scots Borderers, who were keeping the landing zones clear for the eventual arrival of the Polish glider troops. Communications had gone wrong yet again, as vital supply drops were dropped on captured landing zones, with the Germans managing to shoot down a number of RAF aircraft and preventing many supplies reaching the beleaguered British forces. This meant Major Frost 1st (still at the bridge) had not received any fresh ammunition weakening their defences, as the tanks of the Germans destroyed the buildings they were defending.
With so few fighting units left, Major General Urquhart opted to form a defensive positon and wait for reinforcements from XXX Corps, but this meant making the harrowing decision to abandon Major Frost his fate. The Major and a number of his men were badly wounded, and he and his men were captured. Of the 750 men with him, only 100 would make it back to England.
With the forces on the bridge no longer a problem, the Germans could now send reinforcements to engage the British. At this point, the Polish parachute battalions showed up, and were redirected to drop at the south bank of the River Rhine and secure the ferry there. When they arrived however they found that the captain had scuttled the boat to prevent the Germans from using it!
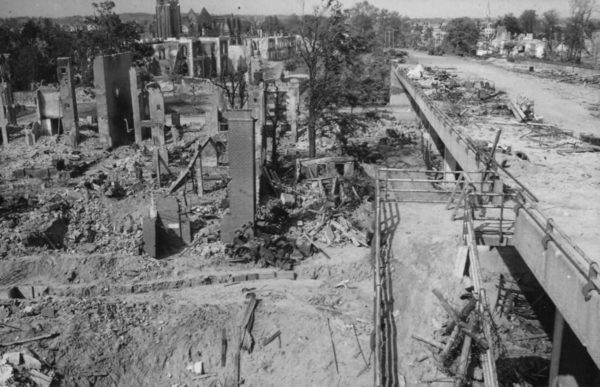
The Germans had to respond to the Polish threat, and thankfully for the British they sent forces to deal with them, giving them some breathing space. By this point the British defence had been fought in fox holes, ruined buildings and rubble, making for a very claustrophobic and intense battle ground, with over 3,000 men dug into the positions. Fortunately the forward artillery of the XXX Corps had made its way to their positions and managed to provide accurate firepower down onto the German positions.
The following three days of fighting, more and more elements of the XX Corps would join the battle, a much welcome site for the British forces already there in and around Arnhem. The Germans however would intensify the attacks, almost breaking through the British defences and nearly wiping out the 10th Paras completely. The RAF managed to perform attacks on the Germans positions surrounding Urquhart and his men, with some supplies also getting through.
Come the ninth day of fighting the order to withdraw was eventually given. Urquhart began withdrawing his northern units first, with units then following them behind moving back on themselves, giving a good fighting retreat. The artillery units would also provide cover for them, keeping the Germans from following too close. The battle was a huge loss for the British, despite the stalwart defence and sacrifice of the airborne units.
Article written by Sam Phillips
Further details on the Battle for Arnhem can be found in the ‘Battleground Europe – D-Day to Berlin’ Theatre Book, available in the webstore now!