If you’ve just got started with your Romans then this step-by-step guide will be perfect for you as we take a look at how we painted a single Roman Legionary using quick techniques and a simple colour scheme to get your troops into battle in double-quick time!
Step 1: THE BASE
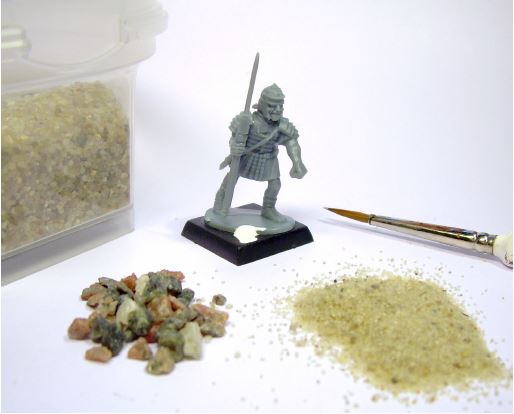
First off we glued the Romans to some spare 20mm bases (you could use thick card or remnants of plasticard equally as well). Next we added fine sand and small stones to act as rocks to the bases using PVA glue. We use the Battlefield Rocks to lessen the ‘edge’ from the model’s integral base and the 20mm base while the fine sand adds a nice texture the whole base.
Step 2: COLOUR PRIMER: PLATE MAIL METAL
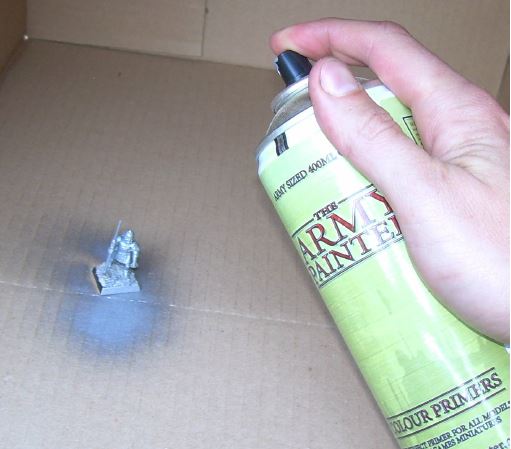
After that we sprayed the Romans with Colour Primer: Plate Mail Metal. A note of advice: The Army Painter
Colour Primers are heavily pigmented quality sprays, don’t apply too thick a coat – you’re better off with just a thin layer, that’s enough!
The shields were sprayed and painted separately. This allows you to get the brush into the areas of the Legionary that would otherwise be covered by the shield
Step 3: BASECOAT

Once the undercoat was dry we painted the Legionary using Army Painter paints: Pure Red, Barbarian Flesh and Leather Brown. No highlights or “black lining” just flat basic colours…
We finished off by painting the sand on the bases Desert Yellow.
Step 4: QUICK SHADE: STRONG TONE
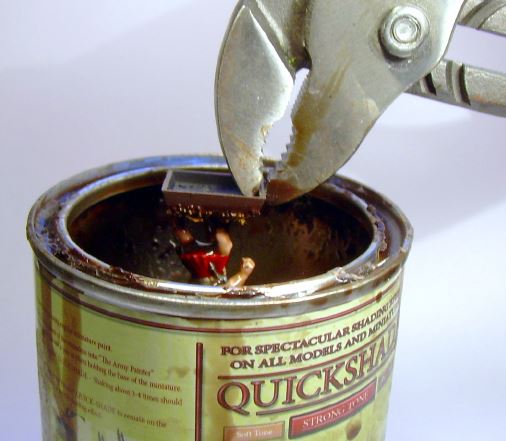
With all the base colours done we went outside with our can of Quickshade: Strong Tone and a pair of pliers. Next we dipped the Romans one at a time, shaking off the excess drops of Quickshade, while holding the base of the miniatures firmly. When shaking off the dip we recommend you go outside – it can be a bit messy! Keep swinging until you have shaken all the excess Quickshade off the miniature.
Note: Don’t be disheartened by the model now looking drab, muddy and shiny – this is only a temporary measure and will be taken care of in a coming stage…
Step 5: LEFT TO DRY FOR 12 HOURS & ADDED TRANSFER
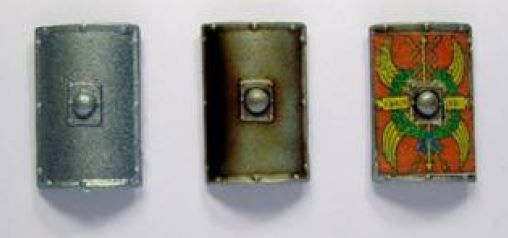
We left the Quickshade to dry over night and then applied a transfer to the shields before gluing the shields onto the figures.
Step 6: BATTLEFIELDS: FIELD GRASS & MOSS GREEN FLOCK
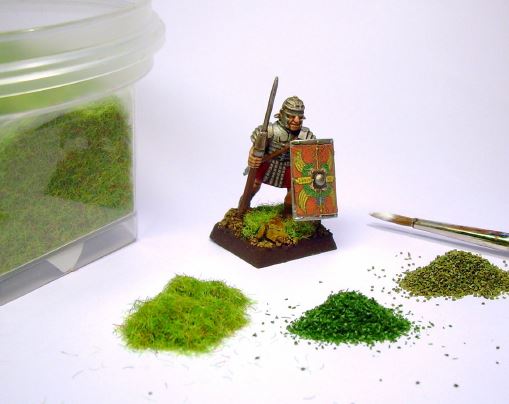
We finished off with a drop of PVA glue and Battlefields: Static Field Grass and Moss Green Flock. The side of the base was painted a dark brown to suit most gaming tables.
Step 7: COLOUR PRIMER: ANTI-SHINE MATT VARNISH SPRAY
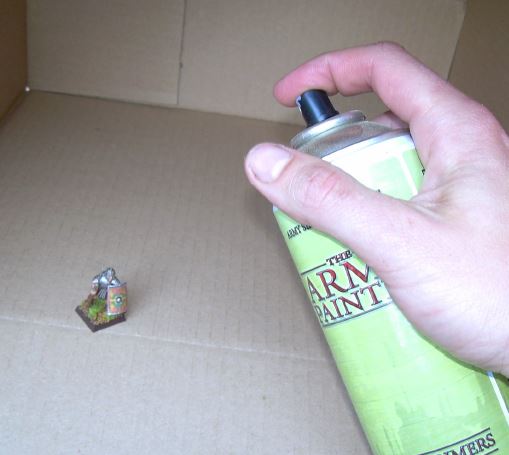
To rid the miniatures of the gloss shine from the Quickshade we gave the lot a quick coat of Colour Primer: Anti-Shine Matt Varnish. This is a totally matt varnish and transforms the model from a brown glossy mess into something you can be proud to show off on the tabletop!
Job done!