The struggle for control of a vital hill in Normandy is chronicled by Mark Barber. Mark also introduces a scenario allowing you to taste the action for yourselves!
“We Shall Fight in the Hills; We Shall Never Surrender” – The Assault of Hill 112
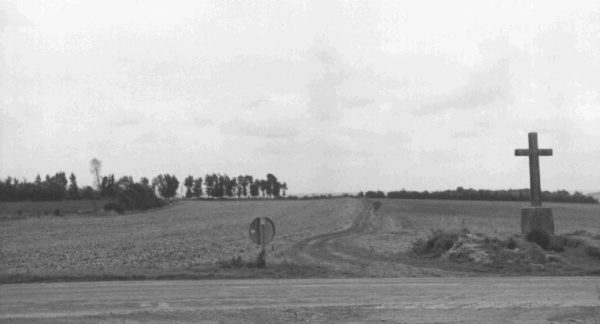
Some five kilometres southwest of the historical city of Caen is a tall hill which dominates the surrounding area. Gently sloping up from all directions, this ancient feature allows a commanding view of the countryside down over Caen itself and even as far as the north coast of Normandy. In the 14th Century it saw the invading armies of the English push their way through the Norman countryside; 600 years later General Erwin Rommel himself would describe it as the feature to control if command of Normandy itself was to be obtained.
As the British Second Army fought its way inland from the amphibious assault of June 6th 1944, stiff resistance was encountered on every step of the way. For General Montgomery, two objectives in his list of priorities were close to the top and came hand in hand – the capture of the strategically vital city of Caen, and the necessity to tie up German armour and reinforcements as they pushed in from the east so as to take the pressure off the US First Army to the west. To the southwest of Caen stood a tall hill with medieval villages and chateaus dotted amongst the wheat fields of its gentle slopes – the hill was named somewhat dispassionately with typical military brusqueness “Hill 112”.
Hill 112 had been identified as a key objective in the earliest days of the campaign. The feature was initially taken by the 11th Armoured Division in late June, but the position proved to be untenable. Once German forces moved back up the southern slopes to reestablish themselves, the defensive positions were significantly bolstered. With British and Canadian forces finally having a foothold in Caen by the second week of July, Montgomery decided that the hill needed to be retaken. The job fell to the 43rd Wessex Division under the command of Major General Gwilym Ivor Thomas. A ferocious man who had proved his mettle with a DSO for bravery during the First World War, Thomas was feared by his own men perhaps even more than the enemy; a quality which no doubt endeared him to Montgomery.
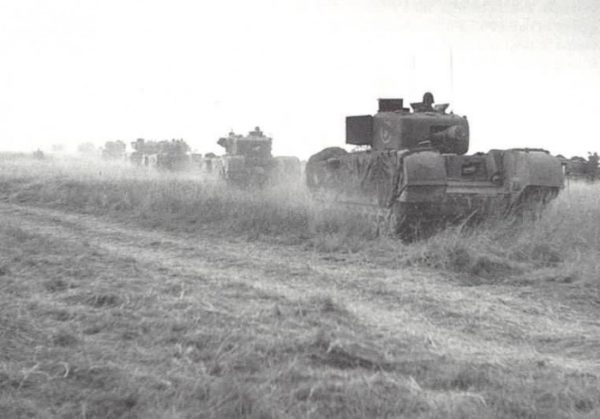
The 43rd Wessex Division itself was relatively inexperienced, with large elements having spent many months training for Overlord whilst based in Britain. The Division would be supported by Shermans and Churchills from the 4th Armoured and 31st Tank Brigades, together with substantial fire support from the 43rd, 15th and 11th Armoured Divisions and 3rd and 8th Army Group Royal Artillery. To augment this further, Naval Gunfire Support from RN warships at Sword Beach was made available. The plan was split into three phases: Phase 1 would see 130 Brigade and 9/RTR clear a company of SS Panzer Grenadiers near les Duanes before moving on to capture Chateau de Fontaine to eliminate a battalion HQ of 2/22 SS Panzer Grenadier Regiment. Meanwhile, 129 Brigade and 7/RTR would advance to take the high ground of Hill 112 itself. Phase 2 planned on 129 Brigade holding the hill whilst 130 Brigade assaulted the settlements of Eterville and Maltot to the east of the summit. 46 Brigade would attack Verson to the northeast and reinforce Eterville. Finally, Phase 3 hinged upon 129 Brigade continuing their defense of the hill whilst 130 Brigade set up a line of defense between Eterville and Maltot to the east whilst armour was moved south to cross the River Orne.
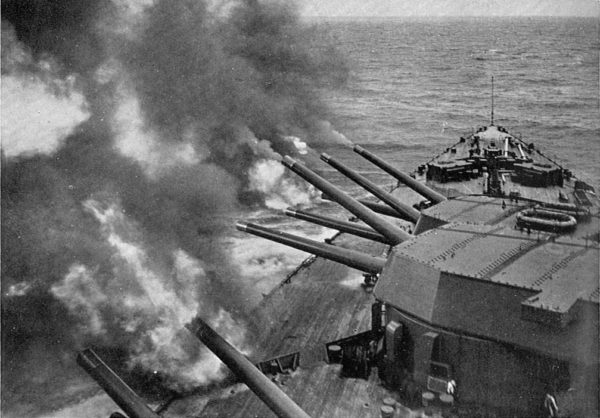
At 0445 on July 10th, 1944, the combined strength of the British guns broke the dawn silence. The ferocity of this bombardment cannot be overestimated. Batteries of the ubiquitous 25 pounders barked into life, acrid smoke wafting across their positions as the dull, metallic clangs of ejected shell casings punctuated the brief lulls between firing. The heavier guns of the AGRA added to the mayhem whilst over a dozen miles to the north, the grey, seaborne fortresses of the Royal Navy sent thunderous broadsides screaming down onto the German defenders. Gunter Balko of the 21 SS Panzer Grenadiers later described the experience of being shelled in Timothy Saunders’ “Hill 112: Battle of the Odon” as relentless and terrible, the effects leaving men unable to move and driving others to madness, summed up with his overriding memory:
“Your artillery is my worst memory of Normandy.”
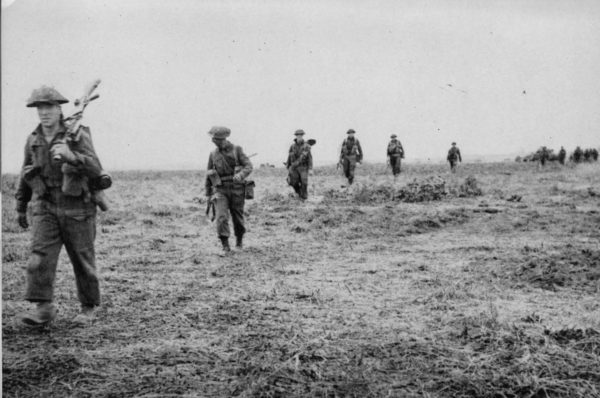
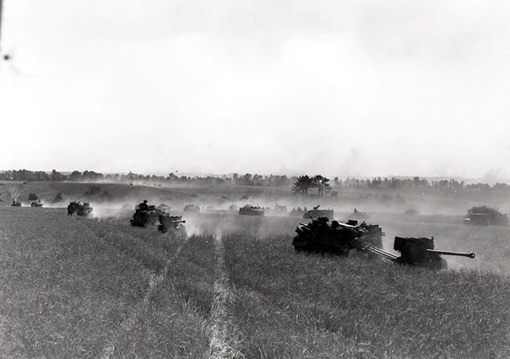
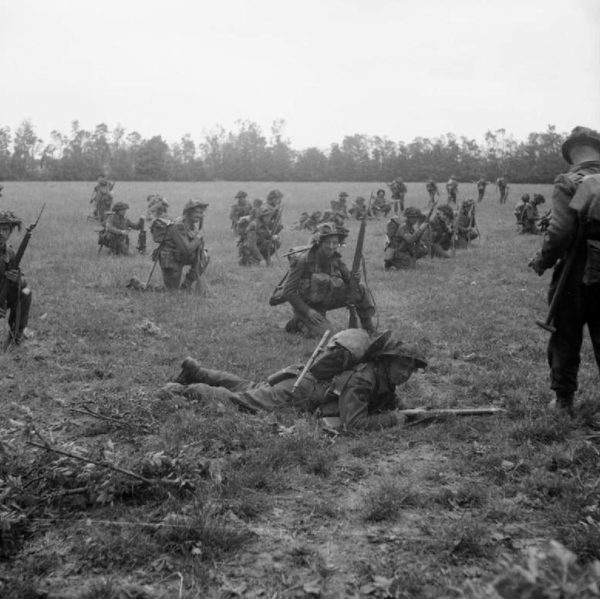
Fifteen minutes after the terrible cacophony began, four battalions of British riflemen rose up and began their long advance through waist high fields of wheat up the slopes of Hill 112, the rising sun peering over the horizon to their left and their Lee-Enfields held at the ready.
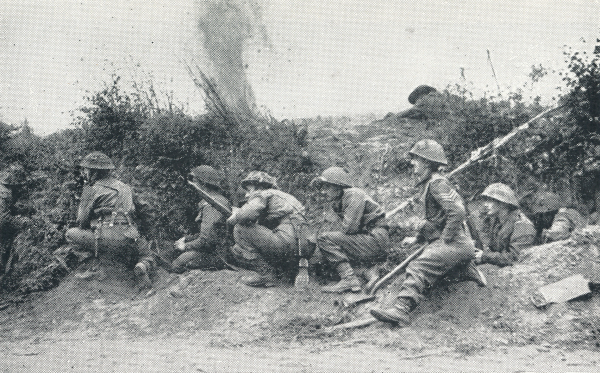
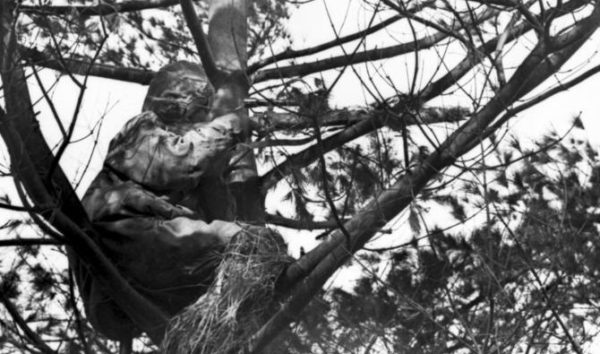
The 5/Dorsets were at the van of 130 Brigade’s push on the left flank; supported by Churchill tanks and under fire from nebelwerfers, they found the SS Panzer Grenadiers at les Duanes all but completely incapacitated by the ferocity of the bombardment The first German prisoners were captured only minutes after the initial advance. The ease of advance was not to last and soon British and German soldiers were engaged in bitter hand to hand fighting in the hill’s trenches. Likewise, casualties continued to mount as the Dorsets steadily advanced through Chateau de Fontaine against determined opposition in the buildings and barns of the old complex. Further casualties were sustained by German bombardments and a seemingly relentless supply of snipers, hidden away in trenches, chateau buildings, streams and even amongst their own dead.
Meanwhile the 4/Dorsets were advancing steadily on Eterville. After forming up, the Dorset men rose up out of the corn to the sound of a bugle and cheered before trudging up the shallow hill, the rumbling and clanking of Churchill tanks cutting swathes through crops around them. Defenders on the outskirts surrendered without a fight and the assault paused until the bombardment and ground attack runs by RAF Typhoons were complete. Tragically, the Typhoons also succeeded in attacking the Dorset men as they lay in wait, causing some casualties.
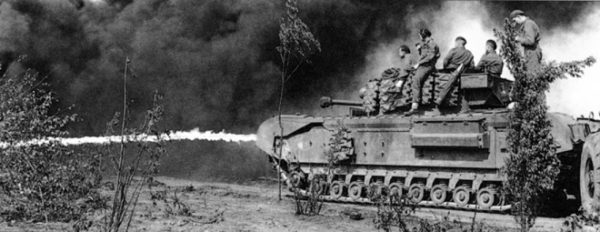
Flames whooshed out from Churchill Crocodiles as the advance continued; machine gun fire and shells from the tanks fired at every tree line, hedgerow, building and bush which might hide a German soldier. Then, suddenly, the first of the Churchills stopped dead in its tracks as clouds of black smoke wafted up into the morning air; a second was destroyed as return fire from anti-tank guns mounted on German half-tracks swept into the British forces. Eterville would not fall as easily as first anticipated. The fighting in the built up area would be slow and costly for both sides, with a German counterattack causing further delays once a British foothold had been established in the large village. By midday, the Dorsets had been relieved in situ by the 9/Cameronians. Realising that Eterville was far from secure, the Scotsmen dug in as the Dorsets moved on to their next objective.
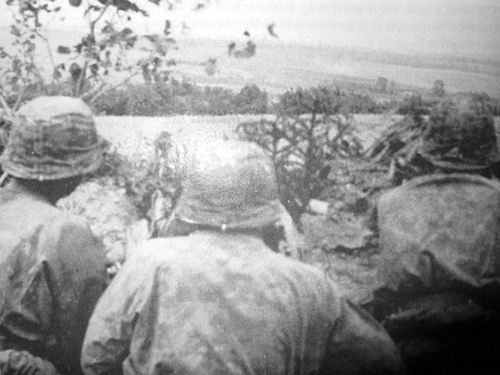
Meanwhile, to the west, 129 Brigade was faced with the open ground of Hill 112 itself. The operation began terribly for the 4/Wiltshires as the potent shells of the British 5.5 inch guns fell short and decimated their leading platoon, killing and mutilating their own soldiers before they had even begun the attack. Steadfastly reforming, the Wiltshires advanced valiantly alongside the Somerset Light Infantry up the hill. They encountered an elaborate system of German entrenchments and machine gun pits but with armoured support the British infantry were not delayed for long. Again, an abundance of German snipers caused major problems, compounded by further casualties sustained as SS soldiers deceptively pretended to surrender or dishonestly wore red cross arm bands only to lure British soldiers in closer before firing.
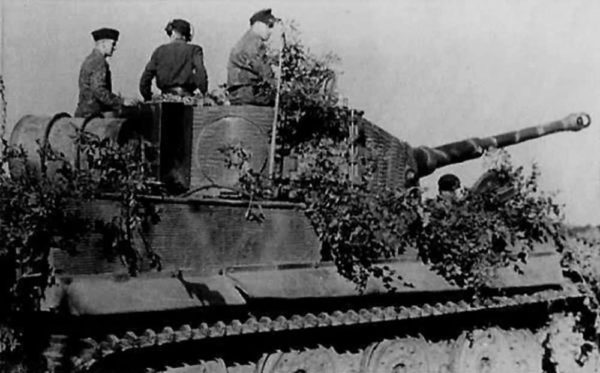
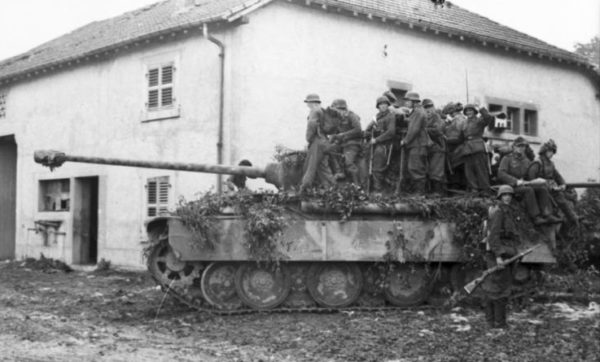
The day was about to become even worse for the Wiltshires – only two kilometers away was 102 Heavy Panzer Battalion of II SS Panzer Corps; 28 monstrous Tiger tanks which had only just arrived fresh in theatre. The heavy German tanks suffered their first casualties from the relentless British bombardment but advanced into battle to support their grenadier comrades; as the armoured leviathans rounded the crest of the hill they were engaged by the Wilshires anti-tank guns, and casualties began to mount on both sides. The Tigers quickly gained the upper hand against the undergunned Churchills, with one Tiger alone quickly destroying four of the British tanks. But, the deafening 17 pounders of the Wiltshires’ anti-tank units and supporting M10 tank destroyers soon evened the odds.
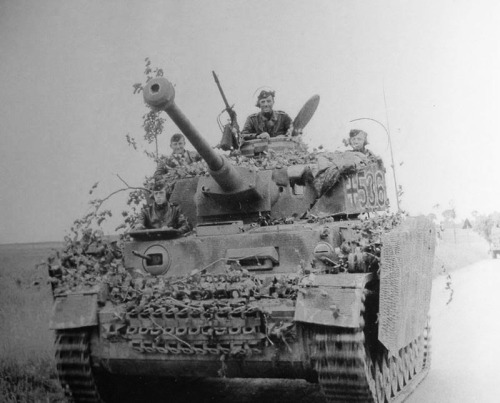
Men of the Somerset Light Infantry had a similarly daunting task as they advanced in the open towards the summit of the hill itself. Coming under fire from SS Panzer-grenadiers and Panzer IV tanks, the British assault continued despite heavy casualties. A string of burnt out Churchills punctuated the route, falling to German anti-tank guns and panzerfausts hidden amidst the corn fields. British infantrymen were cut down in lines by interlocking fields of fire from the deadly MG42s, the distinctive ‘ripping cloth’ eruptions leading to scenes of carnage more reminiscent of a previous generation’s slow advance across the fields of France.
Back with 130 Brigade on the left flank, the 7/Hampshires now advanced towards the settlement of Maltot. This entailed the now characteristic advance across open terrain and a gently sloping hill, with only crops for cover – the position also seemed lightly defended so a further barrage was deemed unnecessary. This decision proved to be disastrous. The Tigers of 102 Heavy Panzer Battalion lay in wait and no sooner had the British Churchills lumbered onto the outskirts of the village when a vicious barrage of 88 shells tore through them, stalling the advance dead in its tracks. Despite every effort to move up and relieve the Hampshires, a force from the 5/Dorsets was forced to fall back towards Chateau de Fontaine. Violent street fighting ensued from house to house as the Hampshires continued to press the advance, at great cost. By 1300, now facing determined SS infantrymen and significant numbers of Tigers on the slopes of the high ground, the attack had ground to a halt. By mid afternoon an analysis of the situation showed that Hill 112 had not been secured and rallying German defenders were now threatening the previous relative stability of positions at Eterville and Chateau de Fontaine.
After a German counterattack was blunted, the decision was made to press on and attempt to support 130 Brigade at Maltot. However, attempts to relieve were hampered when RAF Typhoons misidentified their targets and an entire squadron attacked elements of the 4/Dorsets. Heavy fighting continued throughout the afternoon. Maltot was slowly becoming untenable.
The final desperate gamble of the entire ill fated operation came in the evening, when the men of 5/Duke of Cornwall’s Light Infantry under the command of 26 year old Lieutenant Colonel Dick James were ordered to take Hill 112. Advancing up the darkening slopes as the evening sun dipped to the horizon, the Cornishmen moved valiantly forwards after a stream of AA gun fire swept across the summit of the hill. Advancing under the cover of smoke, the DCLI miraculously succeeded in taking Hill 112. For a brief moment, it seemed as though James’ men had turned the slaughterous stalemate into a British victory.
The Cornishmen dug in to defend as the skies turned to night. 6 and 17 pound guns were moved up to the defensive position. However, the Germans were not defeated: barrages of fire tore through the woods at the summit of the hill as wave after wave of counterattacks were repulsed by 5/DCLI. The heavy guns were slowly defeated and armour would now have to be stopped at close range by PIATs. During the night the valiant Lt Col James fell to enemy fire. As more officers and NCOs were killed and leadership dwindled, the final ragged survivors of the DCLI could hold on no longer. Some 75 men, approximately 10% of the original strength, were all that survived to retreat back down the darkened slopes of Hill 112.
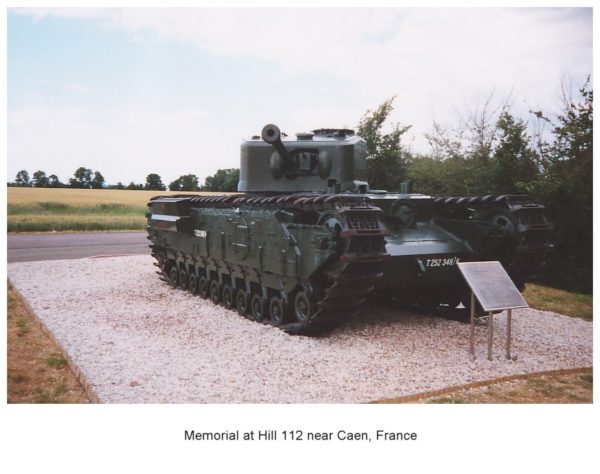
The fighting would continue for weeks to come, but the gentle slopes of Hill 112 remained unconquered by either side. A state of permanent stalemate existed for some time, with both sides blasting and bombarding the hill to oblivion to prevent the site of strategic importance falling into enemy hands as a poor second prize to actually holding it for themselves. On August 4th, with German forces retreating from the entire area, the hill was finally taken by the British. 2000 men were killed or wounded in the Wessex Division’s attack on July 10th.
Hill 112 Scenario
After an intense bombardment, British forces are advancing across a wide front with the aim of capturing key geographical objectives. German infantry is dug in and well prepared, although armoured support is not yet on scene.
Forces
As in the real battle, the British infantry are faced with getting up the hill by foot. For this scenario, no transport options are available for British soldiers. To emulate the large number of German snipers employed in the battle, the German player receives a free Regular sniper unit for each 1000 points he spends on his forces.
Set-Up
The German defenders pick a table side and must set up all infantry and artillery in their half of the table (24” on a standard 6’ by 4’ table). The actual location saw a variety of terrain, with the built up areas of large villages to farmyards, fields and woods. Heavily built up areas should be avoided. The hill was very gently sloped so steep inclines should be avoided, although if there is any higher ground it should favour the German side. Players should experiment with different scenery set ups to try to make the game more challenging for different sides.
German units may use the hidden set-up rule and, in addition, all infantry and artillery units may begin the game as ‘dug in’. A dug in unit counts as ‘down’ when shot at even if its not down (an additional -1 to hit and the number of HE hits halved), If the unit goes ‘down’ while dug in the benefits of being ‘down’ are doubled. Units count as Dug In until they move. If possible mark the locations of the vacated foxholes so they can be reoccupied or captured by the enemy later. All armour and vehicles must be left in reserve.
The British attackers are not on the table to start with. The British player must nominate at least half of their force as a first wave. This can be the entire force if the player wishes. Any units not included in the first wave are left in reserve.
Objective
The British player must move his units into the German defense zone, which forms the first quarter of the German table edge (12” on a standard 6’ by 4’ table). The Germans must try to stop them.
Preparatory Bombardment
The British player receives a preparatory bombardment in accordance with the rules on p.118 of the Bolt Action rule book. This bombardment automatically succeeds, is subject to the normal national rules for British bombardments and receives a further pin marker in addition to the effects rolled up on the bombardment table.
First Turn
The battle begins. During turn 1, the British must move all of their first wave onto the table. These units can enter the table from any point on the attacker’s table edge, and must be given either a run or advance order. No order test is required for first wave units.
Special Rules – Playing Dead
With every German infantryman killed, the German player rolls a single dice. On the roll of a 6, that soldier is playing dead and is put to one side. Immediately before turn six begins, all of these models may be placed anywhere in the German set up zone but not within 6” of a British unit. Every German soldier playing dead may fire once and is then removed from play again before the turn begins.
Game Duration
The game lasts for 6 or 7 turns; at the end of turn 6 roll a dice and on a 1-3 the game ends, a 4-6 continue for a 7th turn.
Victory!
The British score 1 victory point for each German unit eliminated and 2 points are scored for each British unit which ends in the German defense zone. The Germans score 3 points for each British unit destroyed. A clear victory is won by scoring 4 or more victory points more than the adversary; to emulate just how difficult it was during the actual battle for either side to gain a clear upper hand, a 0-3 point spread is considered a draw.
You can find rules for more iconic scenarios in our brand new campaign book; D-Day: Overlord. You’ll also find a wealth of background information, along with new units and theatre selectors!
Head over to the webstore now for more information, and to pick up your copy!