Update 2 on painting and gluing.
Home › Forums › General Discussion › Update 2 on painting and gluing.
Tagged: assembling, gluing, Painting
- This topic has 2 replies, 2 voices, and was last updated 5 years, 11 months ago by
 George.
-
AuthorPosts
-
August 1, 2020 at 3:23 pm #180309GeorgeParticipant
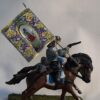
Well, my first unit of cavalry is coming along. Even my wife, who doesn’t much get into my passion for this, finds them detailed and beautiful (I’m not ready to post pics just yet 🙂 ). So, as I worked through I did find that I had to take apart the cavalry and start over. I took my time so as not to damage the pieces. It was also easier than I thought it would be. I used Tamika Extra Thin Cement to assemble my models. What I’m finding is that the glue doesn’t stick very strong (even the first time in some cases). I’ll be putting on an arm and something else will fall off. That was really getting to frustrate me. It was also messing up the paint job, too.
So here is what I’m learning from this.
1. Don’t completely assemble all the pieces. It is difficult to paint a torso with hands, horses, and accessories blocking the way. It makes for sloppy work.
2. I’m not certain on this one yet but paint one piece at a time. Say start with the torso, then glue on an unpainted arm. Let the glue dry then paint the arm. Let it dry and add another piece and so on. What I’m not certain on is putting the piece on unpainted. Perhaps I should paint the piece first and attach it? I notice that one is not supposed to paint inside the joint where the two pieces will be glued together.
3. Need a stronger glue. This Tamika stuff doesn’t have enough hold for me. I looked online and saw Testers has a brand that is advertised to be very strong. Perhaps I should give that a try? What have other modelers used?
August 4, 2020 at 8:21 am #180384 invisible officerParticipant
There are some Special plastic glues. I use a German brand, a liquid one called Faller Super Expert. It sets much faster than average plastic glues, the Company also had that, just called expert. Both are very strong.
Some do plastic miniature glueing with super glues. Not my way but for those who want to try there is a trick. These Cyanacrylat glues settle by reacting with the water in the air. So in a typical dry air apartment and a hot dry day they are slow. Just but a little bit of water or spit on one side and the glue on the other. you get a true one second glue.
Use just a bit of glue, to much get transformed into filler like stuff. Without the water it normally runs out and sets on the miniature. Often getting from clear to white.
For heavy parts (Like metal) you can replace the water with the water based White glue used for wood. It adds some fexible strength to the brittle super glue.
Just try with some trash parts and use what works for you.
There is no one for all solution. Like the parts, I add shields later but most other parts are fixed before priming. It works for me but if you like less restricted Access – why not.
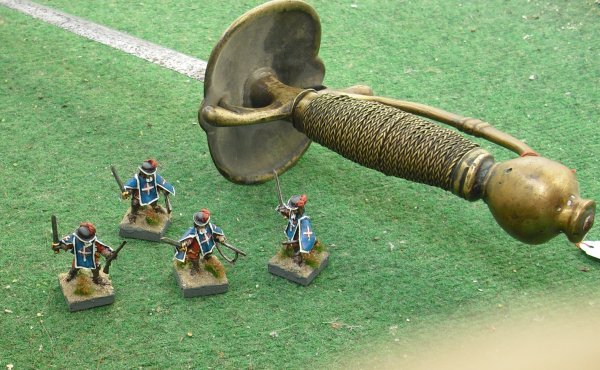
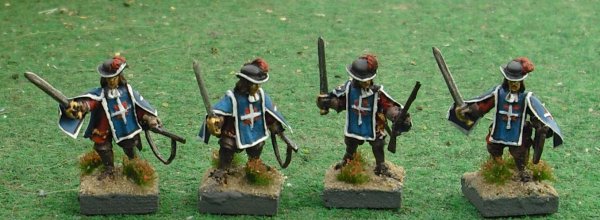
The added pic shows IO converted French royal Musketeers. The carbines are from your horse set and the cassocks are part metal foil, all assembled before painting.
-
This reply was modified 5 years, 11 months ago by invisible officer.
Attachments:
August 4, 2020 at 3:42 pm #180393GeorgeParticipant- Thank you for your info Invisible Officer. Your pics are great. Hopefully, I’ll be able to make mine as beautiful.
-
This reply was modified 5 years, 11 months ago by
-
AuthorPosts
- You must be logged in to reply to this topic.