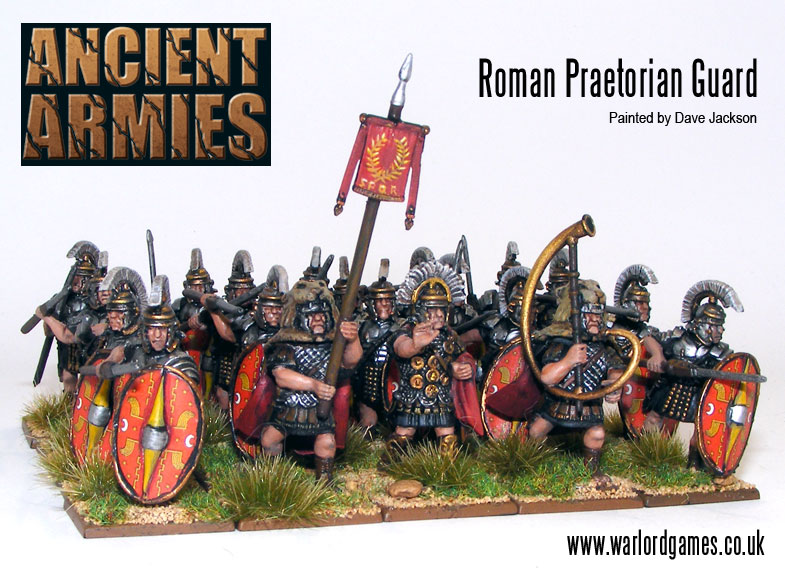
Not content with running the WAMP painting competition for us recently, Dave ‘Undave’ Jackson has also found time to paint a unit of our plastic Praetorian Guard. Even better Dave explains how he did it in this painting guide.
Undave acquired his first miniatures at age eleven and armed only with three pots of Humbrol enamel and a really big brush proceeded to make a real mess of them. Twenty years later his painting has come on a little and he’s always eager to pass on all the little tips he’s picked up along the way. Undave has been a regular poster on such forums as Cool Mini or Not, Platoon Britannica, and WaMP, as well as the Warlord site.
Take it away, Dave…
Painting Praetorian Guard by Dave Jackson
This article aims to provide a step-by-step guide to painting Warlord Games’ plastic Praetorian Guard. Using a variety of simple and easy techniques I hope to show you how to produce a tabletop unit you can be proud of. Although this article deals specifically with Praetorians the techniques used can readily be transferred to Legionaries, Veterans or even Auxiliaries.
To follow this guide you will need the following Games Workshop Citadel Colour paints:
• Boltgun Metal
• Chaos Black
• Badab Black wash
• Chainmail
• Black ink
• Tallarn Flesh
• Dheneb Stone
• Dwarf Bronze
• Ogryn Flesh wash
• Devlan Mud wash
• Vermin Brown
• Skull White
• Shining Gold
• Bestial Brown
• Kommando Khaki
I recommend using a standard, small drybrush and basecoat brush. Once you’ve cleaned, assembled and sprayed your Legionaries black using Army Painter black primer you’ll be ready to begin.
To help us with the tutorial I’ve enlisted the help of three intrepid recruits – Legionaries Primus, Secundus and Tertius! FRONT AND CENTRE!
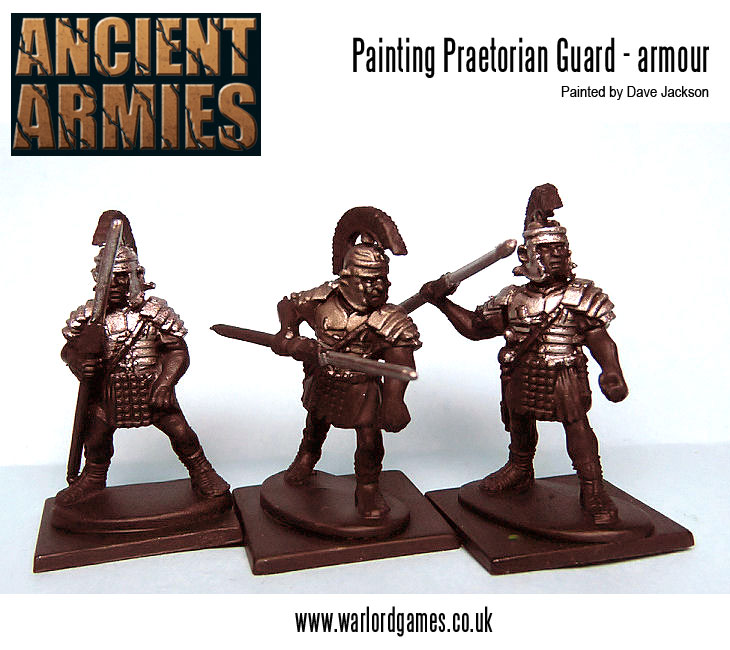
Primus: First of all give all the areas which are destined to be armour a basecoat of Boltgun Metal. The lead shaft of the pilum can be given a coat of Boltgun Metal mixed with a spot of Chaos Black. Try to be as neat as possible but if you go over a bit onto the tunic or face it won’t matter too much as we’ll be going over them again in a later stage. One thing I will say at this point is to make sure you thin your paints! Blobbing paint on straight out of the pot is a sure fire way to ruin both your brushes and your minis. Always use a palette and add a little water to your paints, that way the paint will go on easier and won’t end up obscuring all the fine detail.
Secundus: Next apply a liberal wash of Badab Black to all of the parts you just painted. The wash will run into all the recesses and stain the metals a darker colour. Make sure to pay attention to the edges of the armour where it meets the tunic as we want to make sure there is a strong transition between the two. For some reason on the photo it appears to have turned the armour a bit brown and I suppose at this point you could apply a wash of Devlan Mud if you wanted your lads to look like they’ve been out in the field for a while. Our brave boys are Praetorians though, and will endeavour to look their parade ground best come what may.
Tertius: At this point we are going to bring the metals back up to a polished shine. Begin by re-coating the plates in Boltgun Metal making sure this time that you don’t paint into the recesses where the wash settled. After this you can use Chainmail to further highlight the armour, painting only the sharp edges of the armour segments. Also give the tip of the pilum a small touch with the Chainmail to pick out the tip. If you need to you can further reinforce the separate segments by adding a small amount of Black ink to the gaps between the plates, This works particularly well on the shoulders.
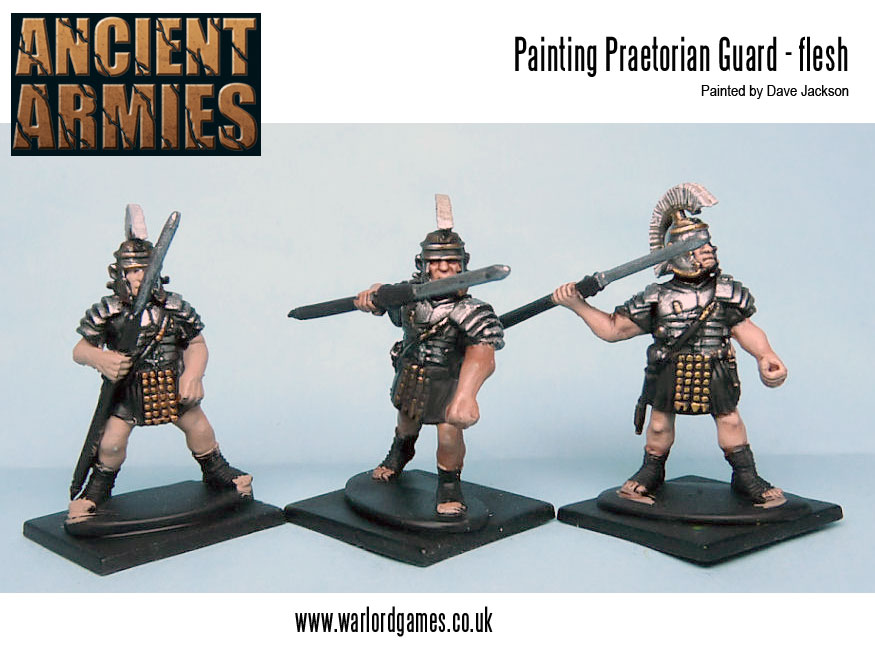
Primus: Using Tallarn Flesh, basecoat the face, arms, legs and toes making sure not to go over any of the lovely armour you’ve just painted. Paint the horse hair plume with Deneb Stone and pick out all the appropriate details like the armour hinges, helmet trim and cingulum (studded belt and apron) in Dwarf Bronze. For the last step you’ll be going over some parts of the silver armour, notably the trim and wing motifs on the helmet.
Secundus: Now it’s time to wash the skin areas with Ogryn Flesh making them nice and dark for that Mediterranean tan. Using a Devlan Mud wash, do the same to the bronze details and the plume. Only use a very small amount for the hinges as you don’t want the wash running onto the rest of the armour.
Tertius: Once the washes have dried it’s time for some highlighting again. Starting with a mix of Tallarn Flesh and a little Vermin Brown gradually paint the raised areas of skin in several coats, using less brown and covering less area each time. The aim is to get progressively lighter the more raised the area is. On the knees for example, the area under the kneecap would be left dark whilst the area above would be lighter and the centre of the kneecap would be lighter still. Once the skin is finished we can turn our attention to the plume. A simple drybrush of Deneb Stone followed by a lighter drybrush of Skull White ought to bring out the texture nicely. The final step of this stage is to bring out the edges of the bronze with some Shining Gold. Apply this sparingly to all the areas you painted Dwarf Bronze, paying particular attention to the helmet details. To highlight edges it helps to run the brush sideways along the ridge of the detail. This way the bristles will not be allowed to deposit any paint in the recesses.
Now it’s time for the finishing touches.
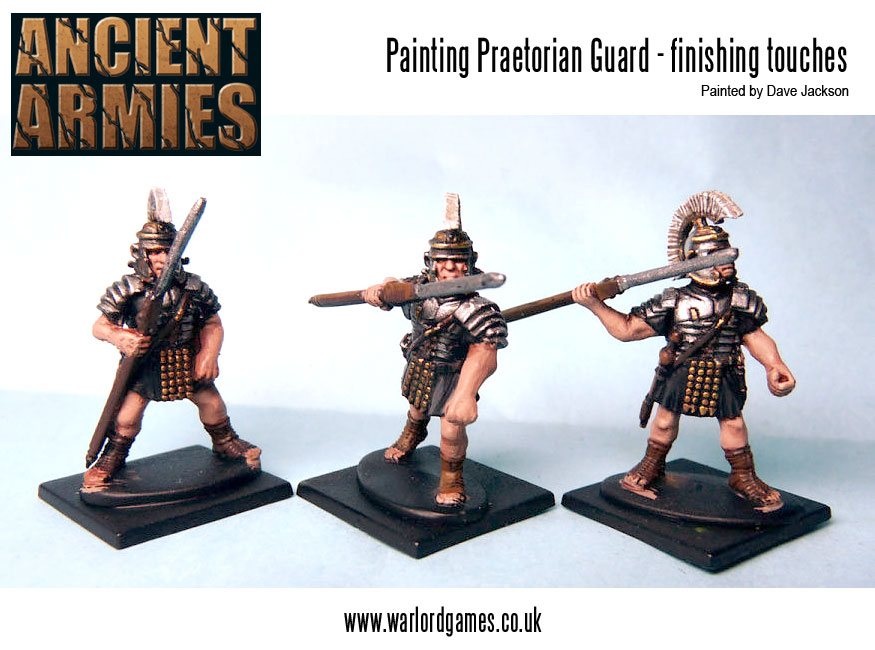
Primus: We are going to be giving these Praetorians black tunics as befits their sinister nature. At this stage it can’t hurt to go over all the areas of tunic with Chaos Black to make sure that you get rid of any spots where you’ve gone over with other colours. All the leather and wooden areas can also be given a basecoat of Scorched Brown, this includes the scabbard, baldric, sandals and pilum shaft.
Secundus: Highlight the edges of the Scorched Brown using Bestial Brown. The sandals can be given a light coat of Bestial Brown as well. Now for the tunic. Many people would highlight black using grey but in this case it would leave the cloth of the tunic looking rather harsh. Instead of adding grey to the Chaos black I’d recommend using Kommando Khaki. This will produce a much softer, muted tone to the fabric. Using progressively more Khaki in your mix highlight the folds in the tunic with the lightest parts nearest the edges of the garment leaving the recesses pure black. It’s hard to see in the photo as the result is still quite dark but you want to keep going until you get to a 50/50 mix of black to Khaki at the hem of the tunic.
Tertius: For the final stage give the sandals and any area of brown that you think needs it a wash of Devlan Mud. Most of the other leather areas are quite small so won’t need doing and the pilum shaft ought to be okay without any washes. The very last thing to do is apply a Badab Black wash to the tunic. This will help to darken it all down again as well as smooth out any transitions in your highlighting.
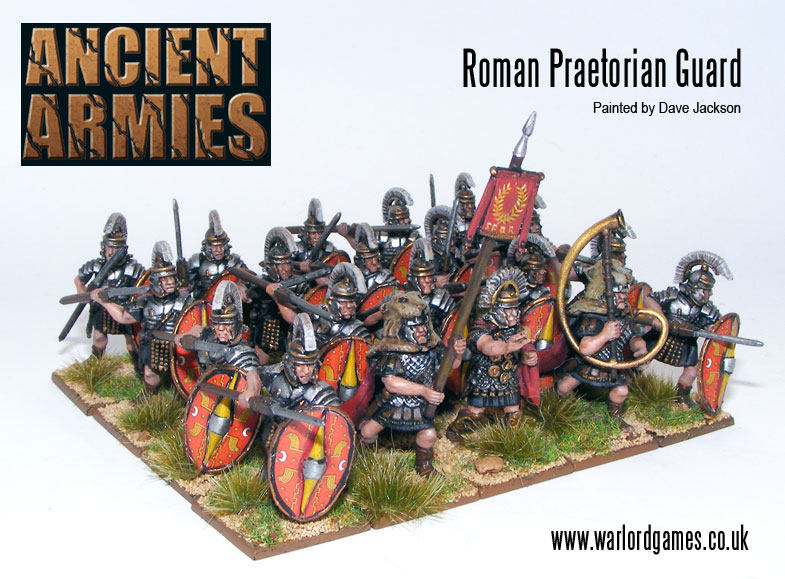
All that remains now is to base your Legionaries and attach their shields, both of these things will be covered in other tutorials. Hopefully this article has given you some tips for making your Legions stand out on the tabletop and don’t forget to post pictures of your finished miniatures on the Warlord Games Forum. We’d be delighted to see your efforts.

