Tim Bancroft strikes again! Tim is becoming a more-and-more regular contributor to the Warlord Games Newsletter – having shared a wealth of his own Antares Fiction, and some of his other musings on the game, the universe and so much more!
Not only that, but Tim also co-hosts the Freeborn Shard Podcast alongside Justin Shearer – discussing all of the latest Antares news, rumours, and goings-on…
However, today Tim’s here to share some thoughts on one of the latest product releases…
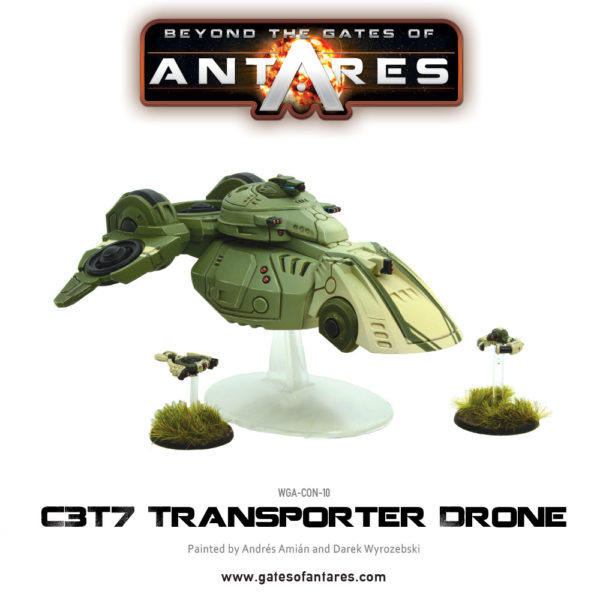
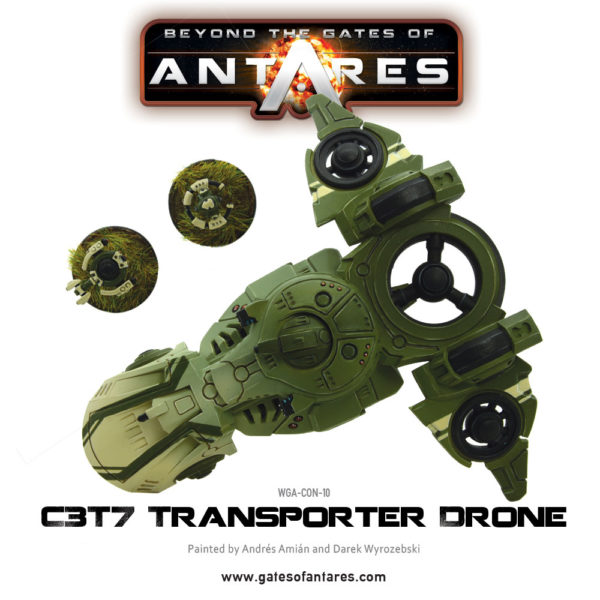
 With the recent release of the C3T7 Transport Drone model, there’s going to be an inevitable surge in the rules governing transports. These transporter related rules include the Vehicle Damage Tables (p.37 of the Antares rulebook), transporting, disembarking and embarkation (p.95-96), Distort Dice (p.168) and the deployment rules (p.140), each of which addresses a different aspect of transport use. What’s more, the T7s are MOD2 which complicates their deployment a little. As a result, I thought it might help to pull everything together to show how the transports work in practice.
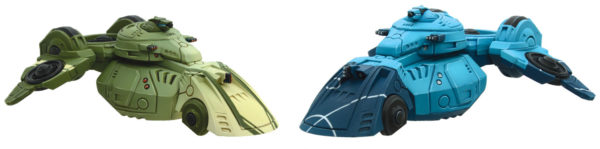
To illustrate what happens we’ll run through a scenario with an example army: a Concord Combined Command Battle Force (1250 points) of 12 Order dice. The units in our force are two C3T7s (T7/1 and T2/51), three C3 Strike squads (Alpha, Beta and Gamma), a Strike Command, a C3 Support team with X-Launcher, a C3D1 drone, Targeters and a NuHu. We’ll use Scenario 2, ‘Reinforce the Position’, from the main rulebook (p.142).
Our opponents? Ghar, of course.
Transport capacity
Before deployment, it must be made clear to an opponent which units are in transports. This is normally carried out openly but, if needed, exactly which units are in a particular transport can be recorded secretly and only revealed to the opponent when the units disembark. Obviously, once a unit has moved into a transport on the table, the opponent knows!
For now, we can cram a Strike squad (Strike Alpha) and the X-Launcher team into our first transport, T7/1. It’s perfectly okay to have two units inside a C3T7 as it is a ‘Transport 10’ vehicle. ‘Transport 10’ means the vehicle can transport 10 troops or support weapons plus all their accompanying drones.
Or support weapons? Absolutely. Support weapons count as a single trooper, so a five strong Strike squad plus a pair of Support crew with their X-Launcher counts as a total of 8 spaces. We could have crammed the NuHu plus its attending drones to make three units transported and still have a spare seat: it’s the total seating capacity that’s key.
Even if we had the space, though, we could not put half a squad in our almost-full T7/1 and the rest of the squad into the other: a unit cannot be split between multiple transports. Moreover, heavy weapons are not support weapons in this context, so we can’t stuff an X-Howitzer into the empty seat beside our Strike squad!
A crammed T7 sounds a bit of a worry, though, so we’ll put the NuHu and Strike Beta in our other transport, T2/51.
Deployment before the first turn
There are a number of deployment rules we need to be aware of that apply to MOD units and transports, so it’s worth going over them.
A transported units’ order dice and the transports’ MOD dice count towards any scenario limitations about the number of units able to be deployed at the start of the game. For Scenario 2 the limitation is half the force in dice terms, rounded up – in our case, six order dice.
T7/1 plus its contents counts as four dice towards the total we are allowed to deploy prior to the start of the game (MOD2 C3T7 + 2 normal units). With the two remaining dice we decide to deploy the Targeter shard and the Light Support Drone, both of which have one dice each.
Having decided who is going to be initially deployed, we must then determine where they are. Importantly, this initial deployment or placing is a separate stage in the game that occurs before the start of the first turn (p.140). Though we could use simple slips of paper, in BtGoA we make use of what we have already just for convenience: the coloured order dice and the dice bag. So, players put a single order dice into the bag for each unit or model that is to be placed onto the table to represent each unit’s presence, not its capabilities. The dice are then drawn out and the owning force places a unit or model onto the table.
For the purposes of initial deployment only, the number of MOD dice a unit or model possesses does not count: a command crawler has only one dice just as the T7 only has one dice. Similarly, units that are being transported do not get a placement chit or dice, either. This means that any units that are already within the T7 do not get to put a dice into the pre-game deployment bag and are automatically placed within the transport when it is placed.
As we have T7/1 plus its cargo, plus the Targeter and C3D1, we just put three dice into the deployment bag. The good thing is that when we place our T7/1 transport on the table, we are effectively putting three units down in one go!
Turn 1 – Distort Dice and coming on from off-table
Scenario 2 calls for units to be off-table, either coming on from Turn 1 or Turn 2. Any unit we want to come on must have all their order dice put into the bag at the start of the turn on which they arrive. This is in addition to the dice for the units on-table. So, having finished deployment, we place eight dice into the bag at the start of Turn 1: four dice for T7/1 and its cargo, one for the Targeters and one for the C3D1 (1 dice), plus two more dice for the Strike Gamma and the Command squad.
The first dice out of the bag is for Concord. We activate our C3D1 and it skims across the table looking for some Ghar. The next dice drawn is the Distort Dice and we wait with the proverbial baited breath to see who it affects. Inevitably, we draw a green dice. We can’t make the Targeters go Down as they only accept Run, and we do not want to put it on the transport. Unfortunately for us, even though we have the off-table Strike Gamma, the Distort die’s ‘Down’ order must be given to a valid, on-table unit.
This is important from a transport’s perspective: the effected Distort Dice can only be given to a unit that can receive Down orders. The only order we can give to off-table units is Run or Advance, and that specifically to move the off-table units on to the table. That means off-table units cannot be given the Distort Dice. Further, the two units inside our T7/1 can only be given Rally orders, to remain inside, or Run/Advance orders to disembark.
That means our transport T7/1 protects Strike Alpha and the Support team from the effects of the Distort Dice: nice! However, we have no option but to give the Distort Dice to T7/1, so it goes Down. Luckily for us, it is a MOD2 but it will have an impact on us later as we wish to move it quite a long way.
Turn 1 – Continuing movement
The next two dice we draw from the bag are also green. The first is allocated to the Command squad and it comes straight onto the table (no order test needed on Turn 1) and the second is used to give a Run order to Strike Gamma to rush the poor infantry into the shelter of some ruins.
The Ghar now pull a few dice, move their suits, Tectorists and flitters. When another green dice comes out all we have left are the MOD2 transport and its cargo: Strike Alpha or the X-Launcher team. As we want to see what the Ghar do, we decide to allocate it to Strike Alpha. Unfortunately, without disembarking we can only give Strike Alpha a Rally order, effectively operating as a ‘pass’ because it has no pins.
Another grey dice comes up and the Ghar player moves a unit of six Outcasts into the open. To our delight the next dice is ours, again, so we give T7/1 its second MOD dice, an Advance order, and move it forward 5”. It fires its Plasma Light Support on the Outcasts, scores three hits and the Ghar fail their saves; they take a break test, fail and run. Success!
After a few more dice for the Ghar player our final order dice turns up. We can only give this to the Support team so we give it a Run order to disembark from the transport. The X-Launcher team scurry behind some cover, their spotter drone scanning the table for targets.
Did you notice we were able to disembark the X-Launcher team even though T7/1 moved? This was because it made an Advance order (p.95-96). Had it made a Run, then the X-Launcher team would have been stuck inside and only able to receive a Rally order, effectively another ‘pass’.

Turn 2 – Final deployment
In turn 2, we decide to bring on T2/51 so add its four order dice to the bag. We could delay this, of course, but there seems little point. Importantly, though, this highlights another rule that transports affect: if you don’t want a unit to come on, don’t put its dice in the bag. In the case of a transport though, this applies to the transport’s dice as well as its occupants!
The first dice out of the bag is green. This is a great opportunity to quickly establish a threatening flank force so we state we want to bring on T2/51. This turn, we have to make an order test (p.140) but fail, so the order dice is put to one side. However, the transport doesn’t go Down as we are testing for it to come on.
We pull another green dice and immediately give it to T2/51 again (it is MOD2, after all). This time we pass the order test, Advance 5” onto the table and fire its PLS at a Disruptor cannon now only 9” away. We now have all our units on the table and are threatening the Ghar flank.
It’s worth mentioning that if this second attempt to come on had failed, the two units T2/51 transports, Strike Beta and the NuHu, would also have been stuck off-table. When their dice were eventually pulled, we would not have been able to give them an order at all (p.96) and would have to leave them to it.
Turn 2 – Disembarking
As T2/51 only made an Advance, we can now deploy Strike Beta and the Nuhu by disembarking them (pp.95-96). So, with the next Concord order dice, we disembark the Strike squad, give it a Run order and claim an Assault against the Disruptor Cannon, just as if the squad were leaving a building. Delightfully, the Disruptor Cannon is wiped out in Point Blank Shooting from our brave troopers.
This is an interesting twist on the Assault rules when coming on-table (p.140). Whilst the transport certainly came on this turn, it did not make an Assault. However, when Strike Beta made the Assault it was already on the table so could do so. This not only adds to a transport’s capability but also enables some tactical manoeuvring in respect to embarked units.
Subsequently, we deploy all the other units from their transports using Advance orders: Strike Alpha, the Command Squad and our NuHu all come shooting from their transports and cause disarray amongst the Ghar. Importantly, even though T7/1 still has both its MOD dice it cannot Run as it disembarked at least one unit this turn. However, we are happy with it supporting the troops it deployed so give it Advance orders and allow it to fire onto the encroaching Ghar.
Turn 3 – Embarking, back on the bus again
We start off Turn 3 by Advancing T7/1 closer to T2/51. Unfortunately, the dice goes against us and Strike Beta and our NuHu get into a spot of bother. The nearby T7/1 has already moved this turn, which prevents the NuHu boarding, but T2/51 is only 10” away and has not moved. We give the NuHu a Run order and it embarks into T2/51, very quickly joined by the harassed Strike Beta.
As the NuHu and Strike Beta embarked this turn, T2/51 cannot Run or Advance. Instead, we give it a Fire order with each of its MOD dice and succeed in putting several pins on the approaching suits with its single Plasma Light Support. Hopefully the pins will make them think twice and this also reflects the transport covering the embarkation of units this turn.
Turn 4 – The end of the road!
Turn four starts with appalling luck: the first dice drawn is the Distort Dice, the second a green order dice. The table is now a little complicated but, at least, T2/51 has its squads on board so (perhaps in panic) we give it the Distort Dice and it goes Down. Note that this makes no difference to the units inside: both the NuHu and Strike Beta could disembark again as the Down order is not on them, but on their transport.
The next dice is grey and the nearby Ghar troopers attack T2/51 and hit with four of their disruptor blasts. As the C3T7 has a Res of 13 and the Ghar Disruptor only has a SV of 1, it is heavily armoured and T2/51 easily makes three of the Res saves. However, T2/51 still takes 2 pins as disruptors apply two pins to non-Ghar targets just on a hit (p.79).
What about the last Res save? Ah. The other Res save rolled a ‘10’, an automatic fail, so the shot goes through. However, as T2/51 was heavily armoured against the disruptors, the Vehicle Damage Table roll is only a D5 (p.37). The Ghar roll a ‘4’, meaning we take one more pin and go Down, so we take T2/51’s second MOD dice from the bag and give it a second Down order.
Things aren’t going well: this turn, T2/51 is going nowhere. Whilst it now has three pins, there is no need (yet) to take a Break Test unless the Vehicle Damage Chart says so. T2/51 would, however, still Auto-Break when it has eight pins, a number equal to its Co stat.
We pull another dice from the bag: this is also grey. Smelling a kill, the Ghar player Advances their command crawler into effective range and lets loose with the dual scourers, this time in Concentrated mode. T2/51 takes two hits and, with its Res of 13 having been reduced to 9 by the scourers’ SV, succeeds at one save but fails the other. The Ghar roll on the Vehicle Damage Chart at full effect as T2/51 is no longer classed as heavily armoured. The Ghar player rolls a 10 and Transport T2/51 is immediately destroyed!
But don’t panic! Even though T2/51 is now removed from the table, the NuHu and Strike Beta have a second chance (p.96). Each model inside the transport must make a close attack Res save which, in our case, is 6 for all six figures as the NuHu’s Nano drone is still in one piece. The NuHu succeeds and Strike Beta fails two. Whilst Strike Beta takes two pins, one for each model removed (like an assault), they and the NuHu also get to make an immediate ‘M’ escape move before going Down.
Even in its destruction, the C3T7 protects its cargo.
Summary
In using a transport drone, I found there were a few rules that I had not explored. However, the application of those rules was quite straightforward and easily recalled with a little imagination: how can a unit jump onto a transport speeding past a metre above their head? Of course, the deployment rules need a little more focus to understand but once the light clicks that it is not order dice that are being pulled, they become obvious.
Unlike the luckless C3 player posited in this article, I have found the C3T7 to have a variety of uses, such as:
– to bring or deploy several units onto the table at once,
– to transport troops quickly with its MOD2,
– to act as a safe haven with its Res of 13 and use of the Vehicle Damage Chart, and
– as a support platform with its RF3/SV3 Plasma Light Support.
In fact, transports were much more useful than I realised and, as with many of the units in Beyond the Gates of Antares, their capabilities were well worth exploring. In the hands of a savvy C3 commander, the C3T7 can be a potent asset.
I hope you find it so, too.
Have fun!