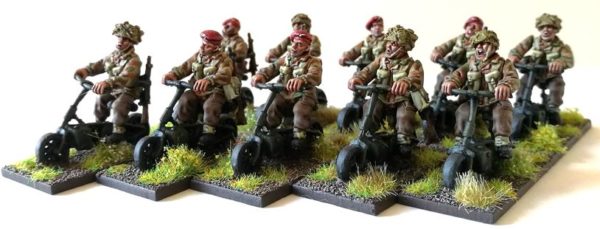
Laurens Vannijvel has set aside his Napoleonics, for now, to bring us a quick history of the “Mighty Welbike” plus a painting guide – bonus!
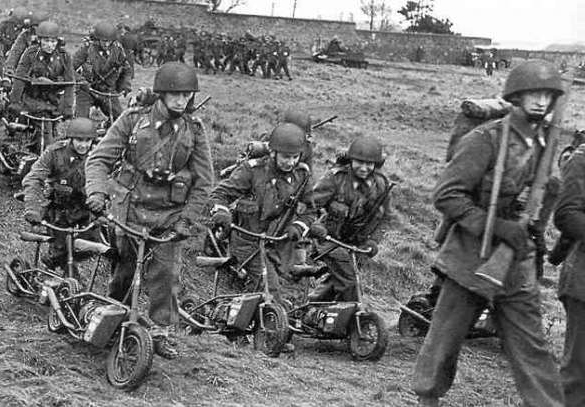
During the Second World War, most of the nations which fielded parachute infantry also turned the minds of their engineers towards motorcycles for said troops. This generally sound idea was born out of the need for these parachutists to quickly cover ground once they had landed.
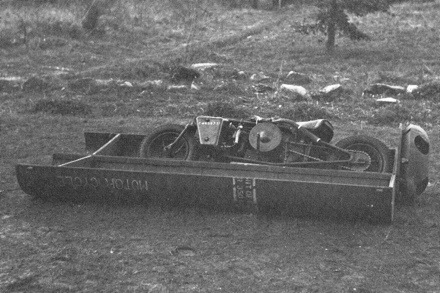
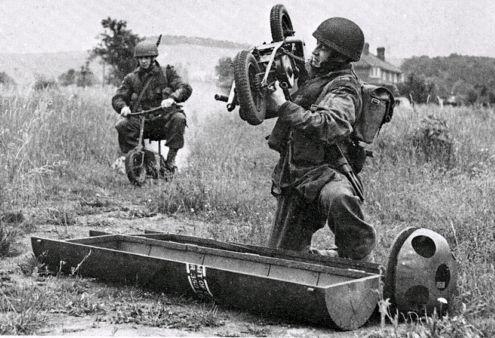
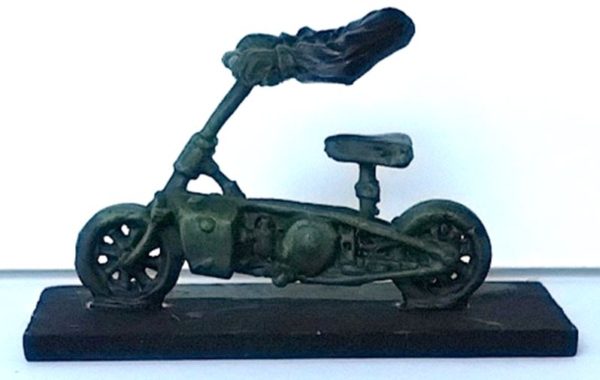
For the British paratroopers, the Welbike was designed by SOE operator Harry Lester. The name ‘Welbike’ was derived from the place it was designed: after the Welrod and the Welgun, Welwyn gave its name to the Welbike, too. Theoretically, this small vehicle could be extracted from its airdropped green container and readied in a matter of seconds. Its operational range was around 90 miles at a speed of around 30 miles per hour, which was definitely on the slower side of things but faster than walking!
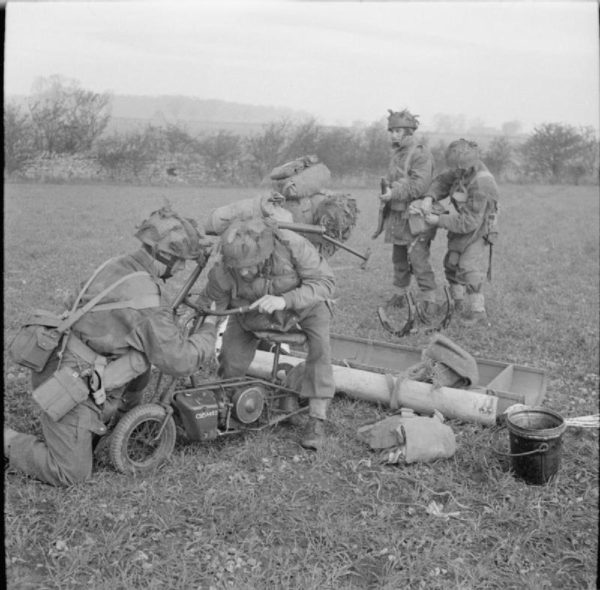
Beyond armchair generals nicking a Welbike or two for personal use at airfields and other large installations, these motorcycles saw little use. Although they were issued to the 1st and 6th Airborne at Market Garden, and to several regular infantry divisions, including those partaking in the invasion of Normandy, they were all but superseded by larger motorcycles once the latter could be dropped in aboard newer, bigger gliders. An additional problem was that, when dropped by parachute along with their users, the difference in weight between the two meant that they didn’t land in the same place – rather defeating their purpose!
Many Welbikes ultimately ended up being sold dirt cheap, but as they lacked a front brake it was illegal to drive one on the road in many countries. John Dolphin, who had originally come up with the idea of the Welbike, set up the Corgi Motorcycle Co Ltd. which converted many surviving Welbikes to the Corgi motorcycle, which featured an upgraded engine and was popular in the late forties and early fifties.
Painting The Welbike for Bolt Action
• Assembly
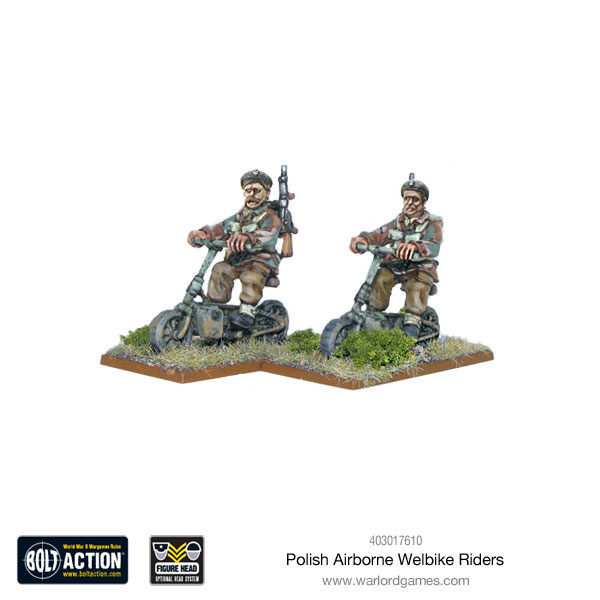
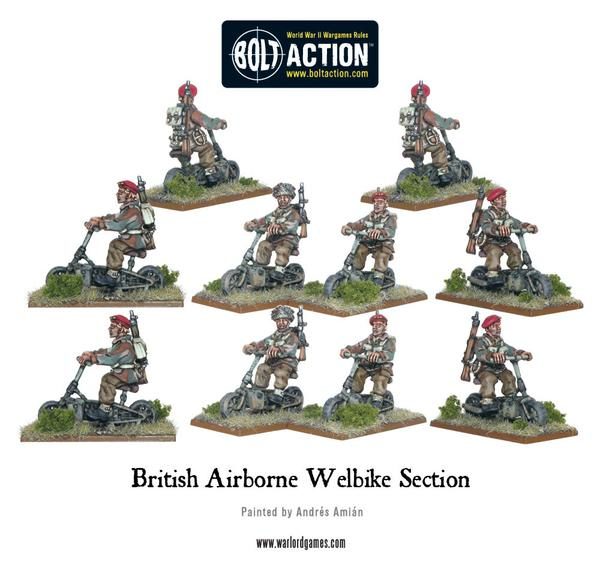
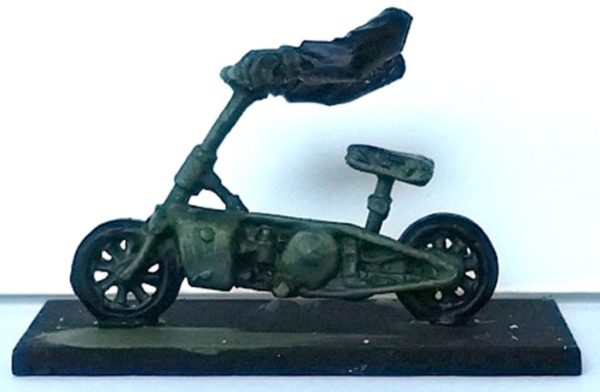
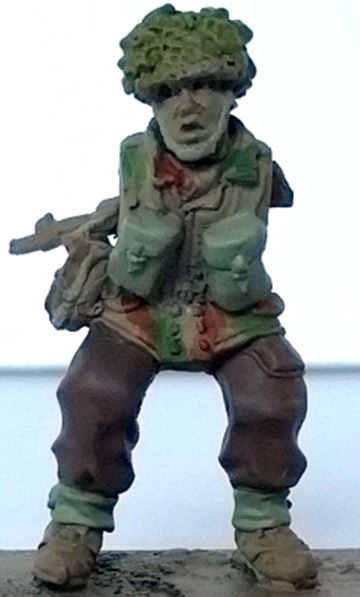
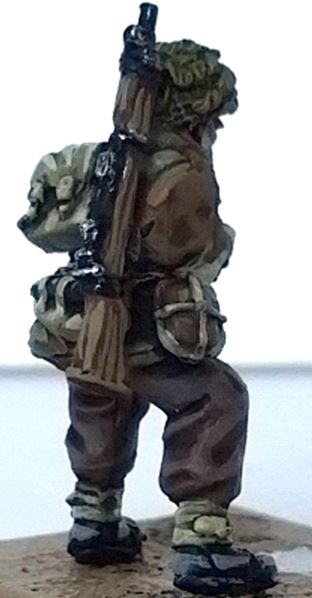
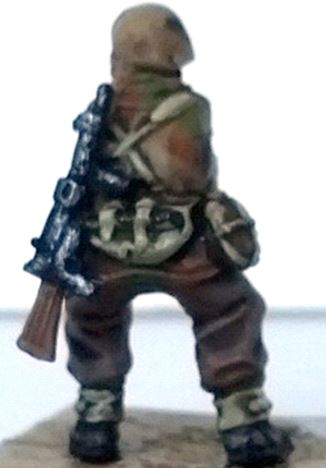
There are two Welbikes and two drivers included in each blister. Both troopers can be armed with a rifle or a sten gun. Two heads are included in the box, one with a beret and one with a helmet. These are interchangeable with those found in other Red Devils kits – I’ve mixed in some heads from the Red Devils Jeep kit for variety.
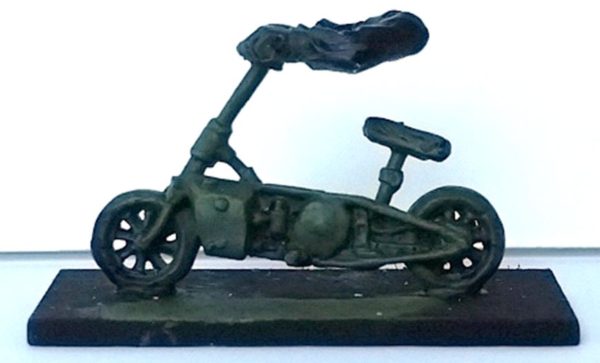
I have made two sub-assemblies: one is the Welbike proper on its base with the arms attached, the other is the temporarily disarmed (haha…) Red Devil. This is to make it easier to paint spots on the model that are difficult to reach. I’ve also undercoated these two parts with different spray colours, which would not have been feasible with a completed assembly.
It’s important with this sub-assembly to file down the surfaces connecting the arms to the torso so that these bits go together snugly – do this before you start painting or you’ll regret it!
• First Basecoats on the Bike
Over a preferably black undercoat, paint the bike a dark olive green (I’ve used VMC Olive Grey 888). Make sure this covers well, but don’t apply too heavy a coat.
• Green Drybrush
Apply a drybrush of VMC Camo Green 967 to all the green. Places to hit a bit harder with this drybrush are the steering wheel and engine block.
• Black Touch-up
Unless you were super neat in the previous two steps, paint the wheels of the welbike black again.
• Grey Drybrush
Apply a middle grey drybrush to the tyres. You mostly just need to highlight the top of the tyres. Make sure not to get any of it onto the green bits!
• Black wash
Apply a black wash to the entire bike and let it dry thoroughly. This will tone everything down quite nicely. And that’s it! The bike is now finished. Now for the riders, which are definitely more involved…
• First Basecoats on the Rider
I’ve undercoated the rider VMC Desert Yellow 063 to save me some time painting the Denison smocks. If this is not an option for you, then a white undercoat will do fine. Here goes:
• Paint the Denison smock VMC Desert Yellow 063
• Paint the trousers VGC Earth 062
• Paint wooden bits (gun stocks, hip flasks) VGC Terracotta 065
• Paint the helmet VMC Olive Green 967
• Paint all the webbing, rucksacks, Denison cuffs and gaiters with VMC German Camo Beige 821
And for the camo:
• Paint the brown camo dots VMC Orange Brown 981
• Then paint the green camo dots VGC Goblin Green 030
As for the method of applying the camo dots, I just stick to using rough streaks or zags all around the Denison. A lot of space is taken up by the webbing and equipment on these models, so there are no big areas to cover. Tackle the brown bits first, then use the green camo colour across or adjacent to the brown one. It’s a bit labour intensive the first time around, but count yourself lucky you’re not painting splittermüster!
• Brown Wash
By now you’ve probably noticed that all the colours you’ve applied are a horrible palette of pastel tones. Fear not! Apply a dark brown wash (I’ve used AP Strong Tone) to the entire model. Let this stage dry completely before carrying on.
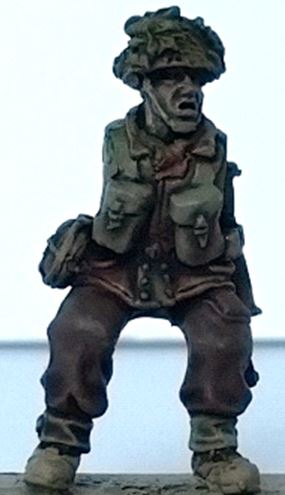
• Some Highlights
Afterwards, add highlights to the areas you just washed. Apply a layer highlight of VGC Bonewhite 034 to all the webbing, backpacks and such, and highlight the beige parts of the Denison smock with VMC Desert Yellow 063. You’ll see this is quite a light colour for a Denison – I like my uniforms to pop on the table – but if you like yours darker then just skip this highlight. Easy!
• More Basecoats
Paint the face and hands VGC Tan 066, and paint the boots and any metal bits (the gun barrels mostly) black. Be as neat as you can during this stage, and let the paint dry fully before proceeding.

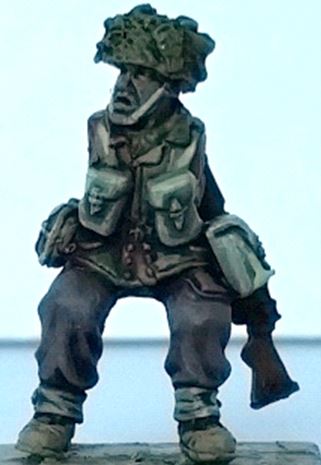
• Highlights on the Boots and the Guns
Apply an edge highlight of the brightest silver paint you have to the metallic parts, and apply a middle grey highlight to the boots. It’s okay to be crude with this highlight as we’ll afterwards be applying a wash which will cover most mistakes.
Optionally you can add some wood texture to the weapon stocks. To do this, grab your finest brush (not your smallest per se – just one with a very accurate tip) and apply horizontal streaks of VMC Desert Yellow 063 to all the wooden parts of the weapons. Make sure this paint is sufficiently watered down so that it flows well. This step requires a steady hand, so if you don’t feel up to it just skip this stage, but the end result is well worth the trouble.
• Some More Washes
As the silver you applied will be a bit too bright for gunmetal, apply a black wash to all the metallic bits. Wash the black leather as well while you’re at it.
On the face and hands, apply a chestnut wash (I use VGC Fleshtone Shade Wash 73204), and put a coat of this on the weapon stocks as well.
These two washes will tone down the stark highlights and woodgrain of the grey, the silver and the brown, and they will tidy up any slips of the brush you might have made during the previous step.
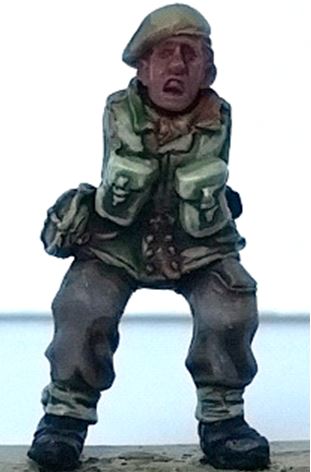
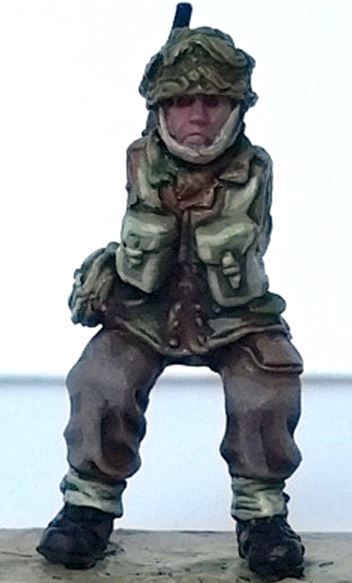
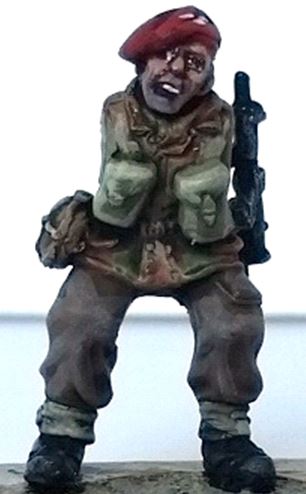
• Face and Beret
Apply a layer highlight of to the face and hands with a medium skin tone such as VGC Elf Flesh 004. Paint the brow, the cheeks, the ears, the jawline, the nose, the chin and the lips with this colour, making sure your paint is thinned down a bit – lumpy paint is especially horrible looking on the face! On the helmeted heads, you’ll have fewer areas to paint, so these should be straightforward enough; just try not to get any paint on the helmet straps.
Also, paint the beret a dark red – I used VGC scarlet red 012.
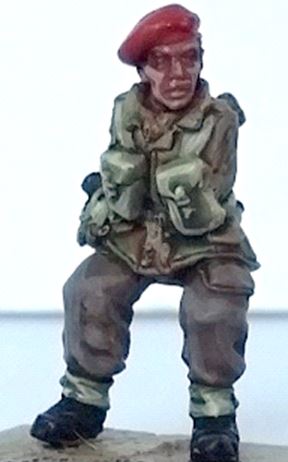
• Face and Beret Again
Apply a finer highlight to the face and hands with a light skin tone (I used VGC Pale Flesh 003). Just paint the tip of the nose, top of the cheeks, the upper lip, and the top of the chin. If you feel up to it, you can also highlight the lower eyelids. On the hands, just paint the knuckles and the tips of the thumbs.
Wash the beret with a purple wash, such as AP Purple Tone Ink.
• Final Detailing
Most of this last step is completely optional, so if by now you’re happy with how your model looks, feel free to stop here. Don’t forget to paint the white insignia on the beret, though!
For the eyes, paint the eyeballs white first and then add a little black stripe down one corner of each eye – this method makes it easier to avoid cross-eyed soldiers, although as you can see from the picture I am far from perfect!
I do stubble with a very simple wash. Mix a little medium skin tone with a dark blue until you get a warm grey, and dilute with water until you get the consistency of milk, then apply this to the lower cheeks, chin and upper lip of the model. Don’t put too much on at the same time so that you can keep control of where the wash goes.
The lower lip is a tricky area to get exactly right. Of course, you could leave it a regular skin tone, but I’ve grown to prefer giving it a rosy tone. After many failed lipstick-esque accidents, here’s what I’ve come up with: just paint a red wash such as AP Red Tone Ink across the lower lip. There! Done.
For the berets, there’s always been a bit of discussion regarding how to paint them. You could leave them a dark wine red, but I’ve gone for a brighter colour to make them stand out on the table a lot more. If you feel the same way, just add a layer highlight of AP Pure Red.
• Final Assembly
We’re done painting! First, glue the rider onto the saddle, and then glue the arms to the shoulders. Use the natural bendiness of the pewter to make the connection fit exactly right.
Now all that’s left to do is to base your model. I’ve glued mine to 40x20mm rectangular MDF bases which I’ve covered with coarse sand, painted dark brown, drybrushed a bone colour and then covered with a number of AP tufts and static grass.
• Other Red Devils Models
Of course, you can paint any British paratroopers with the technique I’ve used above, from regular troopers to jeep crews to officers. Whatever you’re collecting, just make sure your entire force is painted with the same techniques. Hope you have fun painting your soldiers!
Order your Welbikes today!
Polish Airborne Welbike riders