Andy Singleton of Volleyfire Painting took some time out to help us with a ‘How To’ article as he paints the eye-catching caunter scheme!

Andy: In this article, I look at a step by step guide to masking a tank wearing the distinctive Caunter scheme used in the Western desert by British forces in the Second World War.
With the DAK part of my Operation Sand dune series being mostly complete now, I’m slowly turning my attention to the British 8th army (In-between working on Winter SS, expanding my Fallschirmjäger and Volksgrenadiers, and all my Antares armies…).
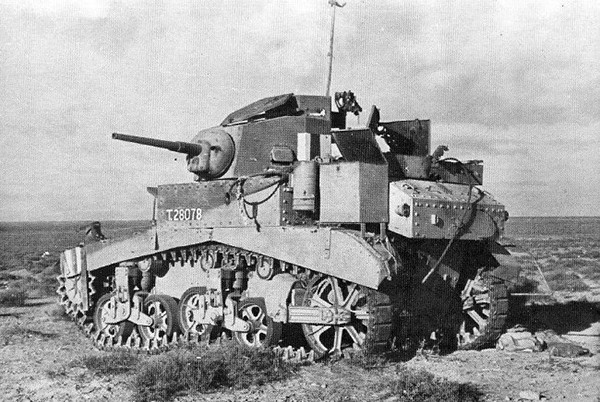
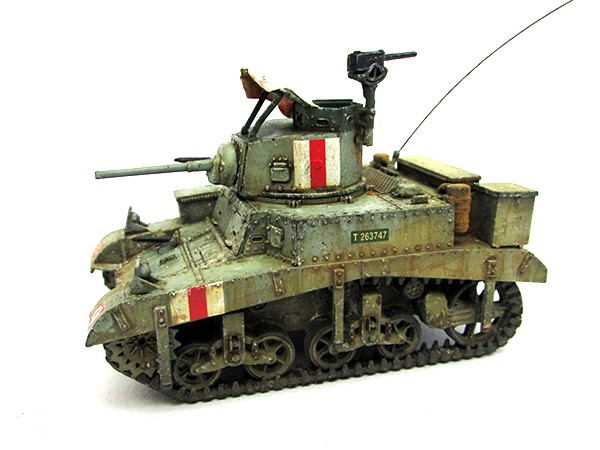
One of the most enigmatic and striking parts of the war in the desert, is the Caunter camouflage scheme used by the British army in the early stages of the Second World War in North Africa. Caunter scheme was a type of dazzle camouflage, with specific patterns for each type of vehicle it was applied too. Colours for the scheme have been hotly debated for decades, with some suggesting a pale sand, pale blue and a darker blue, and others suggesting pale sand, pale green, and a darker green, and several variations upon this too…
To ease myself into creating this scheme on potentially several vehicles, (and also as an excuse to build the lovely new M3 Stuart), I opted to attempt to replicate this pattern on an M3 of the 7th armoured division, around the time of the Battle of El Alamein. I was largely guided by colours I liked than being 100% accurate, however it does seem to be relatively close to at least some of the theories…
Caunter scheme is pretty complex, with lots of hard edges and tight angles so to do the scheme justice I’ve had to do some fairly extensive masking. For this I’ve used 6mm Kabuki tape, though Tamiya tape works just as well, and you can find it at most model shops. It’s worth spending the extra for this, as it’s got a slightly rubbery texture that conforms to detail better, but has a lower tack too so won’t damage your paint either.
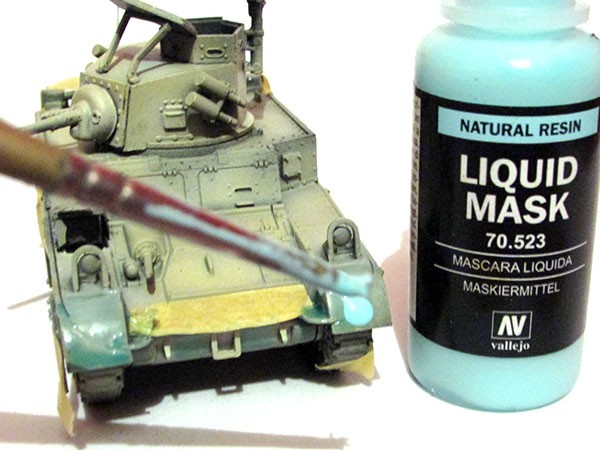
I’ve also used some liquid mask for some of the trickier areas, and this time used Vallejo, although there’s plenty of types out there and your local model shop should have some in.
Step 1
So, at this stage I’ve built the model, primed it black, and then sprayed it with my sand colour and finally put the first masks on. Proper drying times are pretty essential, so I left the model over night after priming before putting any paint on, and then overnight again after spraying it sand before putting on the first mask. This mask is done using the tape, and conforms to the outline of the pale blue colour I’ll be putting down next.
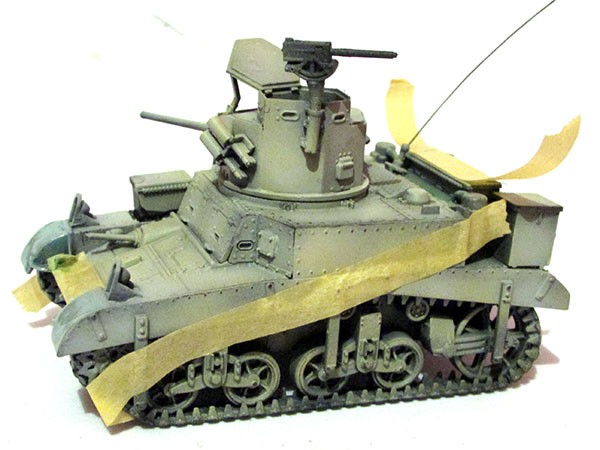
Step 2
To ensure the tape is properly sealing to the model, and fitting around detail, I apply some gentle pressure with a cocktail stick pressing the tape in and around any details. This will serve to prevent any paint bleeding through, hopefully!

Step 3
In this step, I’ve painted on some liquid mask. This is a type of latex material, and forms a protective skin on the model. It’s especially useful for masking around complex shapes, but is quite delicate, so be careful not to touch it even when dry. Here I’ve used it to mask the top of the fenders, and the disruptive pattern on the front of the hull. Once painted on, I leave the liquid mask to dry for at least a few hours. It’s also really massively important to use an old brush you don’t need any more, as the liquid mask will ruin the brush you use!
Step 4
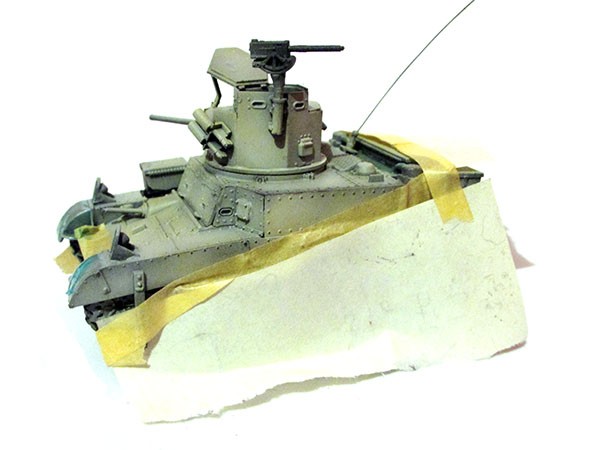
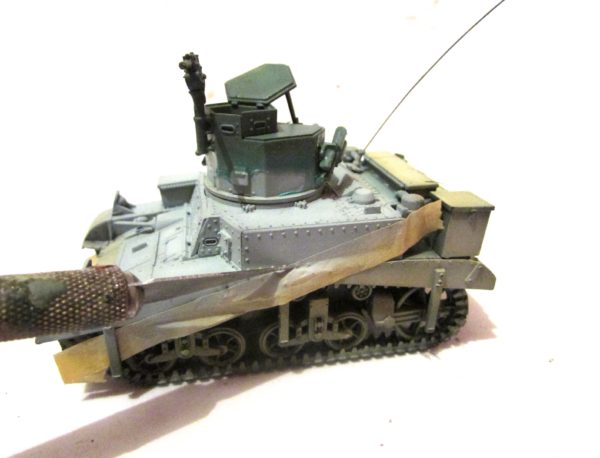
To save masking tape, I’ve used some old paper to act as a broader mask for the models.
Using a paint brush airbrush is advised, but if you are using a rattle can for the next stage, ensure that you have covered all the parts that you don’t want paint to reach, rattle cans an get messy.
Step 5
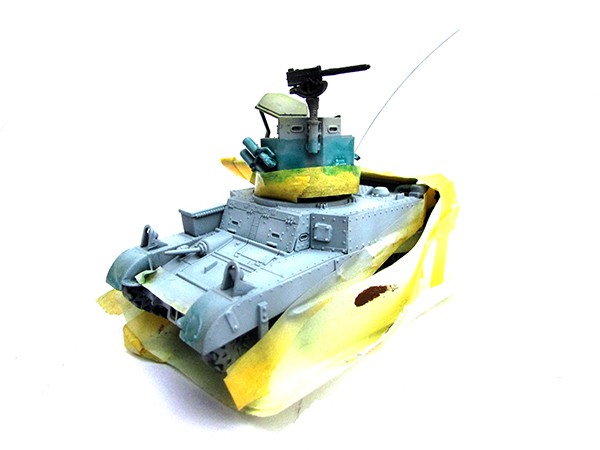
In this stage, I spray the blue onto the model, and again leave the tank to dry overnight.
Step 6
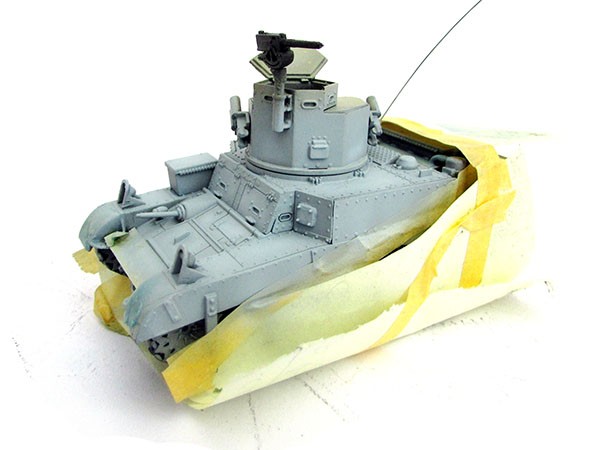
Once the paint applied in step 5 is dry, I’ve repeated steps 2 and 3 on the turret. Note that I’ve not masked the hull, this is because I will be holding the turret whilst spraying, so it’s not required.
Step 7
Here, we start to remove the masks. Acrylic paint tends to form a skin when it’s applied, so to break any build up that may have formed around the mask, I’m running a brand new knife blade along the edge of the mask, being careful not to press the blade into the model itself, and letting the weight of the blade pull itself along the edge of the tape. I do the same with the join between the masking fluid and painted surface as well, and then carefully pull the tape away.
The masking fluid needs a little more care, however I use an older brush to gently scrub it from the surface.
Step 8
Here’s the tank, freshly painted and unmasked, and ready for transfers. There are a few places where the paint has lifted with the mask, however, I’ll be weathering and chipping the tank anyway so they won’t be noticed.
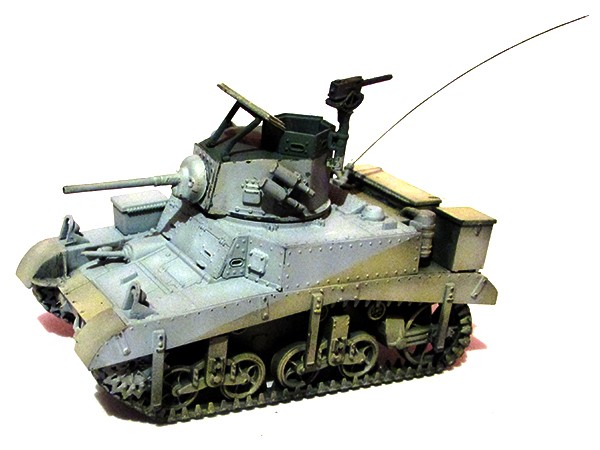
And that’s it! It sounds a convoluted process; however it is fairly simple once you get used to the process, and the most important thing is allowing each layer of paint a solid 12-24 hours to dry as a minimum.
Paints used
Although I’ve used Vallejo, I’ve listed some fairly close matches from the army painter and Games Workshop ranges too.
| Vallejo | Games Workshop equivalent | Warlord Paint equivalent |
| Vallejo 976 Buff | Karak Stone | Skeleton Bone |
| Vallejo 972 Light green Blue | Blue Horror | Wolf Grey (may need mixing with white). |
| Vallejo 920 German Uniform | Thunderhawk Blue | Greenskin |
Keep your eye’s peeled on the Warlord Games facebook page for more news scoops and more!
For the King!