Our in-house paint master Andrés Amián dropped in to the web team office to give us this little look at how he goes about converting and painting the Warlord plastic Caesarian Romans.
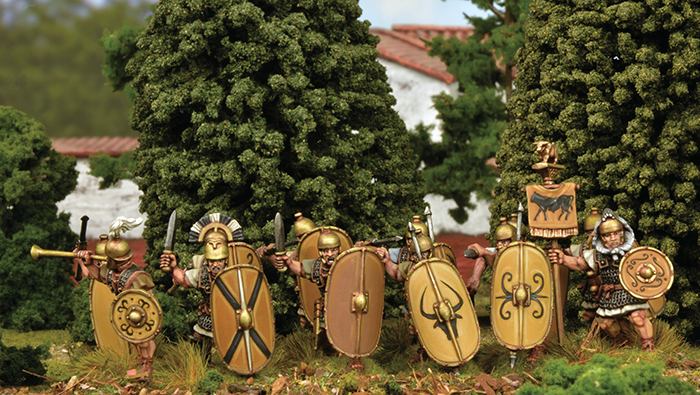
Andrés: As wargamers who like to paint and collect Roman armies, we’re very used to the traditional Caesarean Romans with big red shields sporting yellow wings and the red dyed clothes and brown leather armour. I decided to paint mine using a different colour palette and, in this case, using different shield designs and different tones of the same colour throughout the unit.
.
I have always liked to do this. When painting WW2 for example, I prefer to mix several shades of the same colour on a model, and within a unit, to make the final result a bit more interesting. It helps show a unit that perhaps has experienced combat ware and helps troops to look slightly different.
Historically, it is known that Pompey legions would have yellow and white shields, amongst other colours. I wanted to focus on this fact, hence I chose yellow/ochre for their shields. The tunics would be different colours, ranging from creams and beiges to greens and greys.
Preparation
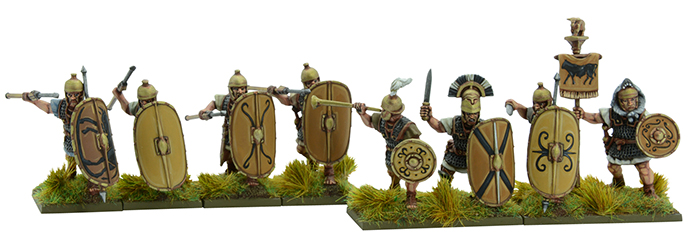
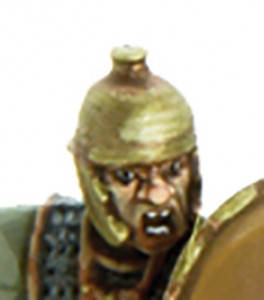
The first task was to make some minor and easy modifications to the miniatures. To become a legionary of Pompey rather than Caesar I needed to remove the horse tails on most of the legionaries helments. It’s a very easy thing to do because there are hardly any contact points between the horse tail plume and other parts of the helmet. So, with a bit of care, and cleaning the cuts with a file, everything was swiftly done.
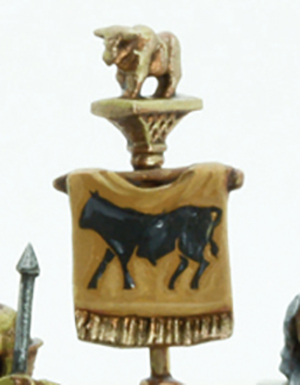
Another very easy conversion was to use a spare vexilum, I had one of these in my bits box (always worth keeping those little pieces), gluing it just under the bull icon part of the standard pole. For the musician, I used a normal legionary head, but didn’t cut the horse tail plume this time, just to make him stand out a bit more.
The last thing I did was cut the hilts on all the miniatures that were attacking with their gladius. If you don’t do that, the miniature will have a sword in the hand and another one in the scabbard!
Painting
I trick I’ve always used to speed up my painting is to paint the heads detached from the bodies – it just makes my life easier. Once everything is finished I glue them carefully with superglue (or you can scratch the paint a little off all the contact parts, and then use plastic glue – this could get messy).
After the whole day painting at Warlords’ Studio, and with family life, there isn’t much time left (or eyesight!!) for me to do big projects. So I tend to focus on fast but effective ways of painting units, even if that means not painting eyes (yes I know I did end up painting eyes on these, I couldn’t resist).
I find it very useful to prime miniatures in the main colour used on them. In this case I chose Army Painter Fur Brown spray. It gives me a good base colour that works very well for flesh tones, browns parts in the miniatures like sandals and pilums shafts; it can also be covered easily with bronze and steel paints.
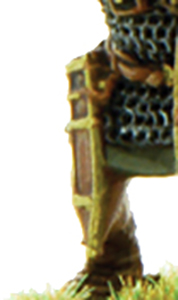
I used a dark metallic colour for the chain mail, sword blades and pilum metal heads. You can get this dark colour simply by mixing Gun Metal with Black paint. I kept all the leather edges around the chain mail as well as the belt, the sandals and the pilum shaft. Because I was going to use Fur Brown as base colour for my flesh tone, I left it as it was too. I painted all the Bronze parts, like the helmet, scabbard decorations, buckle, shield edge and boss. I gave the last touches to the sword pommel and hair with Charred Brown (well, for the hair I used several different colours).
After this, I gave the chain mail and other dark metal bits a Dark Tone Ink wash. I used Strong Tone all over the bronze parts, the face, the sandals and the brown zones. I kept the flesh clean, without a wash, just allowing a little in the wrinkles.
Fast & Easy Highlighting
For the flesh: AP Barbarian Flesh, followed by VMC Flat Flesh in the raised parts like cheeks, chin, tips of the nose, knuckles, finger tips, knee cups and so on. I painted the stubble using AP Monster Brown and then highlighted with a bit of VMC Flat Flesh to blend it with the colour of the cheeks.
| Chain mail and other dark metallic parts: | VMC Metallic Grey, followed by AP Gun Metal. |
| Bronze: | In this case I used AP Bronze followed by AP Shiny Gold. |
| Leather: | I just highlighted the edges of the belts and the sandals with AP Monster Brown. |
| Weapon shafts: | Just some long strokes of AP Desert Yellow. |
I think the final result is quite good for the amount of time spent on them. You can paint eyes easily (because they are well defined in these miniatures) but it’s not necessary.
Shields
For the shields, I just used a range of ochres and yellows to give an irregular look to the unit (yet a very Roman feel). On some of them I painted free-hand designs, others I used decals from our vast range of Romans Shield Designs. The main motifs were bulls and spirals.

After that I varnished them with a coat of AP Warpaints Anti Shine matt varnish (with the brush, since I prefer to control where the varnish goes and how much goes on).
Bases
The bases are just covered with PVA glue & dipped in sand. Once dry they’re painted with VMC Charred Brown, followed by a VMC Khaki drybrush. I used a bit of grass and a couple of Summer Tufts
That’s it! I could field my first small unit of legionaries for my Pompeian army, because Caesar needed enemies, and what could be better for my army than a couple of fast risen Spanish Legions?
AA
Show us your collection for Hail Caesar by dropping us a line with a couple of pictures to the Warlord Facebook page or share with all over at the Warlord Forum