Jim Graham and Neil Smith, writers of the new Zulu! book for Black Powder, present historical background and scenario ideas for use with your Black Powder Zulu forces:
So you have a Zulu army for 1879 and have played all the scenarios in the Zulu supplement. What else can you do with your force? After all, you’ve gone to all that trouble to make it look spectacular on the table. Well, the Zulu Nation was founded in the early 19th Century and was effectively subdued by 1880, so in this narrow time period there really weren’t that many changes to the army, though a couple of crucial innovations do stand out. There is no reason, therefore, why you can’t think laterally and use your all-conquering Zulus for other conflicts. Moreover, while you may want to tinker with the Black Powder factors for various battles, they all do seem to have been fairly bloody so no drastic changes are required.
Who’s the Daddy?
One option is to go back to basics and convert your army to that of Shaka kaSenzangakhona, or Shaka Zulu, founder of the Zulu nation. Shaka took one of many similar tribes of Southern Africa and developed them from relative obscurity to the largest, most powerful tribe in the history of the region. He did this by changing their weaponry and tactics then defeating, cowing, or bribing the neighbouring tribes into joining him. Shaka had formed what we recognise as a Zulu army by the early 1810s, and your Warlord Games Anglo-Zulu War figures can comfortably be used for a Shaka’s army because he is the reason they had the colour-coded cowhide shields and the short-stabbing assegai spears. The one proviso is that he did not like firearms, so those figures will have to be set aside for the moment.
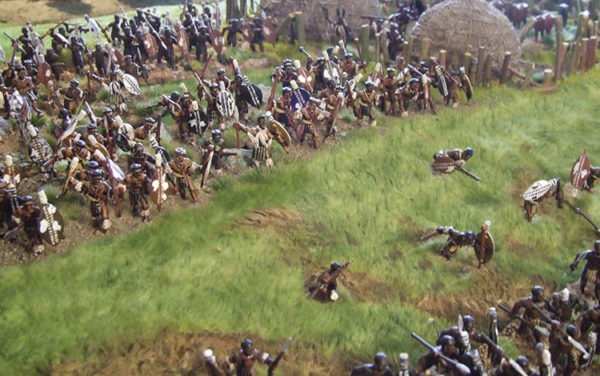
Shaka’s main wars were against the Ndwandwe, which was to all intents and purposes a civil war. The major battle was the Battle of Gqokli Hill where Shaka and his men held the high ground are were attacked by the Ndwandwe of Zwide. The much smaller Zulu force just about held its own then turned the tide when Shaka led his reserve into the flank and rear of the enemy thereby routing them. This is a straightforward refight: the terrain is open with a river, the White Umfolozi, and Gqokli Hill being the only notable features. The Zulus start with small parties trying to hinder the Ndwandwe crossing the river and the main Zulu force on top of the hill. The Ndwandwe outnumber the Zulus by about 2:1 so a simple division of what is available would work – or buy more with one of the army deals. Neither side has any firearms, and if you are being really picky the Ndwandwe should not have regimentally coloured shields but should have longer spears. It would be, however, a harsh opponent who objected!
Here Come the Boers!
In 1828, Shaka was usurped and assassinated by his half-brother Dingane. He had few troubles with neighbouring tribes, but had persistent issues with the newly arrived Voortrekkers. They were Boers travelling north from Cape Colony to escape the oppression of the British, and were encroaching into traditional Zulu lands. Dingane began negotiations with them, but talks broke down. He then killed a Boer emissary, massacred his party, and attacked the remaining Boers in the area. Dingane then doubled down by trying to wipe out the remaining settlers to clear his lands. Unfortunately for Dingane, the Boers did use firearms and were very good shots, so the subsequent Battle of Blood River was about as one-sided as a battle could be with casualties estimated at 3,000 dead Zulus against just three wounded Boers. Blood River will make for a good wargame if you happen to own a couple of dozen ox-wagons and possess an odd sense of fun. However, if you bring the Boers on in a wagon-train crossing Blood River, and the Zulus have a fighting chance to intercept them in the process then things become a lot more balanced. Smaller scale skirmishing and fights between raiding parties, as the Boers and Zulus bickered back and forwards over land and cattle for years afterwards, will also make for some interesting engagements, and perhaps an engaging campaign.
Dingane’s other major war was against another half-brother of both himself and Shaka, Mpande. He along with 400 Boers, who can be represented by Natal Horse and the like, revolted against Dingane in 1840 and defeated him in a series of minor actions until finally Dingane met his death at the hands of an assassin. It is noticeable that interaction with the Boers and British led to the Zulus using some firearms, but these were not common until after Isandlwana.
The Son rises!
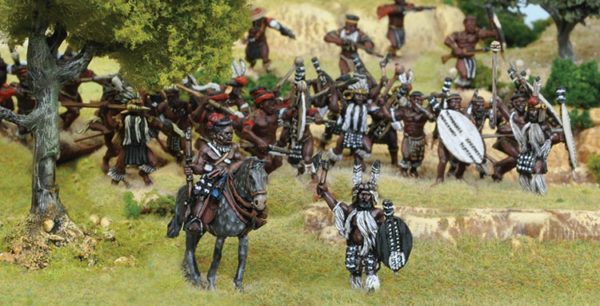
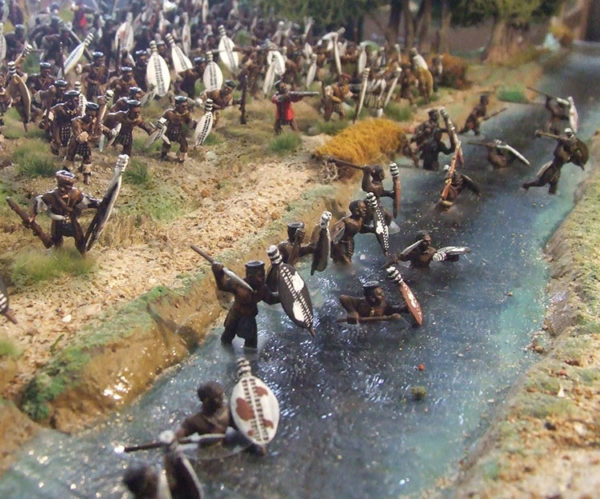
Mpande was fairly indolent as king. His main problem was that of succession, having several sons by several wives and favouring them in turn. To the surprise of no-one, this led to yet another civil war between two of Mpande’s sons, Cetswayo and Mbulazi. The war came to a head at the Battle of Ndondakusuka where Cetswayo triumphed and became the power behind his father’s throne. The battle was fought on the banks of the Tugela River, which was to the rear of Mbulazi’s position. Unfortunately for him, the river was also in spate, so when Cetswayo’s superiority in numbers finally told there was nowhere for the losers to run and they were massacred.
Ndondakusuka is a straightforward battle to refight. The table needs to have a river on the Mbulazi baseline, but other than that it is all open veldt. About two-thirds of your available figures form Cetswayo’s force and the remaining one-third is Mbulazi’s. Mbulazi has the help of a small force of about 35 Natal Police and 100 Native assistants under Captain Dunn. They can be represented by a handful of Boers/Natal Horse and Native auxiliaries. Victory conditions for this, and most Zulu battles, aren’t required: it is usually very clear who has won as one side or the other usually ends up in tatters.
So there you have it. You don’t need to chase stiff upper-lipped redcoats around, or run up against their stunning volleys, to have fun on the wargames table with your massed ranks of fearsome Zulus; you can indulge in some alternative entertainments before you go back to the main event. Whatever you do, remember always the object of the game is to “eat ‘em up!” Enjoy your feast!