Dennis recently sent in an article to the fantastic chaps at WWPD about making his own scenic basing, making his forces unique! Some great ideas to finish off your diorama for our diorama challenge for which the deadline looms large this Monday 7th March 2016!

I’m Dennis, a handful of the Aussie guys have already met me. Others might know me as that guy that missed his connecting flight and drove from Melbourne for Cancon, the guy that took a Flak 88 or that bloke that provided a heap of terrain for the event.
But before I type anything else I’d like to give my father a huge thank you for his hard work and countless hours he has put into my hobbies over the years. Most of the terrain is his work. I know how its made and the steps taken to make it, but he’s been the creative genius behind the majority of the work. We share ideas and he makes it happen. I then adapt the techniques into my modelling side of things. He’s an inspiration for me and I’m just happy to be the middle guy that answers the questions! We are planing to do some basic terrain tutorials in future so keep your eyes peeled.
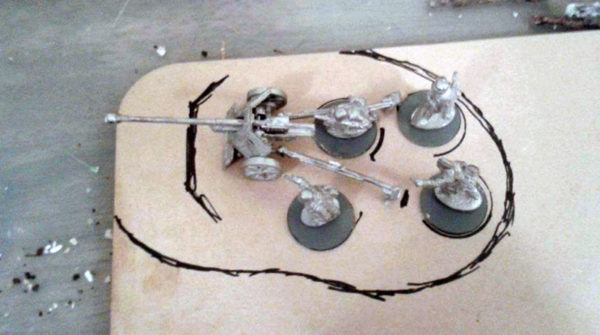
I had a lot of people ask about my 88’s base at Cancon, so today I’m going to share some of the techniques I’ve learnt for dioramic bases using a Warlord Fallschirmjager Pak 40.
For starters, I traced the basic shape I wanted on some 3mm MDF. I then marked out the base with marker to guide where I wanted the gun and crew.
I’m going for forest/woodland look, so I have marked where I want to build up a log wall as well.
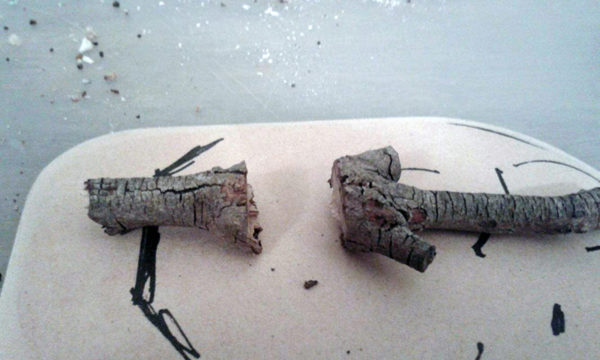
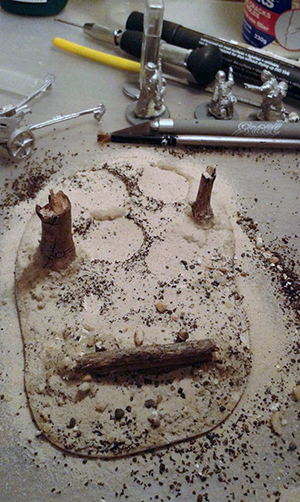
This was then cut it out and the edges rounded off with a hand sander. A few hard dry sticks have been broken to length for the log wall.
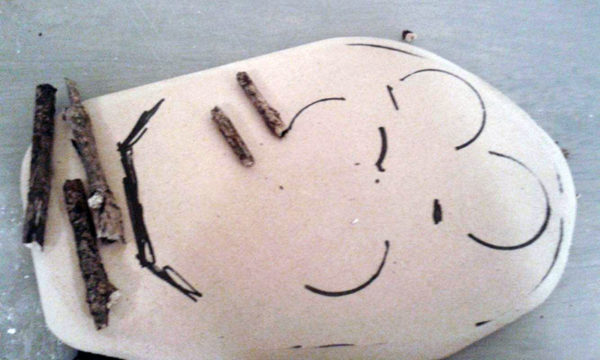
From here I carefully drilled small indentations into the MDF, it doesn’t matter if you go through the MDF as we can sand it back later. Then I glued the posts/logs into position on the guide holes (I used super glue here).
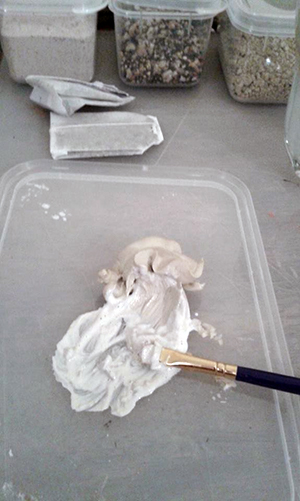
Now spread a thick layer (2-3mm) of builders putty across the base, making sure there isn’t any where you want the crew. I use Selley’s ‘No More Cracks’, a trick I picked up from Bryan (thanks Bryan!)
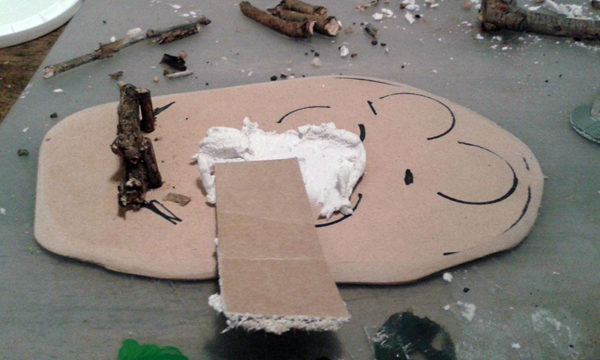
Using a base glued to something random can help with the marking stage.
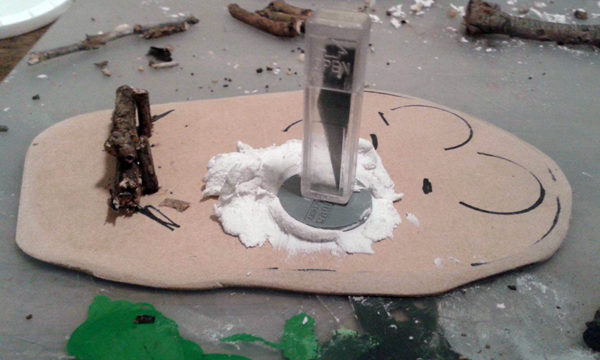
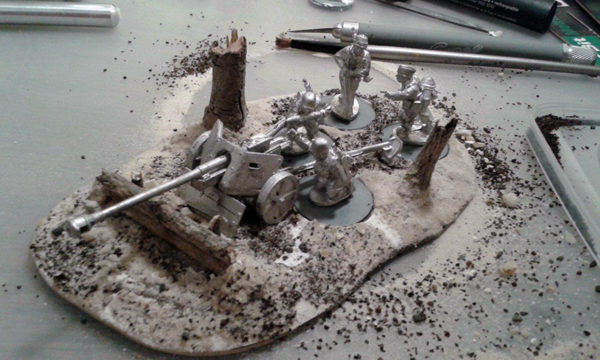
Once you have completely covered the base with putty and marked the positions for the crew, you can put the gun and crew models in position to test their spots while the putty is still soft – it shouldn’t stick to the models much. I also added a few larger rocks around the wall at this stage.
NOTE: I don’t leave the models on the base while it dries.
While the base is drying, it’s time to give this base a more woodland-ish look. Tree trunks like this are done by cutting a dry hard stick right on the joint and breaking off the other side with pliers.
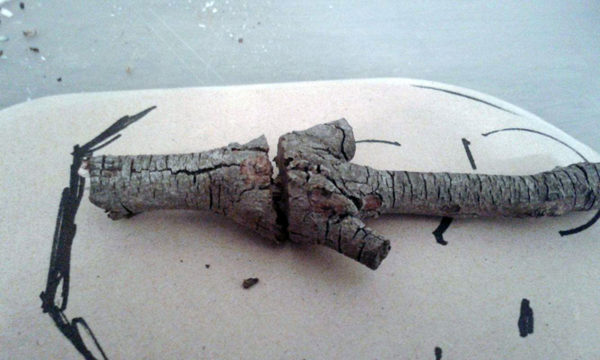
This gives it a more realistic look of roots at the base of our tree stump, rather then cut sticks suck in the ground.
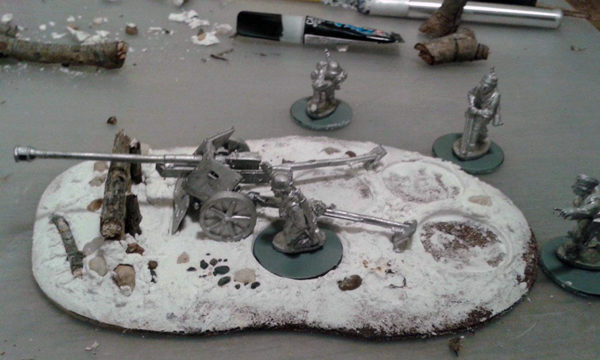
I left the base to dry overnight. Now it’s time to add the tree trunks and some gravel/sand to give the base more texture. We’ll be fixing them all into place with water-based liquid nails. Make sure it’s the “easy clean with water” one.
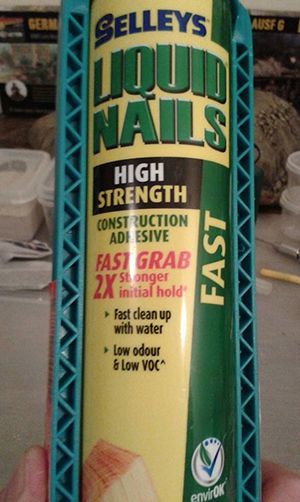
From here I put some liquid nails on an old take-away lid and watered it down, mixing it until it is as thick or as runny as I need it.
- Thicker for filling/building up and holding in place.
- Thinner for for adding sand and gravel as a replacement for PVA as it holds a lot better.
DON’T USE A GOOD BRUSH! Keep a piece of paper towel or old rag handy as well, as you WILL get the liquid nails on your fingers at times. Its much easier to wipe it off when its still wet.
I added the tree stumps and built earth around the log wall. I’m using a gravel (chips off concrete “besser” bricks), beach sand, builder’s sand and a humble tea bag.
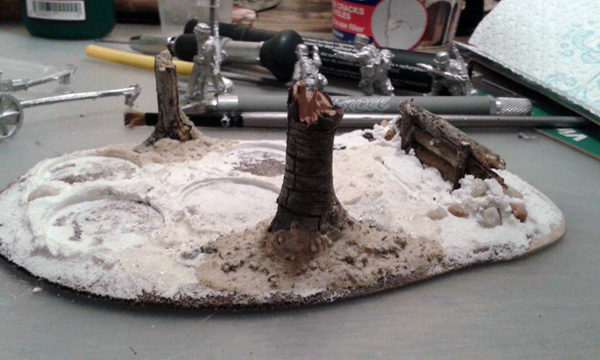
To do the rest of the base, I coated the set filler with watered down liquid nails a section at a time.
I added the largest gravel bits first, then beach sand, then the tea leaves.

Once all three were done I covered the entire base in builder’s sand. Left it to sit for a minute and then shook off the excess.
Then leave it to dry for another night….
In the next part I’ll base the crew and then paint and detail the base. Until then…
Diorama Challenge Competition 2016 deadline approaching!
And if you’re eager, and one for pressure and a last minute attempt (just like doing the homework the night before its needed), then here are your competition entry details: