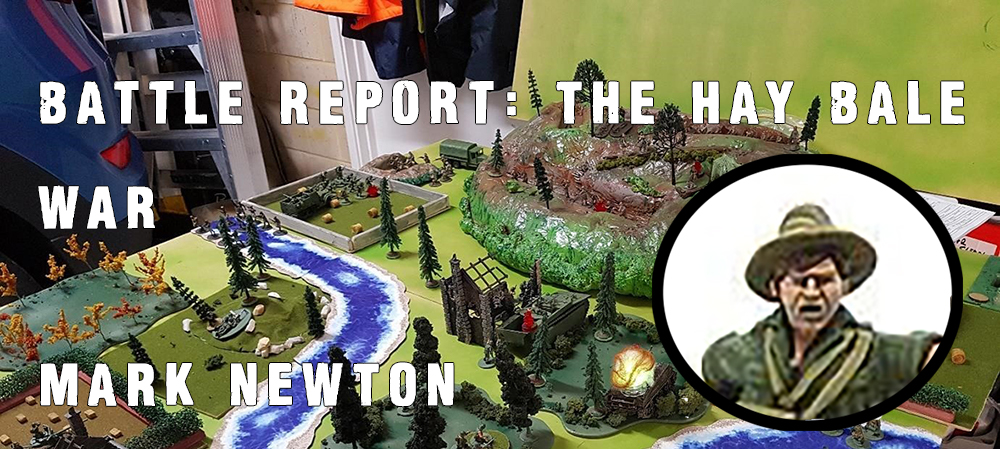
One of our Australian customers, Mark Newton has spent some time putting together a report of his latest Bolt Action adventures – a fictional trade war between the US and Australia over the shape of a hay bale. Mark’s infectious enthusiasm and creativity is something we just had to share with you!
The Hay Bale War
Background
Many years ago (around 45) I used to wargame using Airfix and Matchbox 1/72nd scale plastic soldiers and models. It must be around that time, I was in Wynyard at Primary School (Tasmania) and played with my mate Craig ‘Doc’ Docherty. We had a set of rules, but I don’t remember where Craig got them from.
In more recent times I was introduced to Warhammer 40K, but didn’t like the unbalanced rulesets and 2 years ago introduced to Bolt Action by my son. Started collecting Aussies and loved the fact there was a rules supplement just for us. Pleased to have seen this grow to an Australian Army now. I’ve got a little over the top and now have Japanese, Germans, US and Aussies. My boy has Russians. And a mountain of other gaming systems. His newborn son will be a gamer!
Of course, to game you need scenery. Whilst I’ve bought some ruins, I needed more and have played with making stuff as it is significantly more economical, but not everything works! One of my creations was a hilltop, which at the time was built with the Kokoda Track in mind, but when finally used is really something anywhere but Kokoda or the Outback.
Having been made redundant recently, I had a bit of time up my sleeve and decided to try out my Aussies against the Americans – as yet unplayed. Decided on 1250 points as I had a couple of companies built in boltaction.easyarmy.com and set about building a 4 x 4 table in the garage while my wife was at a work.
Set up in the morning – Interview over the phone at lunchtime – play in the afternoon. Good day as it was wet and miserable outside!
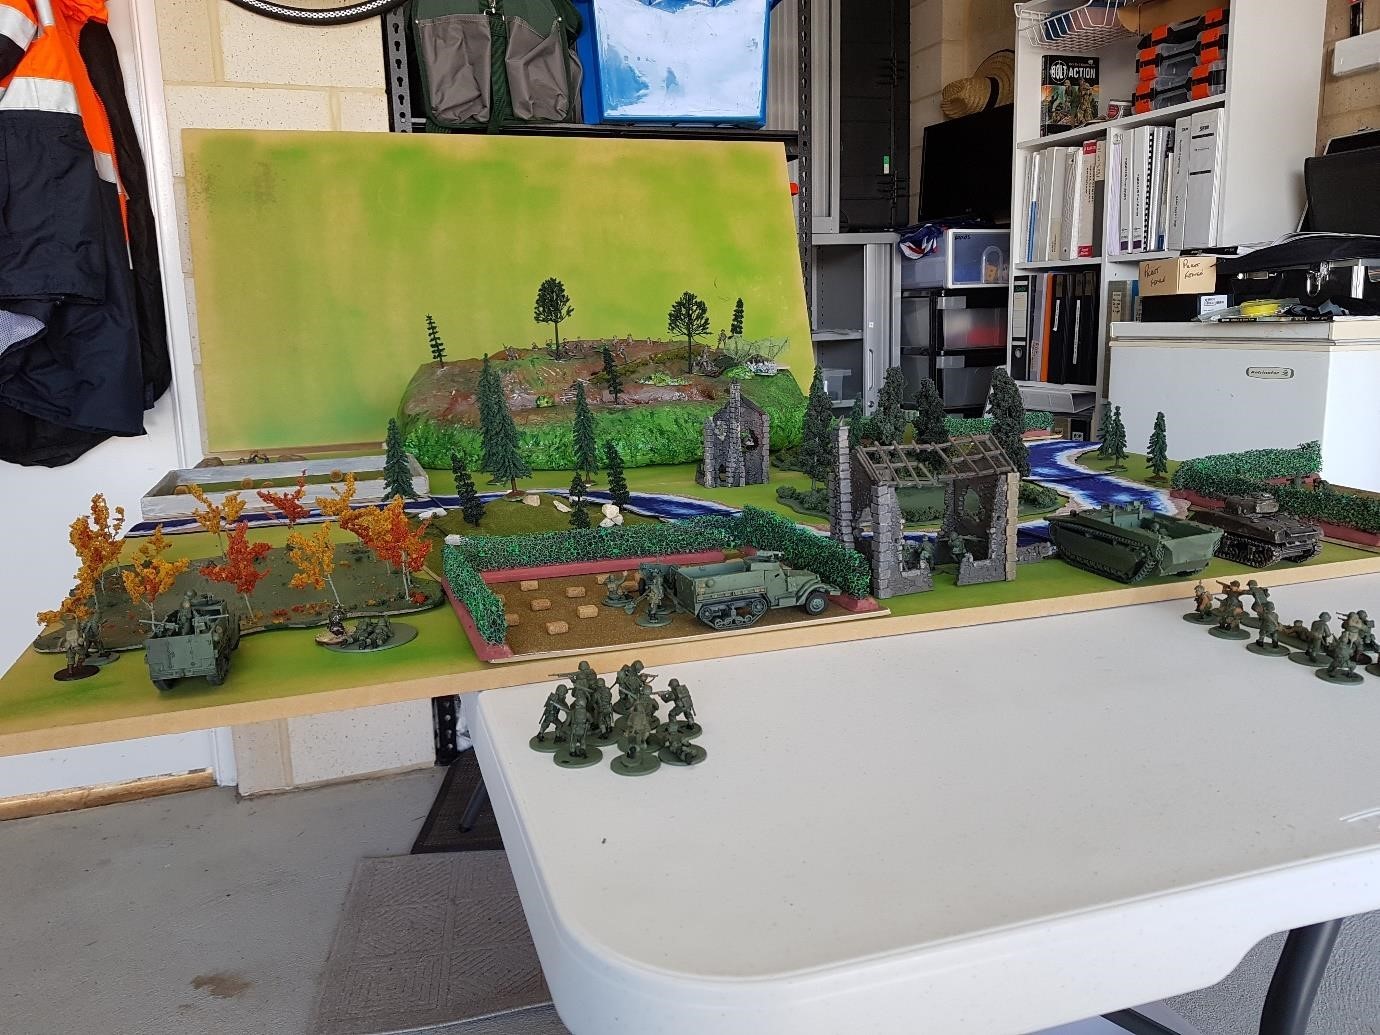
The Table
I had previously gone to my local Bunnings Hardware store and acquired 3x 2’ x 4’ MDF panels. These have been spray-painted green to represent grass as a base. Put 1 up as the backdrop – you don’t need to see the coloured boxes on the shelf behind.
While putting the table together I thought I needed a theme just for the fun of it. While in the USA I visited a place called Hobby Lobby – fortunately, I did this late in my engagement or I would have a spent a lot more money! I had purchased some hay bales. The pack came with square and round types and I thought that’s it. A Trade War over the shape of hay bales (Didn’t have to be a great reason – just a reason for the battle.)
Wanted to use my hilltop for real so that was in. Parked the back slope over the edge of the playing area so as not to waste space and make setting up within 12” possible. Added some paddocks made by glueing grass mat (Hobby Lobby) on to thin MDF sheets and some forest areas.
The Creek and forest were rough terrain.
The paddocks were open with the hedges designed to keep animals in so an Advance though them to represent the wiggle needed for troops and we’re off. The creek is from a Stratagem Rushing Waters pack.
Mark’s scenario premise may not be quite as strange as it first seems. While the USA and Australia never came to blows over the shape of hay bales, from 1898 to 1934, US Marines were deployed across Central America and the Caribbean.
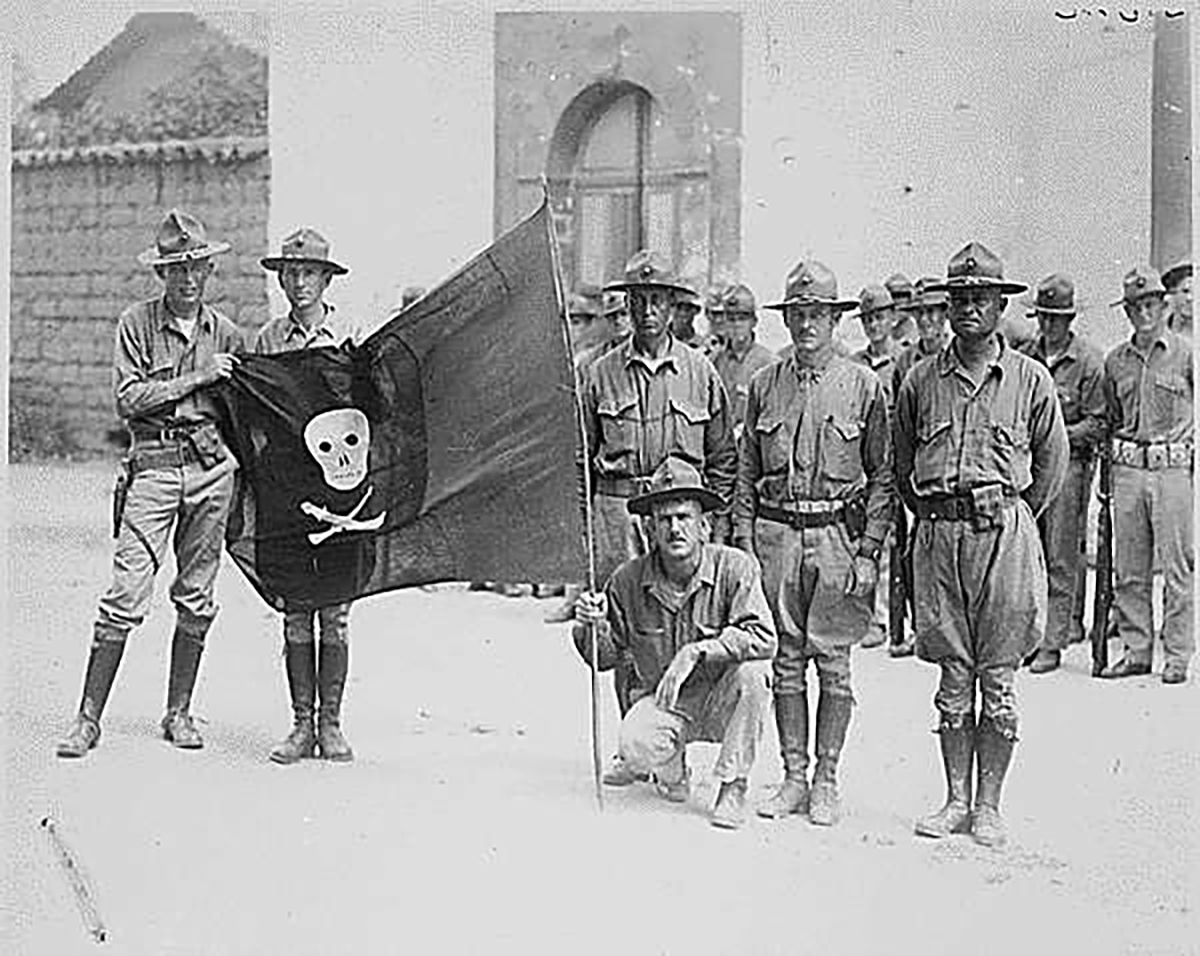
US Marines with the captured flag of Nicaragua’s Augusto Sandino in 1926.
Known as Banana Wars, these limited conflicts served to advance the USA’s commercial interests in the region, under the guise of stamping out corruption and injustice. Characterised by armed occupation and bitter guerrilla warfare, the Banana Wars ended with hasty US evacuations and the Great Depression pulled on the purse strings and public opinion waned.
These small wars are a little before Bolt Action’s time, but with a bit of imagination we could see this interventionist policy extending into the Early War. While British and French forces scramble for Dunkirk, US Marines could be fighting local partisans in the Guatemalan jungle or beating back an Axis-sponsored push for the Panama Canal.
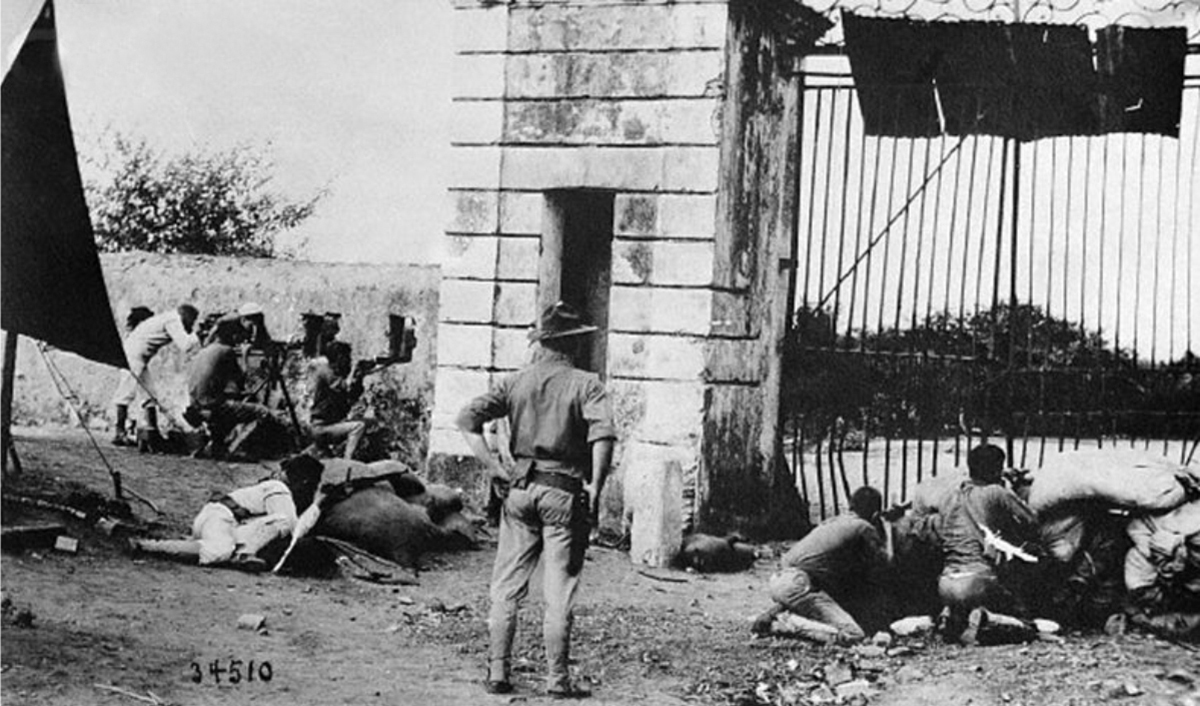
US Marines defending the entrance gate in Cap-Haïten, 1915.
Now back to Mike.
Scenario
I used rulebook scenario 9 as the basis for the game. The 3 objectives were set up at the Fuel Dump, three quarters of the way up the hill with the Aussies defending, and the Yanks attacking.

The Yanks:
- A full squad in a Buffalo
- A full squad in an M3 (only the HMG fitted although the model has 3 MMGs to boot)
- A 57mm ATG and M3 as a tow,
- A Sherman M1A4
- 3 MMG teams
- A Flamethrower team
- A Bazooka team
- A Medium Mortar
- A Lt with a support troop and a Medic
The Aussies:
- A 2nd Lt with 2 troops and Medic
- 3 AIF Infantry Squads with LMGs (NCO with SMG) (1 in Reserve on truck)
- Forward Platoon Scouts
- Forward Observer Artillery and Radioman
- A PNG Infantry Squad (Reserve – Outflank)
- An MMG Team
- A medium mortar and spotter
- A Sniper team
- A Flamethrower team
- A Boyes AT Rifle team
- A Light Howitzer (Short 25lb’er) and spotter
- A 30CWT truck (proxied my Deuce and a half for this) (Reserve)
- A Matilda Frog (Reserve)
Round 1
Yanks advance on to the board. The left-hand side M3 is in the Woods, with the Buffalo and Sherman advancing over the low stone walls and into the creek. The MMG, Mortar and Bazooka run up the right-hand side of the field. The 57mm sets up in the square bale field, using the stacks of hay for partial light cover.
The Aussies basically are still just in alert mode.
“I can hear some clanking in the distance but not sure. There! Did that tree move?” – an Aussie Private
Round 2
The Buffalo gets to the edge of cover and opens fire on the MMG. The howitzer is obscured by the trees to the right, bullets ping around the rocks and sandbags but no damage. The Aussie mortar (whose spotter is sitting under a tree on the opposite side of, but on top of the hill) fires but deals no damage.
The 57mm shoots at the MMG and kills a loader.
The Aussie sniper in the ruined building on the forward slope of the hill takes a shot at the 57mm crew. Well, he was going to, but he hadn’t taken the safety off his rifle.
He spends the remainder of the turn disassembling his rifle to find out why it isn’t working.
The M3 on the left-hand side advances to the creek edge and opens fire at the Aussie mortar crew and takes out a loader. In the Aussie lower trench, the MMG and Boyes hit but deal no damage to the Buffalo. That 7+ armour is effective enough to have the bullets bounce.
Round 2 concludes with the Yanks mobile units all 18” onto the board and about to meet some surprises. The left-hand foot troops lagging a little and the righthand side troops clearing the hedge out into the wooded area beyond the paddock.
The Aussies are a little shaken but not stirred and weapons checked with the safeties off to allow for some shooting next turn.
Round 3
US Mortar fires and kills one of the MMG loaders, reducing their effectiveness.
The Sherman advances to a firing position and misfires. The MMG moves into the creek with the Sherman in close, comfortable proximity. The Buffalo advances to drop troops for an assault up the hill. It fires at the troops in the bottom trench with the two HMGs, but only hits a single digger.
The 25lb’er takes a shot at the Buffalo but misses on a 1.
The Aussie flamethrower team jumps out from behind the hedge and burns the Sherman. No surprises there.
Burning from glacis to engine deck, the Sherman fails its morale test and is wrecked.
The Aussie troops in the first trench fire back at the Buffalo, with just over half of them in range. – Sarge and his SMG are only just out. The Buffalo gets hit, but unlucky damage rolls of 6s just scratch the paintwork.
Both the American 57mm ATG and Aussie Boyes anti-tank rifle blaze away but make spectacular misses.
The left-hand side M3 advances through the paddock stone fence. The HMG fires at the mortar and takes out another mortarman.
The M3 squad dismounts and kills the last mortarman. Objective 1 is now in sight for claiming.
It was at this point I released my set up had a flaw – the 1” clearance to shoot through / around fellow troops is difficult when you strategically place a Medic to have maximum benefit.
The Aussie Forward Scout Platoon in the ruin peppers the Buffalo with small arms fire. Unfortunately, the Buffalo’s thick hide prevents any further damage.
The M3 towing the 57mm gun opens up at the trench and does nothing.
The Aussie truck with a AIF squad advances on to the board behind the mortar. The squad unloads and opens fire on the US squad, scoring hits but dealing no damage.
Emerging on the enemy flank, the PNG infantry squad dashes up the creek and blasts the US flamethrower team.
The Forward Artillery Officer sets up a bombardment on the 57mm ATG and M3.
The left-hand side US MMG has made it to the hillock, with the centre MMG and command team alongside in another copse. The right-hand side Bazooka team remains hidden behind the hedge, ready to relocate to face any enemy armour threat.
The Matilda enters the field near the fuel dump to provide local support for Objective 3
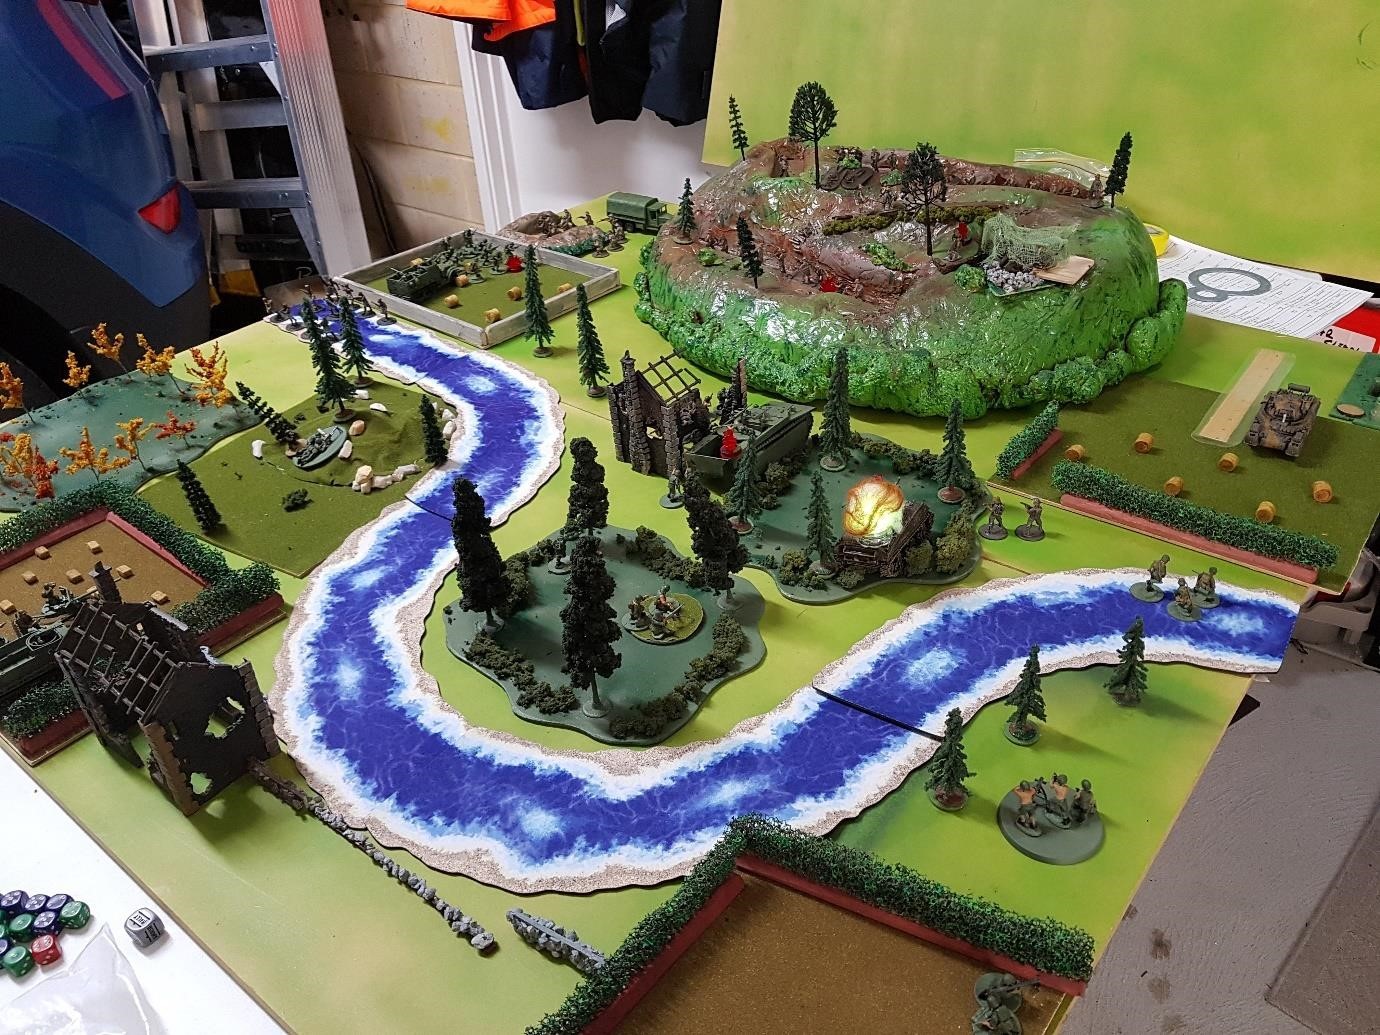
Round 4
No artillery bombardment this turn – just my luck!
The US MMG Troops spring out of the water and try to shoot the flamethrower team – more hits but no wounds.
The Buffalo squad assaults the lower trench with a heroic 10″ run. Unflappable, the Aussies return fire and drop 5 marines with well-aimed small arms fire. In the trench, brutal hand-to-hand fighting claims 3 Aussies and 4 Americans, who quickly turn tail and run back to the trees.
The M3 squad assaults the same position, receiving no reaction fire, wiping out the remaining Aussies and securing the objective.
The M3 fired over the heads on the Papuans as they assaulted the MMG in the trees. They lost one on the way in but kill off the MMG.
Having fuelled up after torching the Sherman, the Aussie flamethrower team turns and burns the US MMG team.
The Howitzer finally corrects its aim and takes out the Buffalo.

Close
Decided to call it quits. The Yanks were not in a good position for getting more than the 1 objective. This Trade War Battle to the Aussies. Cleaned up, packed up fixed the minor damage and made room for Kay’s car on her return from work.
Obviously, I have remembered things well after the game that I need to remember in set up and during game play. I still had fun though and learnt some more on the way through. I was happy with how the scenery worked and the look and feel for it. Might need to cut a couple of gates in the stone wall fence or plant some corn or wheat. My son has done some nice aesthetic wheat field by cutting up a doormat. Runs it as strips of wheat in the field.
Lessons Learnt
I put too much in the trenches on the hill. Probably would have been better to put the AIF Squad in the top trench, down behind the hedge at the fuel dump or over by the mortar.
Having them so far up the hill and blocking their ability to shoot with the 25lb’er and the Medic was just dumb. Leave the command team, forward observer and spotters up there – if they are all that’s left defending the hilltop objective the other side deserves to win.
I think the Yanks would have appreciated another squad versus the MMG’s and the Tank, but with so much rough ground to cover (6” at a time) It would have been 6 turns to just get close enough to assault.
You never know what the mission is going to be. You must tailor your tactics to the task at hand. The focus of this mission was taking and holding objectives rather than killing the enemy, so going in all guns blazing may not have been the best plan.
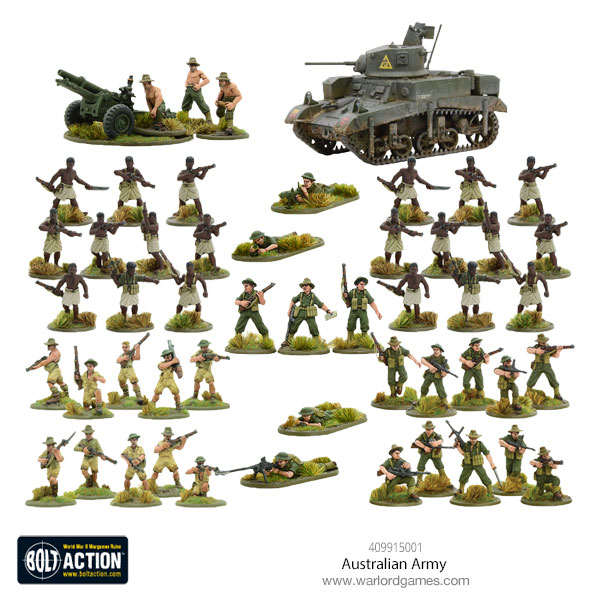
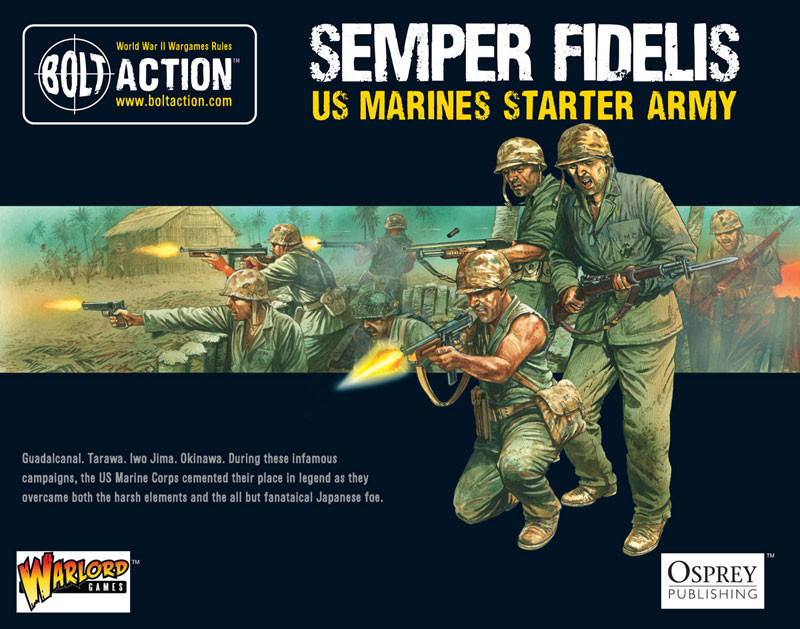
Inspired by Mark’s interesting take on a simple Bolt Action scenario and want to try it out yourself? Grab one of these starter armies to kickstart your collection!