Welcome back! Last time I talked about the tools you’re likely to need in sculpting your own miniatures or converting existing sculpts. If you missed it you can find it here.
The purposes of this short series of articles is to give an insight into sculpting miniatures. This will follow the process as I sculpt a single model (our friend Myrmillo the Gladiator) from scratch. If I were to be working on a unit or several models at the same time I may use pre-made armatures, but we’ll leave that for another time!
It is worth mentioning that I am self-taught as a sculptor and this is merely the way I sculpt – I’m sure other sculptors have different techniques. After a few sessions with pro-create or green stuff I’m sure you’ll soon develop your own way of sculpting.
Inspiration
Whatever I sculpt I spend plenty of time researching the subject matter. Books, the internet or chatting with people who know about the subject all help formulate ideas for how best to portray the models.
The subject of this tutorial will be a Gladiator. This has nothing at all to do with long hours watching Blood & Sand… Honest. Just by typing ‘gladiator’ into Google I came across plenty of inspiring images as you can see below…

When I’ve had my fill of research and visual stimuli I like to sketch out my ideas before picking up the sculpting tools.
After a few minutes of thinking and deciding what I like I’m making a sketch. A simple sketch to have an idea what I’m aiming for. Here’s a sketch I came up with for our Gladiator:

I find that half of a sculpt is done in my head before I pick up the putty.
Getting Started
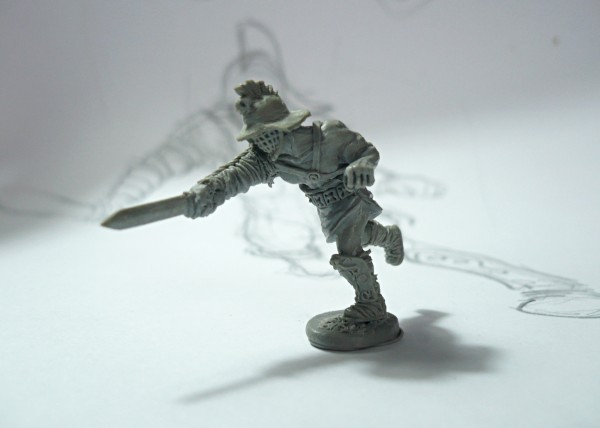
Let’s get started on the second half of the model then!
I begin with a length of wire, about 15cm long and 1mm thick. Bending it in two I add a blob of ProCreate at the point it bends. This gives us the model’s upper torso and leg armatures. Using a pair of pliers I bend the wire to give the leg posing.
A key step at this point is to talk about measurements. A quick search on pintrest or google will soon give you a basic idea of proportions. but essentially work by dividing the body innto 8 head size segments:

As I’m sculpting a 28mm miniature (28mm from sole of foot to eyes) the armature from feet to top of the torso blob should be around 24mm. As my gladiator will be striding forward he’ll need to stand a little shorter than this though.

Now I add a little Green Stuff to the hips and legs to give them a little bulk. I don’t worry about how neat this is as it is going to be sculpted over.
Note that I don’t use a cork as a base, as many sculptors prefer – nor do I use pre-prepared set of dolly armatures. I start from scratch each time as this allows me most freedom in posing. Of course, you may prefer to stick your armature into a cork – we all do things in a slightly different way as suits our own style.
This is just the beginning of our gladiator and we’ll revisit in his ludus soon. Until then have a stab at making your own dolly armatures. Getting these key foundations right is paramount to a believable end result. There is no real right or wrong in how you go about doing this – but practice is the key!
See you again soon when we’ll start to detail our Gladiator…
Cheers,
– Wojtek